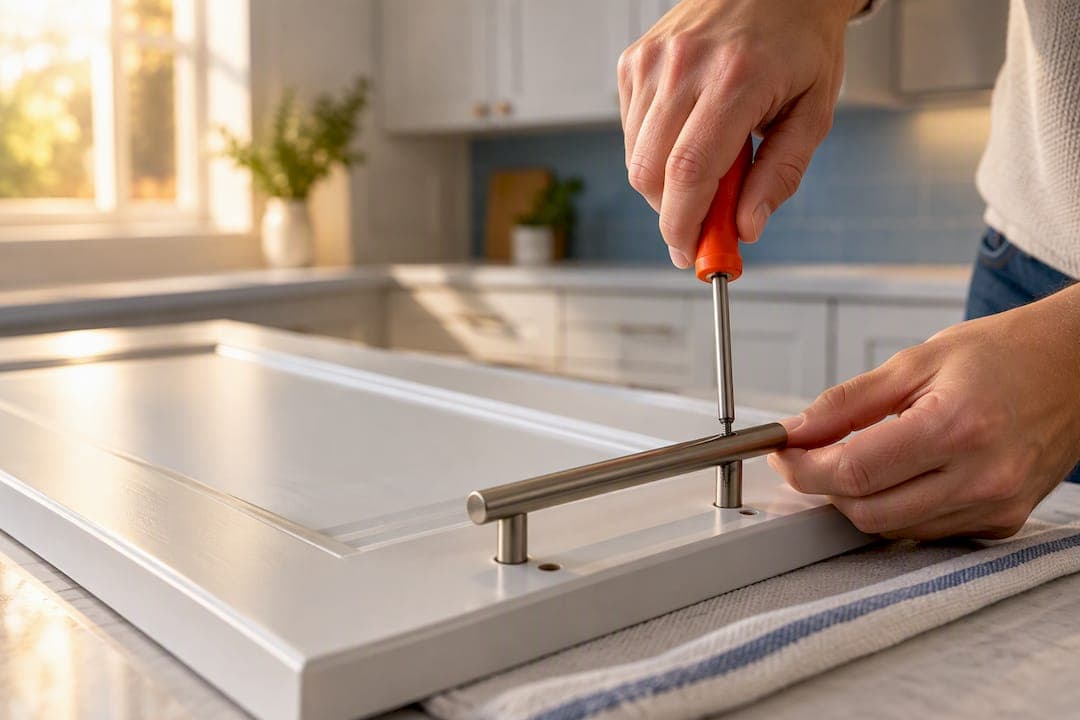
Water-based paint needs about 24 to 48 hours before hardware goes back on, while oil-based paint needs closer to 48 to 72 hours. Full cure takes much longer than that in both cases. The real rule isn't the clock, though. It's testing the finish for cure, not just checking whether it feels dry, before you drive a single screw.
TL;DR:
- Removing hardware entirely before painting ensures a clean, professional finish and prevents paint buildup or ridges around edges.
- Wait at least 24 to 48 hours for water-based paint and up to 72 hours for oil-based paint before handling hardware, with longer times needed in humid or cool environments.
- Testing finish cure with tack, fingernail, or pilot screw tests is essential to prevent dents, cracks, or peeling around screw holes during reinstallation.
- Using proper screw lengths, drilling pilot holes, and applying gentle hand-tightening protect painted surfaces from chips and misalignment.
- Professional cabinet refinishing services handle every step, including hardware removal, priming, and reinstallation, to ensure durability and finish quality.
Table of Contents
- Should You Remove Cabinet Hardware Before Painting?
- Drying Vs. Curing: How Long Should Paint Dry Before Hardware Goes On?
- How Do You Prep Cabinets and Hardware for Reinstallation?
- Refinish Or Replace: What's the Right Call for Your Hardware?
- How Do You Avoid Chipping Fresh Paint During Installation?
- How Do You Touch Up and Maintain Painted Cabinet Hardware?
- Tru Painting's Quick Checklist for a Contractor-Quality Result
- What Cabinet Hardware Works Best on Freshly Painted Doors?
- How Do You Strip Old Hardware Finishes Before Repainting?
- Why Won't Cabinet Hardware Line Up After Painting?
- Patience and Prep Protect Your Finish
- Want a Contractor-Quality Cabinet Finish Without the DIY Guesswork?
- Sources
- FAQ
Should You Remove Cabinet Hardware Before Painting?
Yes. Pulling knobs, pulls, hinges, and screws before you paint is the difference between a finish that looks professional and one that shows paint buildup around every edge you tried to work around. Painting over or even carefully taping hardware in place almost always leaves a slight ridge or "slug" of paint where the tape met metal, and that ridge is exactly where chips start later.
Here's a workflow that keeps reassembly painless:
- Take a photo of each door and drawer before removing anything, so you have a visual map.
- Remove hardware one piece at a time, dropping screws into a labeled sandwich bag for that specific door or drawer.
- Number each door and drawer with painter's tape on the back or top edge, matching it to your photo.
- Store bagged hardware in a labeled bin or divided container so nothing gets mixed up mid-project.
- Set screws aside separately if you plan to replace them with longer ones later.
If a piece genuinely can't come off, mask it tightly with painter's tape and consider a small foil or plastic shield underneath the tape line to block overspray. That approach works, but it's a compromise. According to Sherwin-Williams' cabinet painting guide, removing hardware entirely and testing primer adhesion in an inconspicuous spot gives the cleanest, most durable result. It also means you're not fighting dried paint out of hinge screw holes weeks later.
Drying Vs. Curing: How Long Should Paint Dry Before Hardware Goes On?
Dry and cured are not the same thing, and mixing them up is the single most common reason cabinet hardware ends up with dents, smears, or hairline cracks around the screw holes. Dry means the solvent or water has evaporated enough that the surface feels firm. Cured means the paint film has fully hardened all the way through, which is what actually lets a screw bite without deforming the finish around it.
Typical windows, always double checked against the product label:
- Water-based (latex/acrylic) paint: safe to handle in 24 to 48 hours; full cure often takes 21 to 30 days.
- Oil-based paint: wait 48 to 72 hours before handling; expect 7 to 14 days before it holds up to heavier use.
- Humid or cool conditions: add extra time on both ends. A basement workshop in winter cures far slower than a garage in summer.
GripfastHardware's guide to reinstalling hardware recommends a minimum 24 to 48 hour wait before any handling, stretching longer for oil-based products or damp environments. That guidance lines up with what DIY Enthusiasts reports about coat count and room conditions both extending the timeline.
Three simple tests confirm you're actually ready:
- Tack test: press a knuckle gently on a hidden edge; if it feels sticky or tacky, wait longer.
- Fingernail test: press a fingernail lightly into an inconspicuous corner; a cured finish resists denting.
- Pilot screw test: drive one temporary screw partway into a spare hole or scrap piece; if paint smears or peels back, the finish needs more time.
How Do You Prep Cabinets and Hardware for Reinstallation?
Getting the fit right starts before you ever pick up a driver. Measure your door thickness first, since factory screws are typically sized for standard 3/4 inch doors, and thicker doors need longer screws to seat properly. Knobs points out how easy it is to order the wrong screw length when a remodel changes door thickness, which leaves hardware wobbly or barely gripping.
A quick prep checklist before you start driving screws:
- Clean each piece of hardware with a mild degreaser to remove oils from handling.
- Inspect every screw for stripped threads and swap out any that look worn.
- Add a drop of light oil to stubborn threads so they seat smoothly.
- Drill pilot holes slightly smaller than the screw diameter, using a depth stop or tape marker on the bit so you don't punch through the door face.
- Start screws by hand for the first few turns before finishing with a driver on low torque.
Pro Tip: Keep a cordless driver set on its lowest clutch setting for this job. Cabinet paint is far more forgiving of a slow hand than a power tool set to "drywall speed."
Refinish Or Replace: What's the Right Call for Your Hardware?
If your existing pulls are structurally sound but the finish looks dated or scratched, refinishing usually beats buying new. If the finish is peeling, pitted, or a completely different style than what you want, replacing makes more sense, especially once you factor in center to center (CC) measurements that have to match your existing drilled holes.
For hardware worth refinishing:
- Clean thoroughly with degreaser, then sand lightly or use a metal etching primer to give the new finish something to grip.
- Apply thin coats of spray paint rated for metal, or use a metallic wax product like Rub 'n Buff for an aged brass or bronze look.
- Let each coat cure fully before handling, following the same drying and curing logic as your cabinet doors.
For hardware you're replacing, Family Handyman's installation tips recommend temporarily sticking new pulls in place with reusable adhesive to check spacing before committing to drilled holes. Order a few extra screws when you order new pulls. Mismatched screw threads are a common, avoidable headache. And where budget allows, PVD or plated finishes hold up better in daily kitchen use than a thin sprayed coating on high-traffic pulls.
How Do You Avoid Chipping Fresh Paint During Installation?
The moment right before hardware goes back on is when most fresh paint jobs get their first scar. A driver slips, a screw goes in too fast, and suddenly there's a chip right at the edge of a knob you just spent a weekend painting around.
A few habits prevent almost all of them:
- Slide a small piece of painter's tape or a folded cloth pad under any hardware base plate while you seat the first screw.
- Drill pilot holes slowly, letting the bit do the work instead of pushing hard.
- Set your driver to its lowest torque setting and finish the last quarter turn by hand.
- Never force a screw that feels tight. Back it out and check for a stripped hole or wrong screw length before trying again.
The most common mistakes are simple ones: using screws that are too long and bottom out against the door back, skipping pilot holes on hardwood doors, or using coarse-thread wood screws where a fine-thread machine screw was actually needed.
Pro Tip: If a chip does happen, don't panic and don't touch it up wet. Let the area sit for a day, then sand the chip's edges smooth, clean off the dust, and feather in a thin layer of matching paint before blending the edges with a dry brush.
How Do You Touch Up and Maintain Painted Cabinet Hardware?
Save a small amount of your cabinet paint the day you finish the job. Family Handyman suggests reusing a cleaned nail polish bottle or a small labeled jar for exactly this purpose, keeping the color ready for years instead of guessing at a match later.
When a chip shows up down the road:
- Clean the area with a mild soap and water, then let it dry fully.
- Lightly sand the chipped spot to smooth the edges.
- Thin the saved paint slightly if it's thickened over time, then apply with a fine artist's brush.
- Let it cure fully before touching the spot again.
For daily care, stick to mild dish soap and a soft cloth on both the paint and the hardware. Skip abrasive pads or heavy degreasers, which dull sheen over time. If you're noticing widespread peeling, uneven wear across multiple doors, or a finish that never fully hardened, that's a sign you're past touch-up territory and looking at professional refinishing.
Tru Painting's Quick Checklist for a Contractor-Quality Result
Our crews follow a simple sequence on every cabinet job: remove hardware, prep and prime with a product matched to the substrate, apply two thin coats with 24 to 48 hours between them, confirm cure with a tack test, then reattach hardware using pilot holes and hand-tightened screws. That order rarely changes, because skipping a step almost always shows up later as a chip or a loose pull.

We rely on substrate-matched primers because bare wood, existing paint, and laminate all grip differently, and the wrong primer undercuts everything that comes after it.
Consider calling in a professional when you're facing a full kitchen's worth of doors, want a specialty finish like a hand-glazed or matte lacquer look, or simply want spray booth quality hardware and a finish that doesn't show brush marks under kitchen lighting.
What Cabinet Hardware Works Best on Freshly Painted Doors?
Not every style holds up equally well against a painted finish, especially in a busy kitchen. Simple bar pulls and round knobs in brushed nickel, matte black, or brass tend to pair cleanly with painted cabinets because their flat or curved surfaces don't trap grease and grime the way ornate designs do.
For shaker-style painted cabinets, straight bar pulls or square knobs echo the clean lines of the door and tend to look intentional rather than tacked on. For traditional or raised-panel doors, cup pulls or slightly ornate knobs complement the extra detail without fighting it.
Finish choice matters as much as shape. Matte or satin metal finishes hide fingerprints better than high polish chrome, which shows every touch in a kitchen. Oil-rubbed bronze and matte black have both stayed popular because they hide wear well against light or white painted cabinets, while brushed brass has become a common pick against darker painted finishes like navy or forest green.
One detail worth double checking before you buy new hardware: CC measurement, the distance between the two mounting screw holes on a pull. Buying a pull with a different CC than your existing holes means either drilling new holes (and patching old ones) or committing to the size you already have. Measuring first saves a return trip to the hardware store and an extra patch and touch-up job on your fresh paint.
How Do You Strip Old Hardware Finishes Before Repainting?
Old lacquer, tarnished brass plating, or decades of grease buildup won't take new paint well until it's stripped down to a clean, slightly rough surface. A few reliable approaches work depending on what you're dealing with.
For light tarnish or grime, start with warm water and dish soap, then move to a degreaser like mineral spirits if grease has baked on over the years. For old lacquer or clear coat, a chemical stripper made for metal will lift it faster than sanding alone, though it needs good ventilation and gloves.

For bare metal prep, 220 to 320 grit sandpaper or a fine sanding sponge scuffs the surface enough for primer to grip without leaving visible scratches under paint. A liquid deglosser works as a faster alternative to sanding on hardware with a factory clear coat, cutting the shine chemically so primer bonds without a full sand.
Once hardware is stripped and scuffed, wipe it down with a tack cloth to remove dust before priming. Skipping this step is one of the most common reasons refinished hardware peels within a few months, since paint applied over sanding dust never fully bonds to the metal underneath.
Why Won't Cabinet Hardware Line Up After Painting?
Doors that hung perfectly before painting sometimes look slightly off after reinstall, and it's rarely the hardware's fault. A few thin coats of paint add real thickness, sometimes enough to change how a soft close hinge seats or how a pull sits relative to a door's edge.
Misaligned pulls or knobs usually trace back to a screw that didn't seat all the way, or a pilot hole drilled slightly off from the original mark. Backing the screw out, checking the hole for debris, and reseating slowly usually fixes it.
Stripped screw holes happen most often when a screw was over-driven with a power tool on a high torque setting. If a hole has stripped, don't just force a longer screw into the same spot. Fill the hole with a wood filler or a toothpick and wood glue, let it cure, then re-drill a fresh pilot hole in the same location.
Hinges that bind or doors that don't close flush often mean paint buildup around the hinge mortise. A quick pass with a utility knife along the hinge edge, followed by light sanding, usually restores a clean fit without needing to repaint the whole door.
If more than one or two pieces of hardware are giving you trouble, it's worth stepping back and checking whether the paint fully cured before you started reinstalling. Rushing this step is the root cause behind most alignment complaints homeowners run into.
Patience and Prep Protect Your Finish
Every shortcut in this process, skipping the cure test, forcing a screw, painting around hardware instead of removing it, costs more time later than it saves now. Run the tack test, keep a small touch-up kit on hand, and the finish you're proud of today stays that way for years.
— Kyle
Want a Contractor-Quality Cabinet Finish Without the DIY Guesswork?
If reading through cure times, screw lengths, and pilot hole depth makes you want to hand the whole project to someone else, that's exactly what Tru Painting's cabinet refinishing service is built for. We handle every step, from hardware removal and labeling to substrate-matched priming and careful hand-tightened reinstallation, so you get a finish that holds up without spending a weekend testing paint with your fingernail.

Tru Painting serves homeowners across Lake County and Central Florida who want a finish that looks like it came from a cabinet shop, not a weekend project. We compete on lasting value and dependable craftsmanship rather than the lowest bid, with flexible service tiers that match your budget without cutting corners on prep. If your kitchen is ready for a refresh, request a free estimate through our full service overview and we'll walk you through what your cabinets need.
Sources
For deeper reading, check Sherwin-Williams' cabinet painting steps and preparing your home before a painting project.
- Update kitchen cabinets in 5 steps | Sherwin-Williams
- How soon after painting cabinets can I install hardware? – GripfastHardware
FAQ
How long do I have to wait before putting hardware on painted cabinets?
Wait at least a day or two for water-based paint and a longer period for oil-based paint before handling hardware, and confirm with a tack test before tightening screws. GripfastHardware recommends extending that window in cool or humid conditions.
What should I put on cabinets after painting them?
Once the topcoat has cured, reinstall your cleaned and inspected hardware using fresh pilot holes and the correct screw length for your door thickness. Some homeowners also apply a light coat of furniture wax on painted surfaces for extra protection, though it's optional and not required by most paint manufacturers.
What are common mistakes people make when painting kitchen cabinets?
The biggest mistakes are skipping hardware removal, rushing the cure time before reinstalling hardware, and using screws that don't match the door thickness. Sherwin-Williams also flags skipping the primer adhesion test as a frequent cause of early peeling.
How long should paint dry before installing hardware?
Most water-based cabinet paints are safe to handle within 24 to 48 hours, though full cure can take 21 to 30 days depending on the product. Always check the label and run a fingernail test on a hidden spot before tightening any screws, since dry to the touch isn't the same as fully cured.
Does Tru Painting handle hardware removal and reinstallation?
Yes, Tru Painting's cabinet refinishing service includes hardware removal, labeling, and careful reinstallation as part of the job. Pricing depends on the scope of your kitchen, and current details are available through a free estimate request on our site.