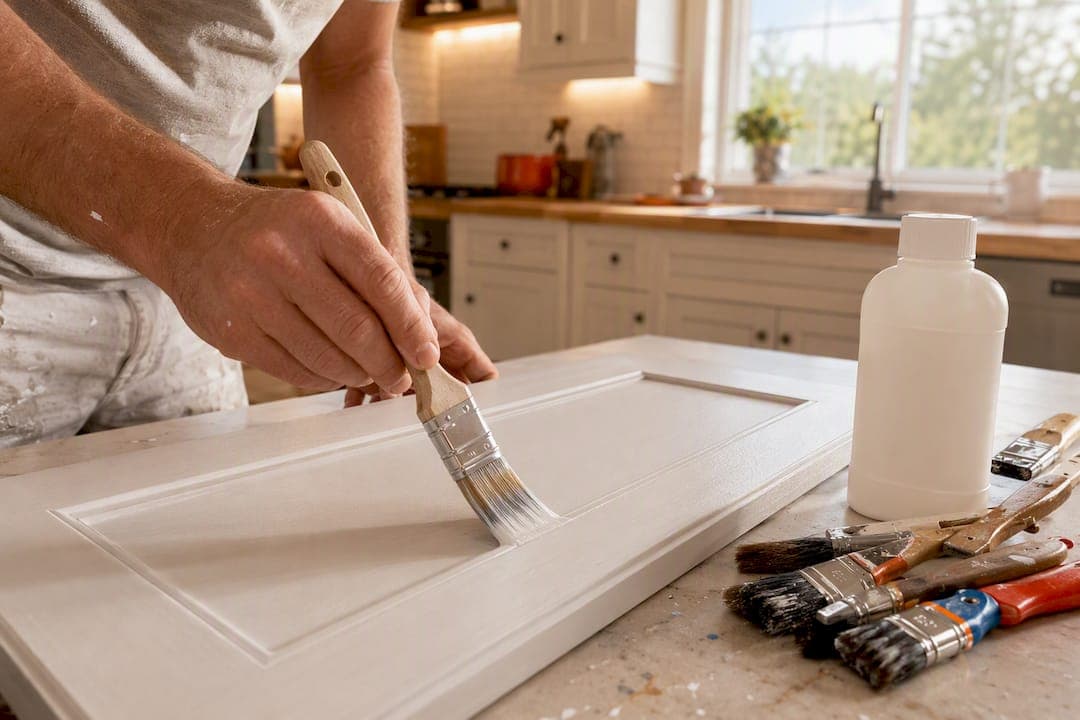
Yes, in almost every real-world case, primer before painting cabinets is what separates a finish that lasts from one that chips at the corners within a year. The only question is which family you need: shellac for tannin-heavy wood and raw MDF, a waterborne bonding primer for slick factory finishes, or an oil-based option for stubborn stains. Substrate and surface condition make that call, not personal preference.
TL;DR:
- Primers are essential for tannin-rich woods, MDF edges, peeling finishes, or grease-heavy surfaces to ensure adhesion and prevent bleed-through.
- Using the wrong primer type for your substrate, such as shellac on laminate or bonding primer on raw wood, will likely cause failure or require rework.
- Proper surface preparation, including degreasing, scuff sanding, filling, and cleaning, significantly impacts primer performance and final durability.
- Spraying primers yields the most professional, uniform results, but high-quality brushes and rollers can suffice for less demanding projects.
- Rushing cure times or skipping surface prep invites peeling, bleed-through, or paint failure, often necessitating complete strip and redo.
Table of Contents
- When Priming Is Mandatory vs When You Can Skip It
- Matching Primer to Your Cabinet Substrate
- Prepping Cabinets Before You Prime
- How to Apply Primer for a Smooth, Professional Result
- How Long Primer Takes to Dry and Cure
- Common Primer Mistakes That Cause Peeling or Bleed-Through
- Which Primer to Buy for Each Cabinet Job
- Why Professional Prep Makes the Difference Long-Term
- The Real Lesson Buried in Every Cabinet Failure
- If You'd Rather Hire It Out: Cabinet Refinishing Done Right
- Sources
When Priming Is Mandatory vs When You Can Skip It
Some cabinets genuinely don't need a dedicated primer coat. Most do. The difference comes down to what's under your hands right now, not what you'd prefer to believe about your kitchen.
Primer is mandatory when you're working with bare or stripped wood, oak or any tannin-rich species, exposed MDF edges on stock cabinet boxes, a finish that's peeling or alligatored, or doors near the range that have absorbed years of cooking grease and smoke. Skip primer on any of these and you're gambling with adhesion, and tannin bleed in particular has a way of showing up as yellow ghosting weeks after you thought the job was done.
Conditional cases are trickier. If your cabinets are previously painted, structurally sound, and low-sheen, a bonding primer can sometimes be optional if you scuff-sand and clean thoroughly first. But "sometimes optional" isn't the same as "skip it," and most professional guides still recommend priming here for insurance against future chipping.
Here's a quick way to figure out what you're dealing with before you buy a drop of primer:
- Wipe a hidden spot with isopropyl alcohol. If the finish softens or smears, you likely have a latex or water-based coating. If it stays firm, you're probably looking at an oil-based or catalyzed factory finish, which changes your bonding primer choice.
- Check the sheen and touch test. Run a fingernail across the surface. A slick, glossy factory finish resists scratching and needs mechanical scuffing plus a bonding primer, not just a scuff and a coat of paint.
- Inspect for damage. Peeling, bubbling, or exposed MDF fiber at the edges means primer isn't optional. It's the only thing standing between your topcoat and another failure.
Three yes/no questions settle most doubts: Is the wood bare or does it show tannin staining? Are there grease deposits you can feel or smell? Is the existing finish glossy, intact, and free of peeling? Two or more "yes" answers point toward a dedicated primer, not a paint-and-primer shortcut.
Pro Tip: Don't trust your eyes alone on grease. Wipe a test panel with a degreaser and a white rag. If the rag comes away gray or yellow, there's more residue than you think, and it will fight your primer's adhesion.
Matching Primer to Your Cabinet Substrate
The primer that works on oak will waste your money on thermofoil, and the primer built for laminate won't touch a tannin bleed problem. Substrate drives the decision more than brand loyalty or what's on sale at the hardware store.
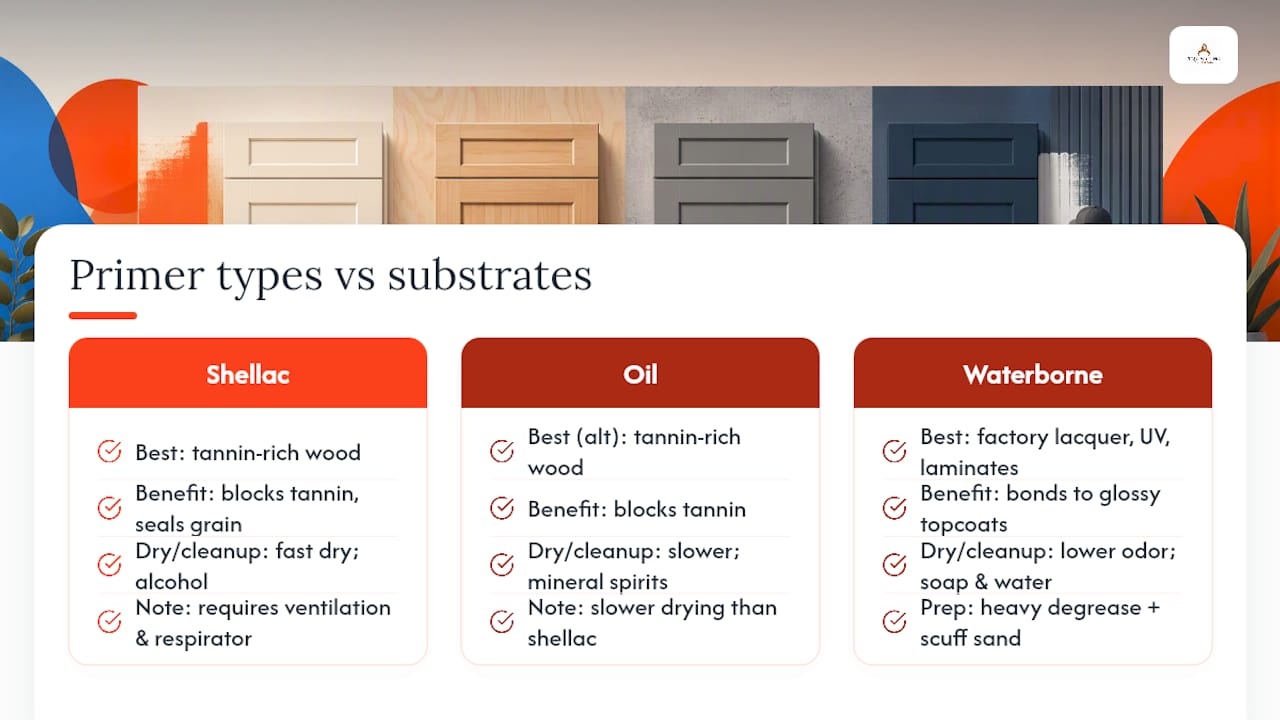
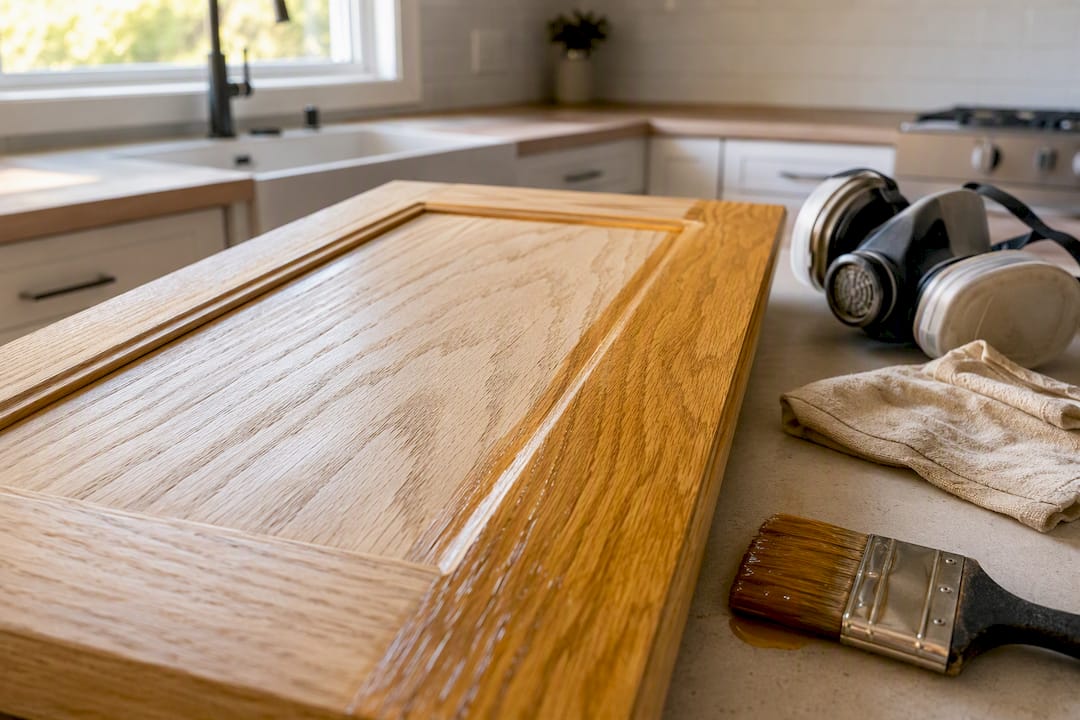
Raw or stained wood, especially oak, cherry, and other tannin-heavy species, needs a shellac-based primer. Zinsser BIN is the standard recommendation among painting professionals because it blocks tannin bleed reliably and seals porous grain before it can telegraph through your topcoat. An oil-based primer can work here too, but it dries slower and cleans up with mineral spirits instead of denatured alcohol. Shellac's tradeoff is real: it demands solid ventilation and a respirator rated for organic vapors, since the fumes are strong and the alcohol base evaporates fast.
MDF panels and routed edges behave almost like a sponge with fibers instead of pores. Shellac-first sealing keeps the material from swelling and telegraphing that fuzzy, raised-grain texture through your paint. Plan on two coats here rather than one. A single pass often leaves thin spots at the routed profile where the fibers are most exposed.
Factory-finished cabinets with lacquer or UV-cured coatings are the surfaces DIYers underestimate most. These finishes are engineered to resist adhesion, which is great for durability and terrible for anyone trying to paint over them. A waterborne bonding primer like INSL-X STIX is built to grip glossy factory topcoats after a thorough scuff sand, and it does it with far less odor than shellac.
Laminate and thermofoil doors need the same bonding-primer approach after a heavy degrease and scuff, but there's a hard limit to what primer can fix. If the vinyl wrap is already lifting or delaminating at the edges, no primer will hold it down. Replacement becomes the only reliable option once that film has started peeling away from the substrate.
Previously painted cabinets in sound condition are the easiest scenario. A water-based option like Zinsser Bulls Eye 1-2-3 offers a practical middle ground, adhering well to existing paint with soap-and-water cleanup that makes the whole project less of a chemical undertaking.
One insight worth remembering here: the primer stage, not the paint itself, is where most DIY cabinet projects actually fail. Get the substrate match right and the topcoat almost takes care of itself.
Prepping Cabinets Before You Prime
Primer only performs as well as the surface underneath it. Skip prep and even the best shellac in the world will eventually let go.
Start with a serious degreasing pass, not a quick wipe-down. A TSP-substitute cleaner or Krud Kutter cuts through the invisible grease film that builds up on any cabinet within a few feet of a stove. Pay extra attention to the 12 inches above the range and the areas around door handles where hand oils accumulate daily. Most homeowners clean once and call it done; professionals clean twice, because the first pass usually just redistributes grime rather than removing it.
Here's the sequence that keeps a cabinet project organized instead of chaotic:
- Remove and number every door and drawer front. Use painter's tape and a marking system so nothing gets reinstalled on the wrong opening. Lay doors flat whenever possible; it prevents drips and gives you a flatter working surface.
- Degrease everything twice, focusing on stove-adjacent surfaces and any spot with visible buildup.
- Scuff sand at 120 to 150 grit to break the sheen and give primer something to grip. Use a Scotch-Brite pad on curved profiles and detailed molding where sandpaper can't reach evenly.
- Fill nail holes, gaps, and dents, then caulk seams where doors meet face frames.
- Sand fillers and caulk smooth, then wipe everything down with a tack cloth before you open a can of primer.
Filling and caulking always happen before priming, never after. Primer seals and highlights surface texture, so any filled spot needs to be sanded flush and cleaned before that first coat goes on. Skip this order and you'll see every repair telegraph through the finish under raking light.
How to Apply Primer for a Smooth, Professional Result
Application method matters almost as much as primer selection. The wrong tool on the right primer still leaves brush marks and orange peel that no topcoat fully hides.
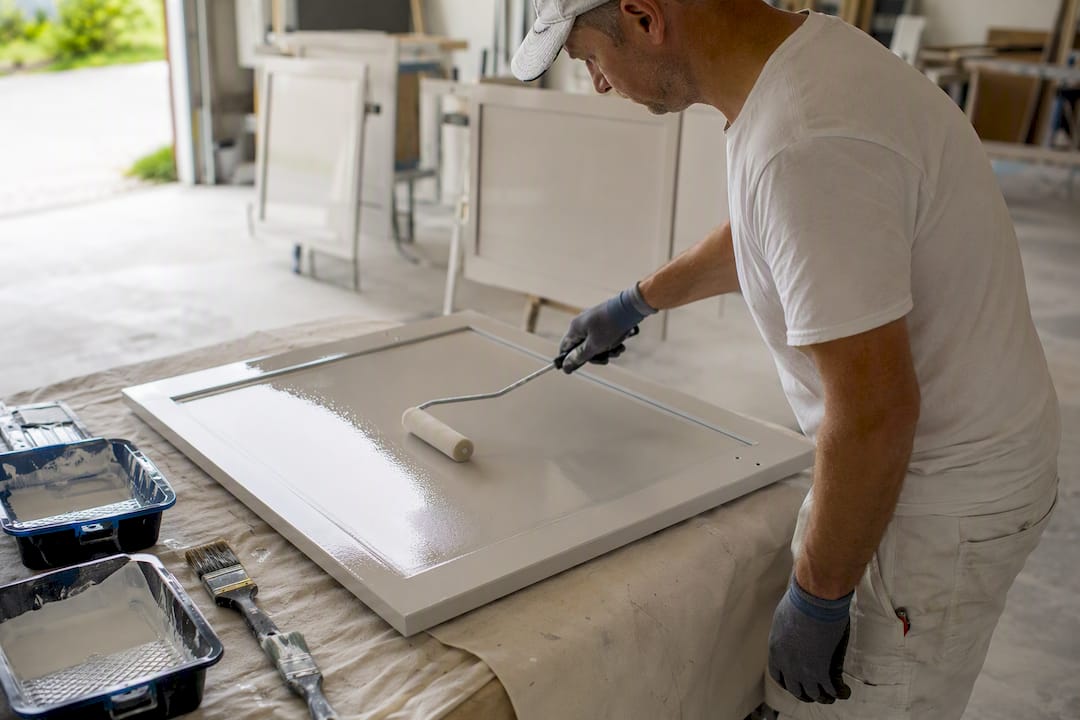
Spraying with an HVLP or airless sprayer gets primer into routed profiles and recessed panel details that a brush simply can't reach evenly, and it's how professional shops achieve that factory-smooth look. The tradeoff is masking. Spraying requires plastic sheeting, careful overspray control, and usually a dedicated workspace like a garage. If that setup isn't realistic for your kitchen, a quality angled sash brush paired with a high-density foam roller produces results good enough for most homes.
A few tool and technique notes that make a real difference:
- Use an angled sash brush for edges and profiles, and a foam roller for flat door faces to avoid stipple texture.
- If spraying shellac, thin and strain it first. Unstrained BIN clogs tips fast and leaves streaks.
- Keep spray tips in the fine-finish range and test on cardboard before touching an actual door.
- Roll in one direction, then lightly "tip off" with a dry brush to knock down roller texture while the primer is still wet.
Sand lightly between primer coats with 220 grit, then wipe with a tack cloth before the next pass or the topcoat. Skipping the tack cloth step leaves dust nibs that show up as tiny bumps once you've committed to the paint.
Pro Tip: If you're brushing instead of spraying, load less primer on the brush than feels natural. Overloading is the single biggest cause of visible brush strokes on cabinet doors.
How Long Primer Takes to Dry and Cure
Recoat times vary widely by primer type, and rushing this stage is one of the fastest ways to undo good prep work.
Shellac-based BIN recoats fast, sometimes within 45 minutes to an hour under normal conditions, though humidity and thick application can stretch that window considerably. A bonding primer like STIX typically needs 3 to 4 hours before you can safely sand or topcoat it. Oil-based primers are the slowest of the group and generally need an extended curing period before you move forward.
Here's the timeline most DIYers don't expect: the full system, meaning primer plus multiple coats of enamel, can take several weeks to reach true cure hardness, even though it feels dry to the touch within a day. That gap between "dry" and "cured" is where a lot of otherwise well-executed projects get damaged. Doors handled or stacked too soon can stick together or show fingerprints weeks later.
Rehang doors gently after a day or two for convenience, but treat the finish as fragile for the initial curing period. Install soft-close bumpers to prevent slamming, and hold off on aggressive wiping or scrubbing until the full cure window has passed. For a fuller sense of how these timelines stack up against hiring a professional crew, see our breakdown of how long a cabinet painting project actually takes.
Common Primer Mistakes That Cause Peeling or Bleed-Through
Most cabinet paint failures trace back to one of a handful of repeatable mistakes, and nearly all of them are avoidable once you know what to watch for.
- Grease contamination is the number one culprit. Even a thin film left behind will telegraph through as fisheyes or cause the primer to lift later. Reclean thoroughly, spot-sand any affected area, and spot-prime before moving forward.
- Paint-and-primer-in-one products often fail on cabinets. These combination products are formulated for walls, not for high-touch, high-wear cabinet surfaces, and they lack the tannin-blocking or bonding properties a dedicated primer provides.
- Bleed-through or peeling after the fact means you strip back to bare wood in that spot, re-prime with shellac specifically, sand smooth, and recoat with your topcoat. Patching over the problem without addressing the root cause just delays the failure.
- Watch for red flags that mean repainting isn't the right move at all. Swollen or crumbling MDF, delaminating thermofoil edges, or structural rot mean the substrate itself needs replacement, not another coat of primer.
Which Primer to Buy for Each Cabinet Job
Four primers cover nearly every cabinet scenario a homeowner will run into, and knowing which one matches your surface saves both money and rework.
- Zinsser BIN is the top pick for bare wood, tannin-heavy species, and raw MDF edges. It seals fast and blocks stains reliably, but plan on denatured alcohol for cleanup and strong ventilation, since the fumes are noticeably sharper than water-based options.
- INSL-X STIX is the bonding primer of choice for slick factory finishes and laminate surfaces. It offers lower odor and water cleanup, making it the friendlier option if you're working indoors without a garage or dedicated spray booth.
- Zinsser Bulls Eye 1-2-3 works well for previously painted cabinets in decent shape, with the easiest cleanup of the group and a forgiving learning curve for first-time DIYers.
- Zinsser Cover Stain is the oil-based heavy hitter for stubborn stains and smoke damage, requiring mineral spirits for cleanup but delivering strong stain-blocking where shellac feels like overkill.
For a deeper technical breakdown of substrate-specific product choices, this professional primer guide covers additional application scenarios worth reviewing before you buy.
Why Professional Prep Makes the Difference Long-Term
Trupainting LLC built its reputation on the unglamorous part of cabinet work: prep. Thorough degreasing, correct primer selection by substrate, and careful sanding between coats are the same fundamentals covered above, just executed with commercial-grade sprayers and controlled drying environments that most garages can't replicate.
That's part of why Trupainting LLC structures its cabinet refinishing work around three-tier service packages. Homeowners choosing between a lighter refresh and a full strip-and-refinish can pick the level of protection and investment that fits their kitchen and budget without getting pushed into more than they need. A rental property owner might prioritize durability and speed, while a homeowner planning to stay another decade might choose the tier with the most thorough substrate prep and topcoat protection.
The proof points that matter to homeowners deciding between DIY or hiring out come down to consistency. Spray equipment applies primer at a uniform thickness that's difficult to replicate by hand, and controlled cure environments prevent the dust contamination that ruins many DIY finishes in the final days of drying. If your cabinets have failed once already, that consistency is often the difference between round two working and round two failing the same way.
The Real Lesson Buried in Every Cabinet Failure
Most cabinet painting advice treats primer as a formality, a box to check before the "real" work of painting begins. That's backward. The research and repeated failure patterns point to primer selection and surface prep as the actual skill in this project. Paint color and sheen are the easy decisions.
What conventional advice gets wrong is treating all primers as interchangeable "just prime it first" products. They're not. Using Bulls Eye 1-2-3 on raw oak or skipping a bonding primer on factory lacquer isn't a minor shortcut. It's the specific decision that determines whether you're repainting these cabinets again in 18 months.
If you take one thing from this guide, prioritize the substrate test over the paint brand. Figure out what you're actually working with, match the primer family to it, and respect the cure time even when the surface looks dry. Rushing the last step undoes the discipline of every step before it.
— Kyle
If You'd Rather Hire It Out: Cabinet Refinishing Done Right
Trupainting LLC is the alternative to a weekend lost in fumes and sandpaper. Full spray-applied refinishing means factory-smooth results without the garage setup, the ventilation guesswork, or the risk of a rushed cure ruining weeks of work.

Hiring a pro makes the most sense for larger kitchens where dozens of doors need consistent coverage, for cabinets with stubborn tannin bleed that keep reappearing despite your best DIY efforts, or simply when you want that true spray-applied factory finish without buying an HVLP rig you'll use once. Trupainting LLC's cabinet refinishing services handle the substrate testing, primer matching, and controlled cure environment covered throughout this guide, backed by the same three-tier packages that let you choose the level of protection your kitchen deserves. Reach out for a quote and find out which tier fits your cabinets and your budget.
Sources
- Cabinet Primer: Best Options for Repainting Cabinets
- How to Paint Kitchen Cabinets Like a Pro Step by Step
- Best Primer for Cabinets - Prep Paint Tools