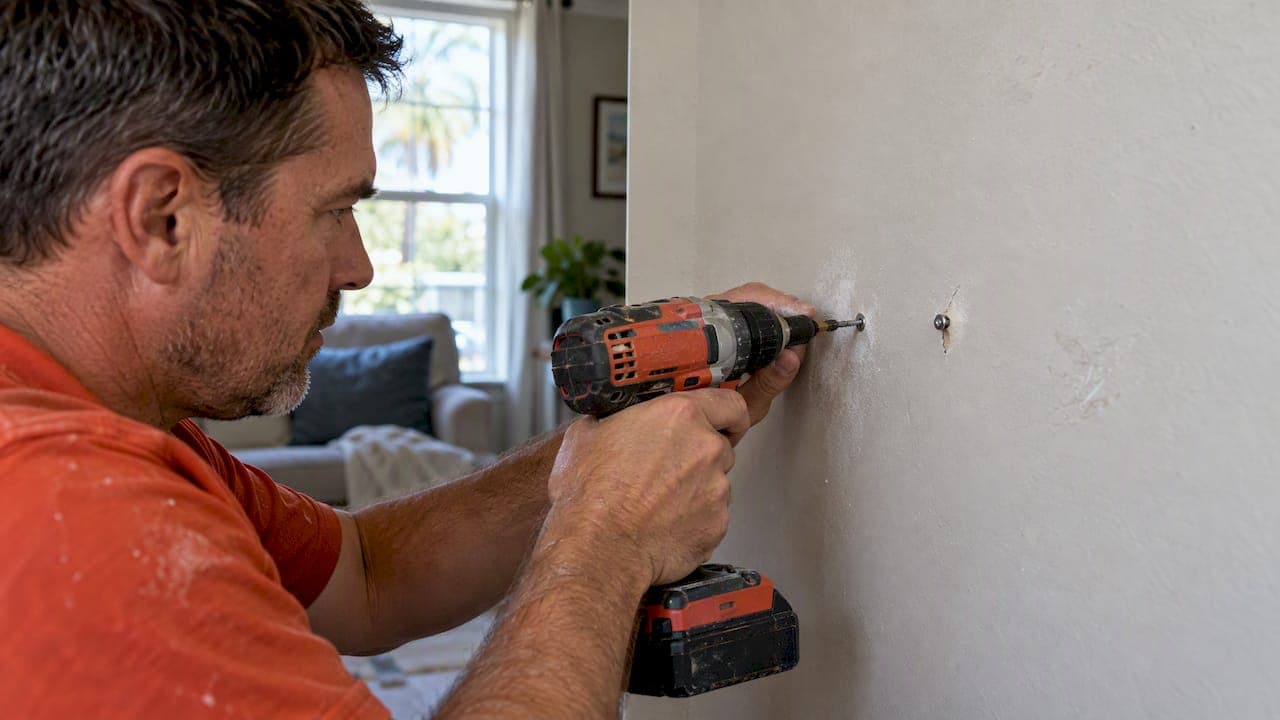
Most drywall nail pops are cosmetic, not structural, and the fix that actually lasts is simple: anchor the loose spot with a new screw into the stud, patch it with a few thin coats of compound, then prime and paint. If you're seeing pops alongside sticking doors, growing cracks, or shifting trim, pause the DIY patch and get a professional look first, since those signs can point to something bigger than a popped fastener.
TL;DR:
- Several pops in a line, torn drywall paper, lengthening cracks, sticking doors, uneven floors, or separating trim warrant inspection before cosmetic patching.
- For a lasting repair, place a new Type W screw 1.5 to 2 inches from the old fastener, anchored in the same stud.
- Use fiberglass mesh tape over torn paper, then apply two to three thin compound coats, sanding between them before priming and matching the paint.
- In new construction, wait through a full heating and cooling cycle before making permanent repairs, because framing lumber may keep shrinking.
- Follow fastener spacing guidance, and add extra screws near ceiling fasteners, where gravity and truss movement place more stress on the drywall.
Table of Contents
- What Nail Pops Look Like and How to Judge Severity
- Common Causes of Drywall Nail Pops
- When Nail Pops Indicate a Larger Problem
- Tools and Materials for a Reliable Repair
- Step-by-Step Repair That Will Hold
- Timing and Prevention: When to Repair and How to Avoid a Repeat
- A Contractor's View on Prep and When to Call a Pro
- How Tru Painting Can Help With Drywall Repair and Paint-Ready Prep
- FAQ
- Sources
What Nail Pops Look Like and How to Judge Severity
A nail pop usually shows up as a small round bump or dimple in the paint, sometimes with a hairline crack around it. There are two basic types: closed pops, where the drywall paper is intact but the fastener head has pushed through the compound, and open pops, where the paper has torn and you can see the metal head or a ragged edge.
A few quick checks tell you how worried to be. Press gently around the bump: if the board feels solid and doesn't flex, you're likely dealing with a single loose fastener rather than a sagging panel. Look a foot or two in each direction for repeat pops in a row, which often means the whole run of fasteners missed the stud or the framing shifted along that line.
- A single, small, closed pop with no nearby cracking is almost always cosmetic.
- Several pops in a straight line or cluster suggest a framing or fastening pattern issue worth a closer look.
- Torn paper, a visible metal head, or compound that's separated from the surrounding texture means the repair needs mesh tape, not just a dab of mud.
Common Causes of Drywall Nail Pops
Wood framing keeps drying out and shrinking for months after a house is built, and that movement is the single biggest reason pops show up, especially in the first year of a new build. As humidity swings between seasons, lumber expands and contracts again, which is why pops can reappear even in homes that are years old.
Fastener choice and technique matter just as much as the wood itself. Nails have less holding power than screws and are more prone to backing out as framing moves, and a fastener that's too short or driven at the wrong angle never gets a solid grip in the first place. Overdriving a screw or nail so deep that it tears the paper face also weakens its hold, which trade guidance notes reduces holding power and makes a future pop more likely.
Adhesive can cause its own version of the problem. USG's testing found that when low-VOC, water-based drywall adhesives are used and the wall is finished before that adhesive fully cures, the adhesive shrinks as it dries and pulls the board tight against the framing while the screw head stays put, creating what's known as a screw button. Letting adhesive cure fully before finishing avoids that failure mode entirely.
- Seasonal lumber shrinkage, strongest in the first year after framing.
- Nails or undersized fasteners that never got firm penetration into the stud.
- Adhesive shrinkage that creates "screw button" protrusions when finishing happens too early.
- Truss uplift, which puts extra stress on wall-to-ceiling intersections during temperature swings.
When Nail Pops Indicate a Larger Problem
A handful of scattered pops is normal wear from a house settling in. A cluster of pops concentrated in one corner, or cracks that keep getting longer between inspections, is a different story.
- Walk each room and mark every pop you find, noting whether they're isolated or grouped along a wall or ceiling line.
- Photograph cracks and pops with a coin or ruler in frame, then recheck in a month to see if anything has grown.
- Check doors and windows for new sticking or gaps, and look at exterior trim and the foundation line for matching movement.
- If you see pops paired with any of these signs, foundation cracks, doors that won't latch, visibly uneven floors, or trim pulling away from walls, bring in a contractor or structural engineer before doing any cosmetic patching.
Our drywall repair versus replace checklist walks through how to scope a repair once you've ruled out the bigger issues.
Tools and Materials for a Reliable Repair
Getting the repair to hold starts with the right fastener. Type W drywall screws are built for wood framing and, per AWCI guidance, need at least 5/8 inch of penetration into the stud to grab properly. A screw gun or a drill with a drywall bit and depth-stop attachment makes it much easier to seat screws just below the surface without tearing the paper.
- Type W drywall screws, a screw gun or drill with a drywall bit, and a 5-in-1 or putty knife set.
- Joint compound, fiberglass mesh tape for any torn or open pops, and a sanding sponge for smoothing between coats.
- A PVA or drywall-specific primer and touch-up paint matched to the wall.
- Optional: plaster washers for older lath-and-plaster walls, and a dustless sanding attachment to cut cleanup time.
If you're also trying to keep dust off nearby floors and furniture, our dustless sanding guide covers tools that cut airborne dust significantly during sanding.
Step-by-Step Repair That Will Hold
A lasting nail pop repair follows the same basic sequence pros use, whether it's one bump or a dozen.
- Inspect first. Press around the pop, check for nearby cracks or repeat pops, and photograph anything that looks like more than a single loose fastener before you touch it.
- Handle the old fastener carefully. If the paper is torn, back the old nail or screw out rather than hammering it flush, since pounding on it can crack the compound further and push the problem deeper into the wall.
- Drive a new screw into the stud. AWCI recommends placing a new Type W screw about 1.5 to 2 inches above or below the original fastener, angled into the same stud, with enough penetration to seat firmly without stripping the wood.
- Prep the surface for compound. For open, torn pops, lay a small patch of fiberglass mesh tape over the area first so the compound has something stable to bond to. For closed pops, just make sure the new screw head sits slightly below the surface.
- Apply compound in thin layers. Build up two to three feathered coats rather than one thick one, letting each coat dry fully and sanding lightly between passes so the final surface blends with the surrounding wall.
- Prime and paint. A PVA or drywall primer seals the patch so it doesn't flash through the topcoat, and matching texture before painting is what makes the repair disappear instead of standing out under certain light. Our primer selection guide explains why that step shouldn't get skipped, even on small touch-ups.
Pro Tip: Stop driving the screw the moment you feel the drill start to spin freely instead of tightening, since that's the point where the head is seated and any further pressure risks tearing the paper.
If this is a new build, give the house through one full heating and cooling cycle before treating any repair as final, since framing continues to move as it dries out.

Timing and Prevention: When to Repair and How to Avoid a Repeat

Patching a pop immediately after noticing it isn't always the best approach in a new build. Waiting through a full seasonal cycle allows lumber to complete most of its shrinking, making repairs more durable.
Prevention starts at installation. GA-216 spells out fastener spacing, generally around 8 inches apart on walls and 7 inches on ceilings for nails, with screw spacing closer to 12 inches on center for ceilings and 16 inches on center for walls. Ceilings also benefit from double nailing or an extra screw near each original fastener, since gravity and truss movement put more stress on overhead framing than on walls.
- Follow GA-216 fastener spacing rather than guessing at intervals.
- Use double fasteners on ceilings, where truss uplift and gravity add extra stress.
- Let framing lumber reach a stable moisture level before final fastening where possible.
- After a humidity swing, walk the house and add a screw anywhere fastener density looks thin, before repainting over it.
A Contractor's View on Prep and When to Call a Pro
Most nail pop patches fail for the same reason: someone skips the dust control, rushes the primer, or eyeballs a texture match instead of blending it properly. We've found that the difference between a patch you can spot across the room and one that disappears entirely almost always comes down to prep, not the compound brand.
Hiring a pro makes the most sense when pops keep reappearing in the same spots, when the work is on a ceiling, when you're matching texture across a large wall, or when you simply want a finish backed by a workmanship guarantee instead of a weekend guess. Drywall repair is considered a first step toward a finish, not a separate chore.
— Kyle
How Tru Painting Can Help With Drywall Repair and Paint-Ready Prep
We handle drywall repair, texture matching, and dustless sanding as part of getting a wall paint-ready, not as an afterthought before painting. Whether it's a handful of ceiling pops or a wall full of them, our prep work is built to make the patch invisible once primer and paint go on.

We offer three service tiers, Cosmetic Refresh, Enhanced Prep & Durability, and Maximum Prep & Protection, so you can match the level of repair and protection to your home and your budget without paying for more than the job needs. If you'd rather hand the patching, priming, and painting to a crew that does this daily, our residential interior painting services page is the place to request an estimate. We'll walk the space, flag anything that looks like more than a cosmetic pop, and give you a clear scope before any work starts.
FAQ
Can I just hammer in nail pops?
Hammering a popped nail back in place is a short-term fix at best, since the fastener has already lost its grip in the wood and will likely work loose again. A more durable repair adds a new screw near the original spot and patches over both.
Is it normal to have nail pops in a new build?
Yes, nail pops are common in new construction as framing lumber dries out and shrinks over its first year. Waiting through a full seasonal cycle before making permanent repairs usually gives a more lasting result.
How many nail pops are normal on a ceiling?
There's no fixed count that's considered normal, since it depends on the size of the ceiling and how the original fasteners were spaced. A few scattered pops are typically cosmetic, while a cluster concentrated in one area is worth a closer look for a framing or truss issue.
Why are there so many nail pops in my house?
Widespread pops usually trace back to fastener spacing that was too wide, nails used instead of screws, or lumber that was still drying when the house was finished. If adhesive was used during installation, finishing before it fully cured can also cause repeated screw button protrusions across a wall or ceiling.
Sources
We rely on GA-216, USG and AWCI trade guidance, and BobVila's homeowner overview for these recommendations.
- AWCI - Nail pops and efflorescence guidance
- Gypsum Association - GA-216 application and finishing of gypsum panel products
- USG - Fastener-related drywall installation issues and recommendations (white paper)
- BobVila - Popped nails? Repair your drywall with these tips