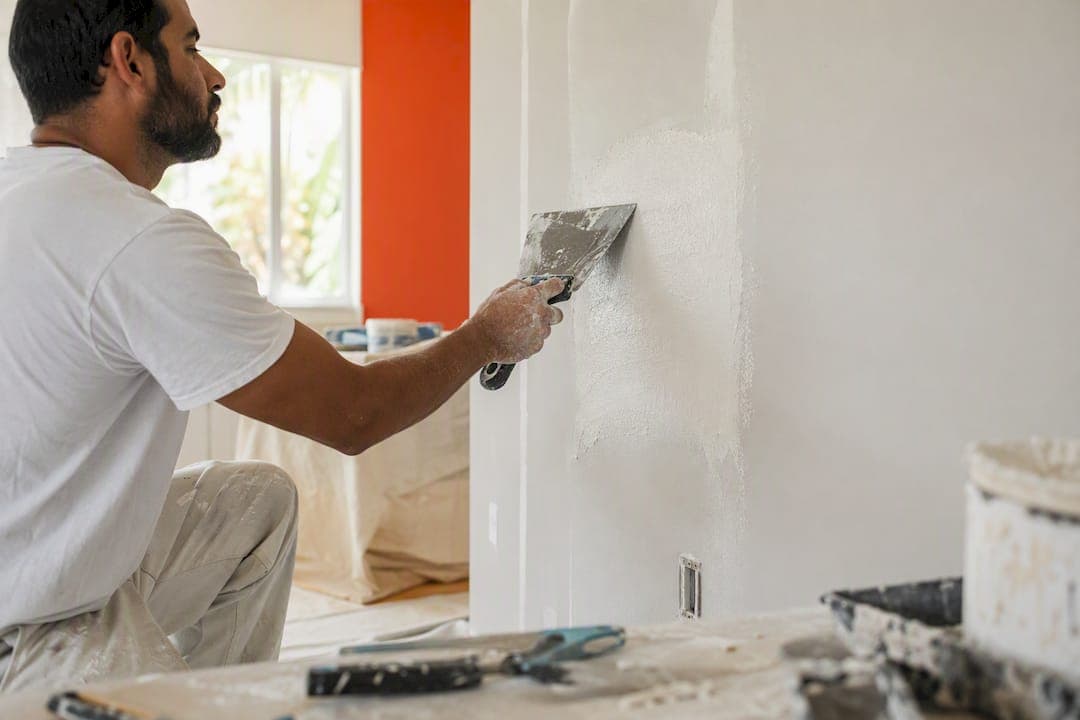
Drywall texture matching comes down to four moves in order: identify the exact texture family on your wall, test your method on a scrap board, apply and feather that texture into the surrounding surface, then prime and paint to a natural break. Expect the finish to depend heavily on your wall's age and paint layers, and know upfront that some repairs, especially on ceilings or heavily aged knockdown, genuinely call for a professional finish.
TL;DR:
- Matching drywall texture requires identifying the correct texture family, as each demands different tools, spray pressure, and timing for best results.
- Accurate testing on a scrap board under the same lighting and conditions as the wall helps ensure the pattern, scale, and sheen will blend seamlessly before working on the actual surface.
- Proper technique involves feathering edges, priming thoroughly, and repainting with matching sheen to hide transition lines and achieve an invisible repair.
- Knockdown texture timing is critical; waiting too long or knocking down too early can lead to noticeable differences in texture softness or sharpness.
- Full-wall or ceiling fixes, especially in hazardous popcorn, often require professional intervention when DIY attempts repeatedly fail or conditions are complicated.
Table of Contents
- What Kind of Drywall Texture Are You Actually Matching?
- Tools, Materials, and Setup Before You Start
- How Do You Match Drywall Texture Step by Step?
- Test Your Sample Before You Touch the Real Wall
- Feathering, Priming, and Paint Strategy That Sell the Repair
- What to Do When the Match Still Looks Off
- Tru Painting's Take on Realistic Texture Matching
- Keeping Textured Drywall Clean After the Repair
- An Honest Note From Kyle on What "Invisible" Really Means
- Ready for a Texture Match You Won't Have to Second-Guess?
- Sources
What Kind of Drywall Texture Are You Actually Matching?
Before you mix a drop of compound, you need to name the texture correctly, because each family calls for a different tool, spray pressure, and timing window. Get this step wrong and no amount of skill later fixes it.
Smooth walls have zero texture, just a flat, sanded finish. Orange peel looks like the skin of its namesake fruit, small, even bumps from a light spray pattern. Knockdown starts as orange peel or splatter, then gets flattened with a wide knife while wet, leaving irregular, stucco-like patches with flat tops. Skip-trowel shows broad, thin swipes of compound with visible trowel marks and bare patches between them. Popcorn is the raised, lumpy ceiling texture common in homes built before the 1990s.
Age changes all of this. A texture sprayed in 1995 and painted four or five times since will look softer, rounder, and less crisp than the same pattern applied fresh today, and professional finishers deliberately mimic that softened look rather than reproducing a sharp, factory-fresh pattern.
Before you buy a single can of texture spray, run this inspection:
- Look at the wall from a raking angle under a work light. Direct overhead light hides texture; side lighting exposes every peak and valley.
- Measure the scale of the pattern. Orange peel droplets are typically dime-sized or smaller; knockdown flats run larger and more irregular.
- Run your palm across the surface. Smooth-feeling knockdown has been pressed flatter than rough, unflattened orange peel.
- Check for multiple paint coats built up in the low spots, a sign the texture is older than it looks.
Tools, Materials, and Setup Before You Start
The right supplies save you from a second trip to the store mid-project, and some choices affect how forgiving your test runs will be.
For compound, you have two real options. All-purpose joint compound dries slowly, which gives you more working time to experiment with spray patterns or trowel motions, but it shrinks as it dries and may need a second coat. Setting-type compound (often sold as "20 minute" or "45 minute" mud) hardens chemically instead of by evaporation, so it won't shrink and it's ready to texture and sand faster, but you lose your window to fix mistakes once it starts to set.
Gather these before you begin:
- Aerosol texture spray (orange peel or knockdown formula) for small to medium patches, or a hopper gun for larger walls and repeat jobs.
- A 12 inch drywall knife for knockdown flattening; anything narrower makes it hard to keep pressure even.
- 150 to 220 grit sanding sponge for smoothing patch edges without gouging surrounding texture.
- A scrap of drywall, at least 2 feet square, for every test run.
- Painter's tape, plastic sheeting, and a dust mask rated for drywall dust.
Pro Tip: Keep the exact same can of texture spray and the same compound batch for both your test board and the final wall. Switching brands mid-project changes droplet size and dry sheen enough to throw off an otherwise perfect match.
How Do You Match Drywall Texture Step by Step?
Work through this sequence in order, and don't skip the test phase even when you're confident, because timing and pressure vary more than most first-timers expect.
- Prep the substrate. Sand any glossy paint off the repair area so new compound bonds evenly, and feather the patch compound at least 2 to 3 inches beyond the damaged spot so there's no hard ridge for texture to catch on.
- Check suction. A bare, dry patch of new compound absorbs texture and paint differently than the painted drywall around it. A thin coat of drywall primer over the patch before texturing evens this out.
- Test on scrap first. Spray, trowel, or stencil your pattern on the scrap board using the same distance, pressure, and mix you plan to use on the wall.
- Texture, then knock down if needed, then let it cure before priming.
For orange peel, hold the aerosol nozzle 12 to 18 inches from the surface; closer distances create bigger, wetter droplets, farther distances create a finer, drier speckle. Spray in overlapping passes and let the pattern feather naturally past the patch edge instead of stopping in a straight line.
Knockdown is where timing makes or breaks the repair. Spray your base texture, then wait. The knockdown window typically runs 5 to 20 minutes depending on humidity, temperature, and how thick you sprayed, and some pros narrow that further to roughly 10 to 15 minutes under normal room conditions. Knock down too early and the compound smears instead of flattening cleanly. Wait too long and it sets hard, leaving sharp, unflattened peaks that won't match the softer, aged texture around them. Hold your 12 inch knife at a shallow angle and shave the peaks, don't press flat, since pressing flat crushes the texture into the substrate and leaves flat, dead-looking patches. On surfaces that are already painted or primed, that window shrinks further because the surface underneath cures the compound faster.
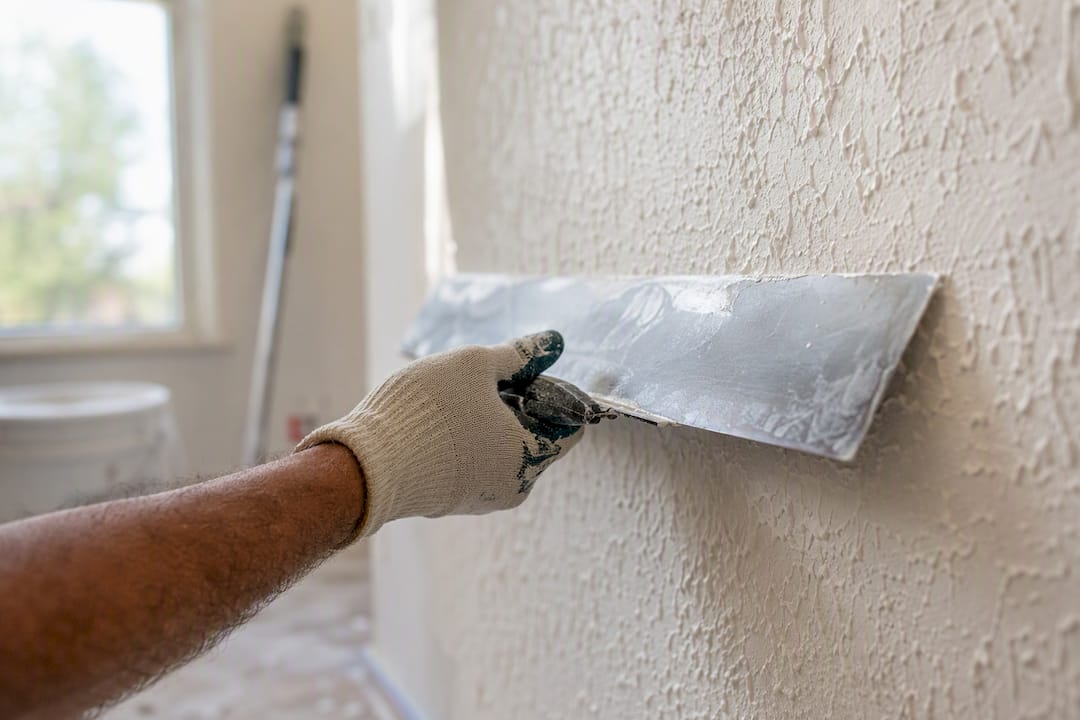
For skip-trowel or hand-applied patterns, mix your compound to a mayonnaise-like consistency, thin enough to spread but thick enough to hold ridges. Load a trowel and drag it in random, overlapping arcs rather than uniform strokes, since uniformity is what makes a skip-trowel patch look machine-applied against a hand-finished wall. Texture stencils can help reproduce a knockdown pattern on small repairs; practice placement on your scrap board and overlap the stencil edge slightly into the surrounding pattern so there's no visible seam.
Popcorn ceilings deserve extra caution. If your home was built before 1978, test the ceiling material for asbestos before you disturb it; popcorn texture applied before that year sometimes contains hazardous fibers that become airborne when sanded or scraped. For safe, newer popcorn, matching aggregate size in a can rarely looks perfect on anything but the smallest patch, and a full ceiling recoat is often the more realistic path to an even result.
Pro Tip: Photograph your test board next to the actual wall under the same lighting you'll use for the real repair. What looks identical under a phone flashlight can look completely different under a lamp at a raking angle.
Test Your Sample Before You Touch the Real Wall
A test patch only tells you something useful if it mimics real conditions, not just the pattern itself. Cut a piece of scrap drywall, orient it the same direction as your wall (vertical grain matters for how compound drags), and use the identical compound batch and spray can you'll use for the final repair.
Evaluate the sample in three stages, not one:
- Wet: does the pattern scale and density look close to the surrounding texture?
- Dry, unpainted: texture often looks rougher and more pronounced once it fully cures.
- After primer and a coat of paint: testing the full system, texture plus primer plus paint, before committing to the wall catches sheen mismatches that are invisible on bare compound.
If the test sample looks flatter than the wall, increase spray distance slightly or shorten your knockdown wait time. If it looks too coarse, move the nozzle closer or extend the wait. If three attempts still don't get you close, that's your signal to expand the repair to a full wall section rather than keep chasing a small, invisible patch.
Feathering, Priming, and Paint Strategy That Sell the Repair
The texture pattern matters less than how it dies out at the edges. Most amateur repairs fail not at the center of the patch but at that transition line, where new material meets old.
Feather your texture spray or trowel strokes so the pattern gradually thins into the surrounding wall over several inches rather than stopping in a hard line. Gradual edge blending, not perfect center matching, is what separates convincing repairs from obvious ones.
Once texture cures, prime the entire patch, feathered edges included, before painting. Raw compound absorbs paint differently than painted drywall, and skipping primer is the single most common reason a technically good texture match still shows up as a dull or shiny patch after paint. Proper drying time and priming before repainting matters as much as the texture work itself.
- Prime the patch with a drywall primer, not straight paint, even if you're using paint plus primer in the same can for the topcoat.
- Match sheen exactly, not just color. A flat wall touched up with an eggshell paint will flash under any angled light, even with a perfect texture match.
- Repaint to a natural break, a corner, a door frame, a ceiling line, rather than trying to blend a small painted patch into an untouched wall.
- When the repair sits on an open wall with no natural break nearby, repaint the entire wall for a genuinely invisible result.
Pro Tip: Roll your topcoat in the same direction and with the same nap roller you used on the original wall. A finer nap lays paint down smoother and can subtly change how texture reads under light compared to the surrounding surface.
What to Do When the Match Still Looks Off
Even careful work sometimes misses. Knowing what each failure mode means saves you from redoing the whole patch blind.
- Too flat or smooth: you likely knocked down too late or pressed instead of shaved. Light re-spray and a gentler knockdown pass, or add a second thin texture coat, usually fixes it.
- Too sharp or pointy: the knockdown happened too early, before the compound set enough to flatten cleanly. A light sanding of the peaks softens the profile without redoing the whole patch.
- Visible edge line: the feathering didn't extend far enough. Feather wider on your next pass, or lightly sand the transition and add a thin skim coat over just the edge.
- Sheen flashing after paint: almost always a missed or uneven primer coat. Prime again and repaint that section rather than adding more topcoat.
Some situations are worth handing to a professional outright: full ceiling texture jobs, any knockdown work spanning more than a few square feet, and any pre-1978 popcorn ceiling where hazardous material testing comes back positive. Repeated failed attempts on the same spot is also a sign the substrate or lighting conditions are working against you, not your technique.
Tru Painting's Take on Realistic Texture Matching
We test every texture repair under the room's actual lighting before committing, not just under a shop light, since a match that looks perfect in a garage can flash badly under a window's raking afternoon light. We also aim for softer, slightly aged texture rather than razor-sharp new pattern, because that's what actually blends with a wall that's been painted two or three times over the years.
Tru Painting bundles the patch, texture, primer, and paint into one visit, which matters more than it sounds. When one crew controls every step, from feathering to final sheen, there's no gap for a mismatched primer or a slightly-off paint batch to sneak in between separate contractors.
Keeping Textured Drywall Clean After the Repair
Textured surfaces trap dust and grime in their peaks and valleys more than smooth walls do, which means your fresh repair needs a slightly different care routine than a flat-painted wall.
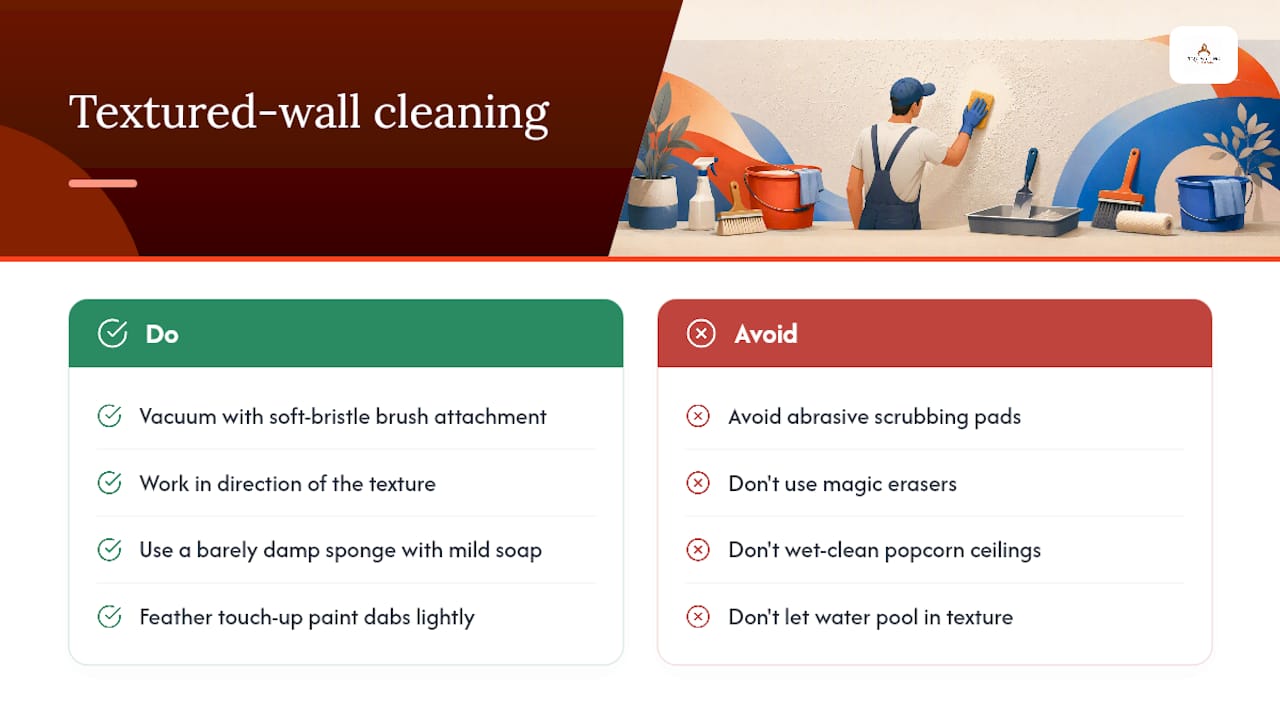
Dust textured walls and ceilings with a soft-bristle brush attachment on a vacuum or a dry microfiber duster every few months, working in the direction of the texture pattern rather than against it. For light marks or handprints, use a barely damp sponge and a mild soap solution, wringing it out well before it touches the wall. Excess water pools in the texture's low spots and can soften the compound underneath, especially on a repair that's less than a month old and still fully curing.
Avoid abrasive scrubbing pads or magic eraser type sponges on textured surfaces. They wear down the raised peaks unevenly, which over time can make even a perfectly matched repair start to look flatter than the surrounding wall. If a textured wall gets a scuff that won't lift with a gentle wipe, a small dab of touch-up paint on a foam brush, feathered lightly into the texture, handles it better than scrubbing.
For ceilings, especially popcorn or heavy knockdown, skip wet cleaning entirely and stick to vacuum attachments or long-handled dusters. Painted popcorn texture can absorb moisture unevenly and shed small bits of material if scrubbed, which creates a new repair job right where you just finished one.
An Honest Note From Kyle on What "Invisible" Really Means
Chasing a perfectly invisible patch on a wall that's fifteen years and four paint jobs old is sometimes chasing a moving target. Aged texture has a softness that fresh compound just doesn't replicate on the first try, and that's fine.
Test on scrap, adjust, test again. That process teaches you more in twenty minutes than any tutorial does. And if a spot repair still flashes after your best effort, Tru Painting handles the kind of full-wall or ceiling finish work that makes the question of matching disappear entirely.
— Kyle
Ready for a Texture Match You Won't Have to Second-Guess?
If you've worked through a test patch and it still doesn't sit right, that's not a failure. It's usually a sign the repair needs a full wall section repainted, or a crew that does this every week instead of once a decade. Tru Painting handles the entire sequence in one visit, patch, texture, primer, and paint, with one crew responsible for the whole result instead of separate trades passing the job along and leaving room for mismatched sheen or texture to slip through.
That bundled approach is also backed by our tiered service packages, so you can choose the level of prep and protection that fits your home and your budget without guessing at what's included. If you're in Lake County or Central Florida and staring at a patch that won't blend no matter what you try, our residential interior painting and repair team can walk your space and give you a straightforward estimate. Reach out and we'll tell you honestly whether it's a spot fix or a full-wall repaint, no upsell required.
Sources
- How to Do a Knockdown Texture | wikiHow
- DAP Spray Texture 20 oz. Knockdown Water-Based Wall Texture | The Home Depot
- Repair damaged drywall with texture stencils | Marshalltown
- How to match drywall texture | Angi