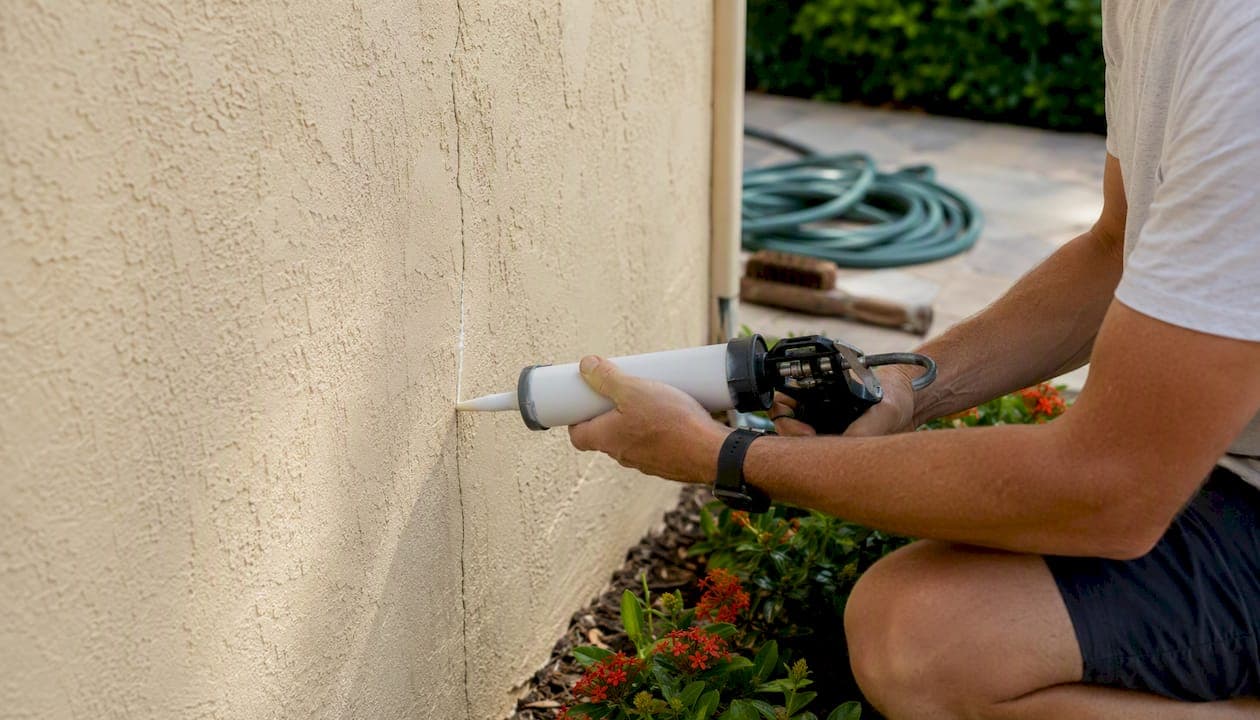
The fastest dependable fix for a stucco hairline crack repair is straightforward: clean the crack thoroughly, force a flexible exterior-grade sealant into the gap rather than smearing it over the surface, tool the texture to match the surrounding stucco, and repaint the entire panel if you want the repair to disappear. That last step matters more than most homeowners expect.
Here's the threshold you need to know before you touch a caulk gun. Cracks around 1/32 inch (0.030 in) or smaller are considered hairline, and industry guidance from the Wall and Ceiling Contractors (WCC) treats these as generally cosmetic and inherent to cementitious materials like Portland cement plaster. Patching them with aggregate-based fillers often leaves a bump or shiny line that's more visible than the crack itself.
- Under 1/32": clean, seal with flexible caulk, texture, consider repainting the panel.
- 1/32" to 1/16": slurry coat or polymer-modified patch, likely with fiberglass mesh reinforcement.
- Above 1/16" or recurring: call a contractor before doing anything cosmetic.
Pro Tip: If the crack catches your fingernail when you drag it across, its past hairline territory. That's your cue to widen your repair plan, not just grab a bigger tube of caulk.
Key Takeaways
Hairline stucco cracks under 1/32 inch are usually cosmetic and heal best with a flexible sealant forced into the gap, careful texture blending, and a full panel repaint when appearance matters most.
| Point | Details |
|---|---|
| Know the threshold | Cracks at or below 1/32 inch are hairline and generally cosmetic; wider cracks need patching or professional review. |
| Fill, don't bridge | Force sealant or patch compound into the crack depth rather than smearing it across the surface to avoid a shiny scar. |
| Texture while workable | Blend texture within the first 10 to 20 minutes of applying patch material, before it sets up hard. |
| Watch for red flags | Rust stains, hollow sounds, and interior water stains mean the crack needs a contractor, not a caulk gun. |
| Call Trupainting LLC for peace of mind | Trupainting LLC's residential exterior team inspects, diagnoses, and repairs stucco cracks with contractor-grade skim coats and elastomeric systems when DIY isn't enough. |
Table of Contents
- Stucco Hairline Crack Repair: What the Threshold Means for Your Approach
- Tools and Materials for Repairing Small Stucco Cracks
- Which Cracks Need Repair, Monitoring, or a Full Resurface
- Step-by-Step Workflow to Fix a Hairline Stucco Crack
- Blending Texture So the Repair Doesn't Show
- Contractor-Grade Options When Patching Isn't Enough
- How Long Repairs Take and What They Typically Cost
- Common Stucco Crack Repair Mistakes and How to Fix Them
- When a Stucco Crack Needs a Professional, Not a Patch Kit
- Why Diagnosing the Cause Comes Before Any Cosmetic Fix
- If You'd Rather Have a Pro Handle It: How Tru Painting Helps
- Sources
Stucco Hairline Crack Repair: What the Threshold Means for Your Approach
The term "hairline crack" gets thrown around loosely, but the construction industry has a real number behind it. Anything at or below 1/32 inch falls into the range where the WCC's technical bulletin says patching often causes more visual damage than it fixes. Stucco is brittle by nature. It shrinks slightly as it cures and shifts with temperature swings, so a network of fine surface cracks is normal, not a sign of failure.
That's the standard industry term you'll see in technical documents: hairline cracking, sometimes called craze cracking when it appears in a spiderweb pattern. Homeowners searching for a "hairline crack fix" are usually dealing with exactly this kind of surface-level crazing, not structural movement. Knowing which one you have changes your entire repair strategy, and it's why the size threshold comes before any tool recommendation in this guide.
Tools and Materials for Repairing Small Stucco Cracks
Buying the wrong sealant is the single most common reason a DIY stucco crack repair fails within a year. Get the shopping list right and the rest of the job gets a lot easier.
Tools you'll want on hand:
- Wire brush for loosening debris and old paint along the crack line
- Putty knife or margin trowel for pressing material into the gap
- Caulk gun (skeleton-frame style holds up better than the cheap plastic ones)
- Sanding block for feathering edges after the patch cures
- Stiff-bristle brush or small roller for priming and touch-up painting
- Masking tape to keep the repair zone clean and protect adjacent trim
- Utility knife for trimming caulk tubes and cutting mesh tape
- Gloves and safety glasses, since cementitious dust and uncured sealant both irritate skin
Materials that actually hold up outdoors:
- Exterior-grade elastomeric or acrylic sealant rated for Portland cement plaster and labeled paintable
- A small tub of cementitious patching compound for cracks on the wider end of hairline
- Bonding agent or masonry primer to help new material grip old stucco
- Finish paint matched to your existing color, ideally the same sheen
- A stipple sponge, texture brush, or dash brush for blending finish texture
Read labels carefully before you buy. Some exterior caulks are formulated for gutters and metal flashing, and they cure to a rubbery, shiny surface that repels paint entirely. You want a product that explicitly states it's paintable and flexible after cure, since stucco expands and contracts more than people assume across a Florida summer or a Midwest winter. Elastomeric patch compounds and sealants are built to stretch with that movement, instead of cracking again along the same line.
Pro Tip: Flip the tube over and check the technical data sheet, not just the front label. If it doesn't list a percent elongation figure, it's probably not flexible enough for exterior stucco crack sealing.
Which Cracks Need Repair, Monitoring, or a Full Resurface
Not every crack deserves a repair kit. Some deserve nothing more than a note in your maintenance log, and a few deserve an immediate phone call to a contractor. Sorting cracks into the right bucket saves money and prevents a lot of wasted weekends.
Cracks at or below that 1/32 inch (0.030 in) threshold are, according to WCC guidance, usually inherent to the material and cosmetic in nature. Trying to force patching compound into something that thin often fails because the aggregate can't physically penetrate the gap, leaving a raised scar of dried filler sitting on top of the wall instead of inside it.
Cracks in the range between the hairline threshold and a slightly larger size start to matter more. This is where Florida-specific guidance notes elastomeric coatings can still bridge the gap effectively, but a straight caulk job is pushing its limits. Anything wider, recurring, or accompanied by other symptoms should shift your thinking from "weekend project" to "get a second opinion."
Watch for these signals that a crack is more than cosmetic:
- Rust staining bleeding out of the crack line, which usually points to corroding lath or fasteners underneath
- Hollow-sounding stucco when you tap it, a sign the plaster has separated from its substrate
- Cracks that follow window corners, door frames, or utility penetrations in a straight diagonal line
- Water stains appearing on interior walls near the same location as an exterior crack
- A crack that reopens in the same spot within a season of being patched
Quick decision checklist before you grab your tools:
- Is the crack under 1/32"? Proceed with a simple seal or monitor it.
- Is it 1/32" to 1/16" with no other symptoms? A DIY slurry patch or elastomeric fill is reasonable.
- Does it show rust, hollow sounds, or interior water stains? Stop and call a contractor.
- Has a previous patch already failed here? That's a pattern worth investigating, not repatching.
One tradeoff worth planning for upfront: a spot patch, even a well-executed one, can leave a faint outline once the paint ages differently around it. If the crack sits somewhere visible, like a front-facing wall, budget for repainting the whole panel rather than just the patch. It's the difference between a repair you can see from the street and one nobody notices at all.
Step-by-Step Workflow to Fix a Hairline Stucco Crack
This is the part homeowners actually came for: the hands-on process. Work through it in order, and don't skip the inspection step just because the crack looks simple.
1. Inspect and mark the crack
Before opening any tubes, spend five minutes really looking at the crack. Run a fingernail along its length. Does it feel consistent, or does it widen and narrow? Check both ends. Cracks that stop cleanly are usually stable shrinkage cracks. Cracks that run into a corner, a window frame, or disappear behind trim may be tracking structural movement, and that changes your repair plan. Mark the start and end points with a small pencil dot or piece of tape so you don't lose track of scope once you start cleaning.
2. Clean and prep the surface
Use your wire brush to knock loose any chalky residue, flaking paint, or debris along the crack. Follow with a rinse from a garden hose (a pressure washer on a wide, low setting works too, but keep it well back from the wall to avoid driving water behind the stucco). Let the area dry completely, ideally 24 hours in warm weather. If the existing paint is old and chalky, wipe the area with a rag; if it comes away covered in white powder, that surface will need a bonding primer before anything sticks long-term. Skipping this step is the number one reason patches fail early.
3. Decide whether to widen the crack
Here's where a lot of DIY guides overcomplicate things. For true hairline cracks under 1/32 inch, you generally should not rout or widen the crack with a grinder or crack chaser. There's nothing for the tool to open up, and you risk damaging sound stucco around a crack that didn't need intervention in the first place. Widening becomes necessary only when a crack shows depth, when you can see daylight or backing material through it, or when it's clearly moving seasonally. In those cases, a shallow V-groove cut with a utility knife or crack chaser gives your sealant something to grip, rather than just sitting on the surface.
4. Fill the crack correctly
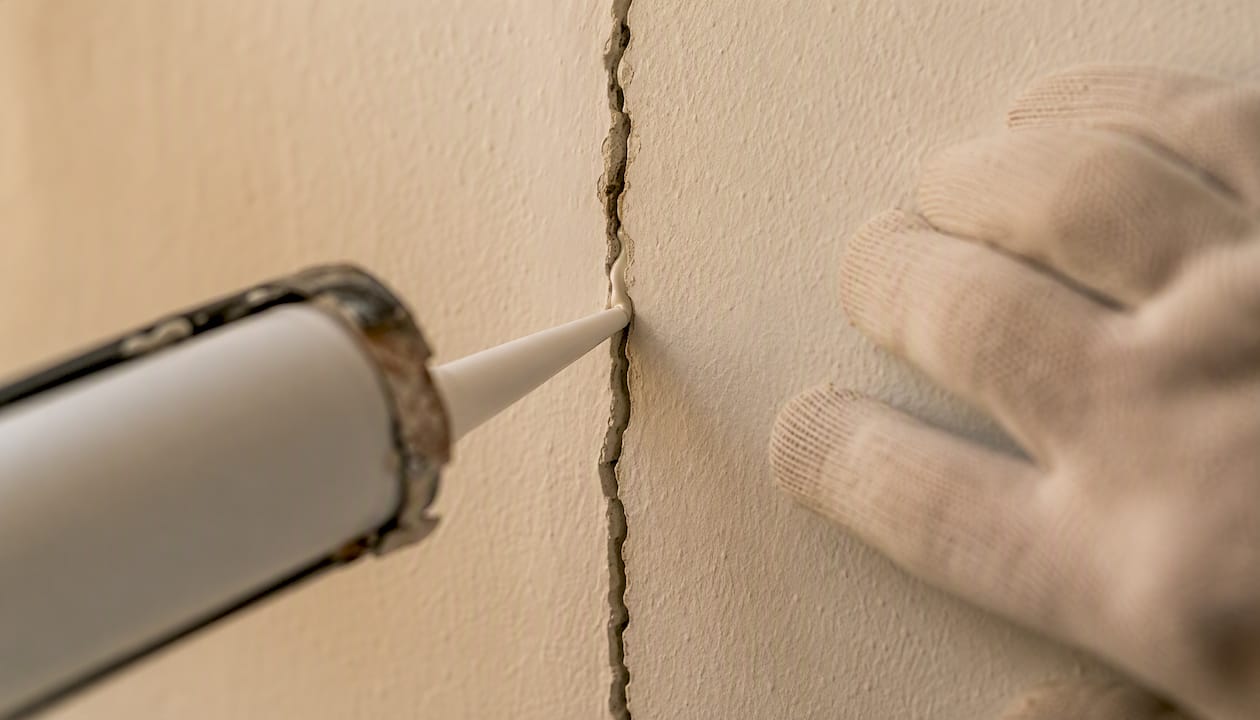
This is the step where most DIY stucco crack repair attempts go wrong. Load your caulk gun and force the sealant into the crack, not over it. Push the tip along the crack line at a steady angle so material fills the depth with the gap instead of bridging across the top. A bead sitting on the surface will crack again at its edges and create a raised, shiny ridge that catches light differently than the surrounding texture.
For cracks closer to 1/16 inch, a cementitious patching compound mixed to a stiff, non-sagging consistency and pressed in with a putty knife works better than sealant alone. Tool it flush with the surrounding surface, then immediately knock down any excess with the flat edge of your putty knife at a low angle. You're aiming to recess the material very slightly, not build it proud of the wall, since paint and texture coats will add a bit of thickness on top.
5. Let it cure before you touch it again
Most exterior sealants need a surface skin within an hour but require 24 to 72 hours for a full cure, depending on temperature and humidity. Cementitious patches typically need at least 24 hours before light sanding and up to a week before painting, though product data sheets vary. Check the product's cure schedule and don't rush this. Press a gloved fingertip into an inconspicuous test area. If it still gives noticeably or feels tacky, wait longer.
6. Blend the texture
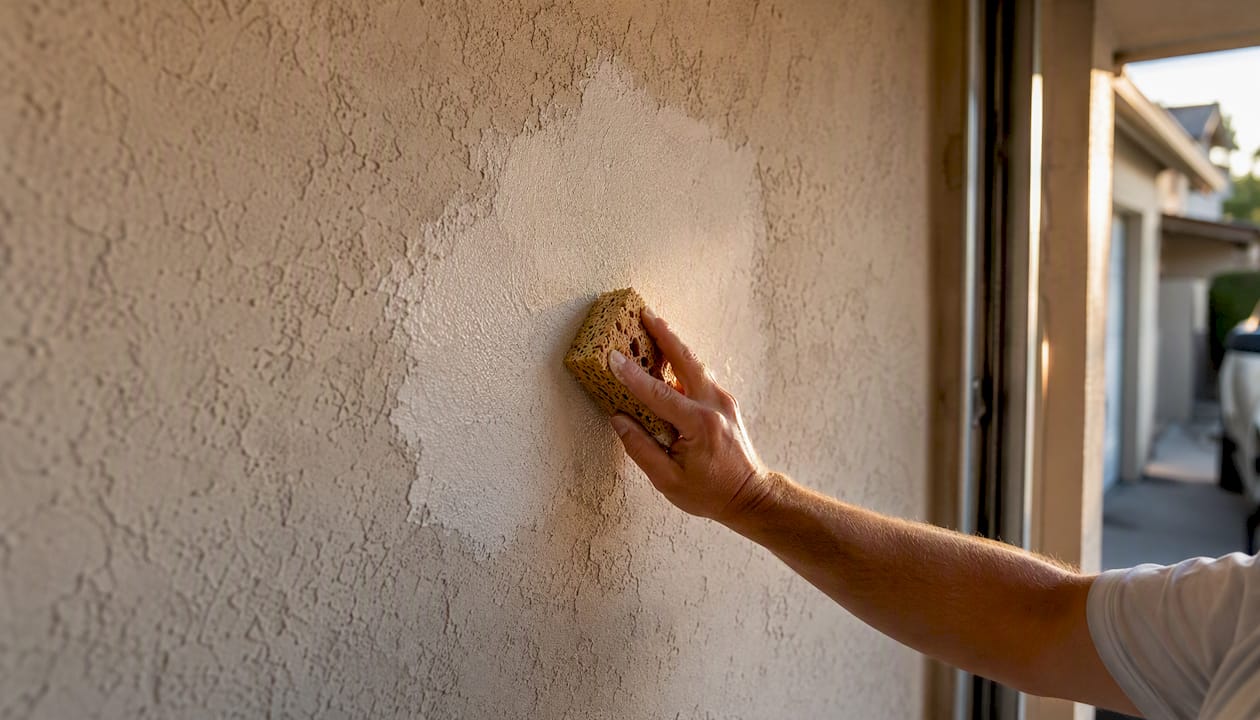
While the patch material is still workable (this window is short, often just a few minutes), press a stipple sponge, texture brush, or scrap piece of stucco lightly against the surface to mimic the surrounding pattern. Practice this exact motion on a piece of cardboard or scrap material first if you've never done it. Once the patch material sets up hard, you lose your chance to texture it, and a smooth patch surrounded by textured stucco is one of the most obvious DIY tells there is.
7. Prime and paint
Spot-prime the repaired area once fully cured, then feather your paint outward well beyond the patch itself, at least a foot in each direction, so the sheen and color blend gradually rather than stopping at a hard edge. If the crack sits somewhere visible, repainting the entire panel from corner to corner is almost always the better call, since it removes any risk of a visible outline down the road.
Pro Tip: Keep a small offcut of your actual stucco finish on hand year-round. It's the only reliable way to test texture technique and paint sheen before committing to the real wall, and it takes the guesswork out of matching a 10-year-old finish.
If you want a deeper walk-through on getting the wall ready before paint goes on, this guide on prepping exterior walls before painting covers cleaning and priming steps that apply directly to crack repair zones.
Blending Texture So the Repair Doesn't Show
A technically sound patch that stands out visually is still a failed repair in most homeowners' eyes. Texture matching is where craft matters more than chemistry.
Stucco finishes generally fall into a few common categories: fine sand float, heavier dash or lace patterns, and hand-troweled swirls. Each one calls for a different tool. A stipple sponge dabbed lightly and rotated slightly recreates most sand-float finishes reasonably well. A stipple brush, pulled back with a quick flick, mimics dash textures. For swirl or trowel patterns, a light circular pass with a rubber float, applied while the patch is still soft, tends to get closest. None of these are hard to learn, but every one of them takes practice on scrap material before you touch your actual wall.
Timing drives the whole process. Cementitious patches and elastomeric fillers only stay workable for a short window, often 10 to 20 minutes depending on temperature and humidity. Try to texture too early and the material slumps. Wait too long and it sets up smooth and glassy, with no texture at all. Watching a patch you tested earlier the same day gives you a real feel for your working window before it matters.
Paint thickness plays a bigger role in final appearance than most homeowners expect. A heavy coat of paint fills in fine texture detail and flattens it slightly, which can actually help a slightly mismatched patch blend better. A thin coat leaves more texture contrast visible, which is fine on a perfectly matched patch but unforgiving on an imperfect one.
- Practice your texture motion on a scrap piece or hidden test spot first
- Work while the material is still soft, generally within the first 15 minutes
- Match sheen as carefully as color; a satin patch on a flat-finish wall stands out even with perfect color matching
- Feather paint well past the repair edge rather than stopping at the patch boundary
If your home has integral color mixed directly into the stucco rather than painted on top, texture matching gets harder and color matching gets nearly impossible on a spot repair. In that case, a fog coat, a thin sprayed color coat applied over the whole wall, or a full panel repaint is usually the practical answer rather than chasing an exact integral-color match on a single patch.
Pro Tip: Ask your paint supplier for a small sample pot before buying a full gallon. Integral stucco color shifts with age and sun exposure, so your "matching" paint color needs to reflect how the wall looks today, not how it looked when it was built.
Contractor-Grade Options When Patching Isn't Enough
Some cracks, or some walls, are past the point where a caulk gun and a stipple sponge get you a clean result. This is where contractor-level systems come in, and understanding them helps you evaluate a professional bid intelligently even if you decide to DIY the smaller stuff yourself.
Slurry coats are a thin, trowel-applied mix of cement, sand, and bonding agent worked into and over a crack, then blended into the surrounding texture. WCC technical guidance recommends this approach for cracks larger than 1/32 inch, particularly where a simple caulk fill won't hold up to repeated movement.
Polymer-modified skim coats with embedded fiberglass mesh go a step further. The mesh gets pressed into a base coat across the crack (and sometimes across the entire panel), then a finish coat goes over the top. This creates what's sometimes called an acrylic lamina, a reinforced layer that resists future cracking far better than an unreinforced patch. Sika's technical bulletin outlines this kind of approach using specified patching compounds followed by a finish system, applied according to product data sheets for correct thickness and cure timing.
Full elastomeric coating systems cover an entire wall or facade in a thick, flexible acrylic membrane. According to Florida-specific stucco guidance, elastomeric coatings can bridge hairline cracks up to roughly 1/16 inch and add real waterproofing value in humid, wind-driven-rain climates, with recoat cycles typically recommended every 5 to 7 years.
The tradeoffs come down to scope and cost. Slurry patches are the cheapest and fastest but only address existing cracks, not future ones. Mesh-reinforced skim coats cost more and take longer but genuinely reduce future cracking risk. Full elastomeric systems are the biggest investment, and the biggest payoff, when a wall shows widespread crazing or when water intrusion is a real concern rather than a cosmetic one.
- Slurry coat: fastest, cheapest, addresses existing cracks only
- Mesh-reinforced skim coat: moderate cost, reduces future crack risk significantly
- Full elastomeric system: highest upfront cost, the best long-term water protection and uniform appearance
If a contractor proposes any of these systems, ask for the specific product data sheet they're following and how many coats and what thickness they're planning. A vague verbal promise of "we'll skim coat it" isn't the same as a scope tied to a manufacturer's documented procedure.
How Long Repairs Take and What They Typically Cost
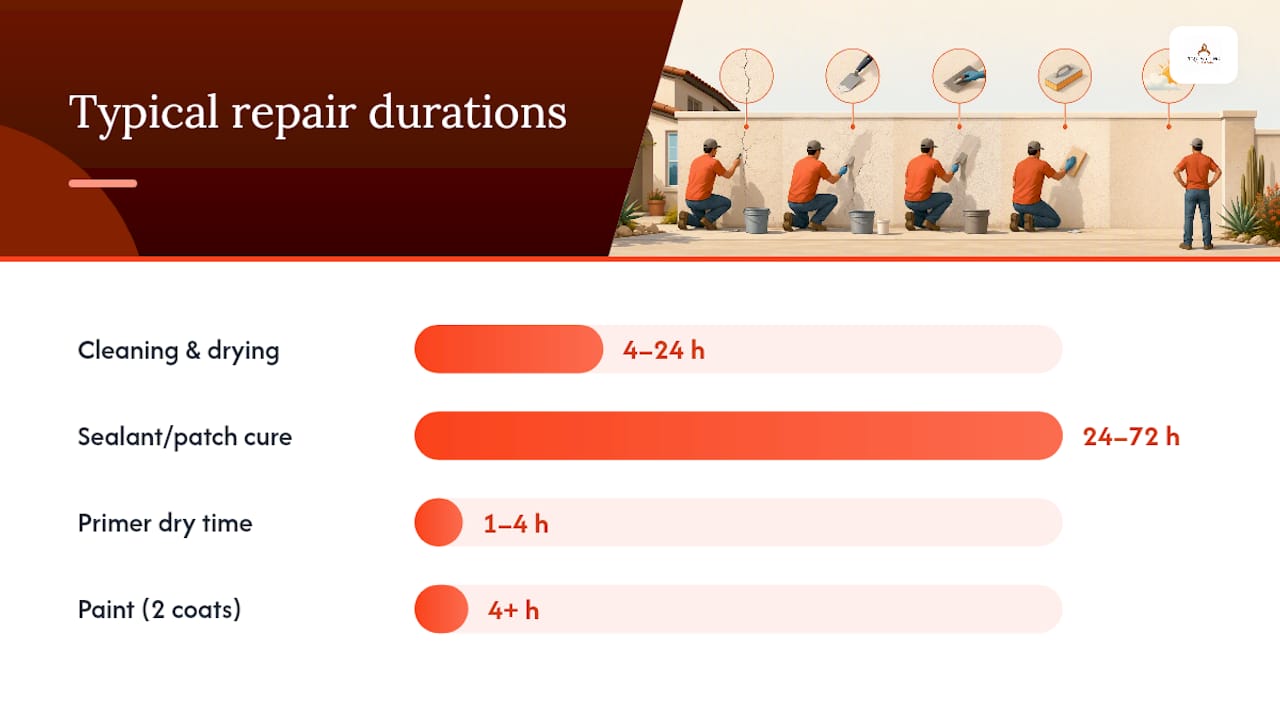
Planning a DIY stucco crack repair around a single afternoon is realistic for one or two small cracks, but the full cure and repaint cycle stretches out longer than most people expect.
| Step | Typical Time | Notes |
|---|---|---|
| Cleaning and drying | 4 to 24 hours | Longer in humid or shaded areas |
| Sealant or patch cure | 24 to 72 hours | Temperature and humidity dependent |
| Texture blending | Same session as fill | Must happen while material is workable |
| Primer dry time | 1 to 4 hours | Check product label for recoat window |
| Paint coats (2 coats) | 4 hours or more | Allow proper recoat time between coats |
Materials for a handful of small DIY repairs, sealant, a small patch tub, primer, and a quart of matching paint, typically run in the range of a modest hardware store trip. A professional spot repair costs more per crack once labor and travel are factored in, but a contractor also diagnoses causes you might miss. A full elastomeric coating system across an entire home's exterior is a much larger investment, priced by square footage and prep condition, and represents a long-term coating rather than a single-crack fix.
Costs climb fastest when hidden moisture turns up mid-project, when scaffolding or lift equipment is needed for two-story walls, or when integral color matching forces a full panel or full home repaint instead of a spot touch-up. None of these are surprises a homeowner should discover after the work starts, which is exactly why a thorough inspection upfront matters more than the patching material itself.
Common Stucco Crack Repair Mistakes and How to Fix Them
Most failed DIY stucco repairs trace back to one of a handful of repeatable mistakes. Recognizing them before you start saves a redo.
Bridging instead of filling. Smearing caulk across the top of a crack instead of forcing it inside is the most common error, and it's why DIY forums frequently report repeat cracking along the same line within a season. Fix it by scraping out the failed bead and refilling with the gun tip angled directly into the gap.
Using a nonpaintable or rigid sealant. Some exterior caulks cure glossy and inflexible, which telegraphs through paint as a shiny stripe and cracks again the first time the wall expands. Fix it by removing the old bead entirely (a utility knife works) and replacing it with a labeled paintable, flexible product.
Skipping surface cleaning. Sealant applied over dust, chalk, or old paint film never bonds properly, no matter how good the product is. Fix it by pressure washing or scrubbing, letting the wall fully dry, and starting over.
Painting over uncured material. Paint applied before a patch fully cures traps moisture underneath and often blisters or discolors within weeks. Fix it by checking the product's stated cure window and testing firmness before priming.
Ignoring movement or moisture signs. Repairing a crack cosmetically without asking why it's there, according to stucco repair guidance from Florida contractors, is the single biggest reason repairs fail repeatedly and sometimes lead to more expensive water damage down the line. Fix it by stepping back and checking for the red flags covered in the next section before you patch anything.
Pro Tip: Work in the 50°F to 85°F range whenever possible. Sealants cure too fast to texture properly in extreme heat and too slowly to handle in cold, and both extremes make the finish step far harder than it needs to be.
When a Stucco Crack Needs a Professional, Not a Patch Kit
Some repairs are genuinely beyond a weekend project, and recognizing that early saves both money and frustration. A handful of specific warning signs should send you toward a contractor evaluation instead of a hardware store run.
Watch for pattern cracking (a spiderweb of cracks across a wide area rather than one clean line), rust staining that suggests corroding lath underneath, hollow sounds when you tap the wall, water stains showing up inside the house near an exterior crack, and any repair that keeps reopening in the same spot despite proper technique. Cracks clustered around window penetrations, door frames, or utility line entries also deserve a closer look, since these are common points for water intrusion that cosmetic sealant won't solve.
A thorough contractor inspection goes well beyond the crack itself. Expect them to check the condition of the lath underneath, look at flashing around windows and doors, inspect fasteners for corrosion, evaluate whether control joints are functioning correctly, and look for evidence of moisture trapped behind the stucco. This is the kind of diagnostic work covered in more depth in what a professional painter checks before starting a job.
Before hiring anyone, ask these questions:
- What's causing this specific crack, in your assessment?
- Which repair method are you proposing, and why that one over the alternatives?
- What product data sheets are you following for patching and finish coats?
- Does the scope include full panel refinishing, or just the crack itself?
- What's the expected timeline from prep to final paint coat?
Pro Tip: A contractor who wants to open the wall a little to check the lath before quoting a firm price is being thorough, not padding the job. That's usually a good sign, not a red flag.
Why Diagnosing the Cause Comes Before Any Cosmetic Fix
Cosmetic crack repair gets treated like a five-minute afternoon task, and for true hairline cracks under 1/32 inch, it mostly is. Where homeowners run into trouble is applying that same casual mindset to every crack they see, regardless of width, pattern, or location.
The pattern I've noticed across stucco failures isn't bad caulk technique. It's skipping the diagnostic step entirely. A crack running diagonally from a window corner is telling you something different than a hairline crazing pattern across a flat wall section, and treating them the same way with the same tube of sealant is how a five-dollar fix turns into a five-thousand-dollar water intrusion repair two years later.
Thorough prep, cleaning the substrate properly, using a bonding agent where the surface calls for it, matching the right material to the actual crack width, isn't the boring part of the job. It's the part that determines whether your repair lasts five years or five months. Skilled exterior work treats every crack as a system-level question first and a texture-matching question second. That order matters more than most DIY guides let on, and it's the same principle that guides how Trupainting LLC approaches every exterior project, cosmetic or structural.
If You'd Rather Have a Pro Handle It: How Tru Painting Helps
Trupainting LLC gives Lake County and Central Florida homeowners a straightforward alternative to the guesswork of DIY: a proper inspection first, so you know whether you're dealing with cosmetic crazing or something that needs real attention, before any patching begins.

Trupainting LLC's residential exterior services cover the full range a stucco crack might call for: inspection and diagnosis, spot crack repair, polymer-modified skim coats, full elastomeric coating systems, and complete repainting when a panel needs full color and texture uniformity. Our three-tier service packages let you choose the level of protection that fits your home and your budget, without pushing you toward more than the situation actually needs.
If you're a business owner dealing with stucco cracking on a commercial building, our commercial exterior painting services cover the same diagnostic-first approach at a larger scale. And if you're already planning exterior work around your home's trim, doors, or entryways, our partners at One Day Doors & Closets of Central Florida handle door and closet replacement projects that often come up alongside stucco and flashing repairs.
Ready to find out what's really behind that crack? Request an exterior inspection and get a clear, honest scope before you spend a dime on materials.
Sources
- Cracks in Portland Cement Plaster (Stucco) — WCC
- Florida Homeowners Guide to Stucco Repair and Cracking Walls
- Sika technical bulletin: Procedure for repairing stucco