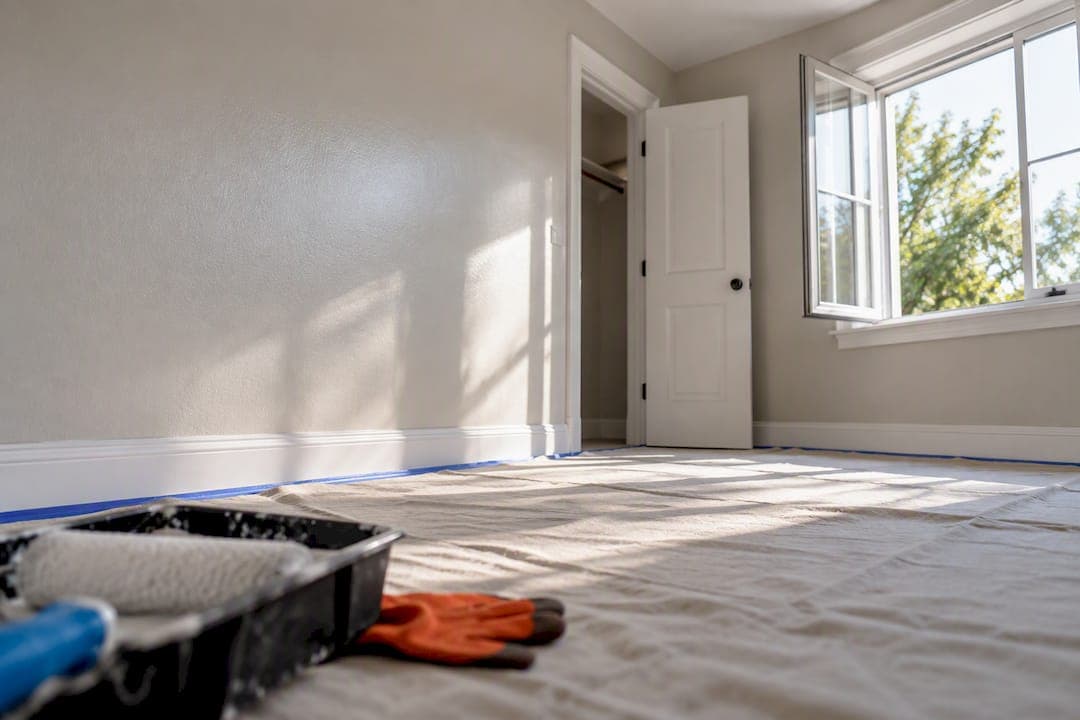
Use this property manager painting checklist to inspect, accept, and document painting work, so you can hold contractors to clear acceptance criteria and avoid premature failures. Before any brush touches a wall, book a pre-bid walk, require a test area, and collect product data sheets and Safety Data Sheets. This guide covers exterior and interior inspections, prep standards, contractor scope, on-site quality control, and closeout paperwork.
TL;DR:
- Proper inspection should match each substrate's failure mode, such as cracks in stucco or rust bleed in metal, with low-angle lighting revealing surface issues.
- Pressure washing must be thorough and followed by adequate drying time, typically 24 to 72 hours, to prevent early paint failures caused by trapped moisture.
- Interior turnover inspections require a consistent, detailed checklist and should identify defects like sheen mismatch, water stains, or chipping for accurate documentation and repair.
- Every scope must include comprehensive prep steps like cleaning, patching, and priming, with contractors providing visual proof and product data sheets before starting work.
- Final acceptance depends on documenting adhesion, sheen uniformity, overspray, and leftover materials, with no payment released until full paperwork, warranty, and safety documentation are handed over.
Table of Contents
- Exterior Painting Checklist: What To Inspect By Substrate
- Interior Painting Checklist For Turnover And Common Areas
- What Prep Steps Belong In Every Painting Scope?
- What Should A Painting Contract Require From Bidders?
- Mid-Project And Final Walkthrough Quality Control
- Closeout Documents And A Realistic Maintenance Schedule
- How Much Should A Property Painting Project Cost?
- How Should Property Managers Handle Paint Waste And Disposal?
- How Tru Painting Applies This Checklist
- Let Tru Painting Run The Checklist For You
- Sources
- FAQ
Exterior Painting Checklist: What To Inspect By Substrate
Every exterior surface fails differently, so your inspection has to match the substrate. Stucco and CMU show hairline cracking and efflorescence before paint ever peels. Wood trim shows checking and rot at joints. Metal railings rust from the inside of a weld out. Walk the property with a flashlight held at a raking angle across walls; that low-angle light reveals chalking, alligatoring, and blistering that flat daylight hides completely.
Confirm adhesion with a simple tape test: press painter's tape onto a suspect area, pull it back sharply, and see how much coating comes with it. Heavy transfer means the existing paint has to come off, not just get covered.
- Stucco/CMU: cracks wider than a hairline, efflorescence, staining below downspouts
- Siding: warping, gaps at seams, chalking that rubs off on your hand
- Wood trim, doors, frames: soft spots, checking, caulk failure at joints
- Metal railings and fixtures: rust bleed, pitting, loose fasteners
- Overall: mildew streaking on north-facing and shaded walls
Pressure washing has to happen before any prep estimate means anything, and the contractor's bid should specify cleaning solution and pressure ranges appropriate to the substrate. Pressure washing without adequate dry time before coating is one of the most common causes of early paint failure, since moisture trapped under a fresh coat causes blistering and adhesion loss within months. Purdue Extension recommends allowing manufacturer-specified drying, often 24 to 72 hours, before any primer or paint goes on. Require the contractor to submit a written repair list from their walk and sign off on a test area before they touch the rest of the building.
Interior Painting Checklist For Turnover And Common Areas
Unit turnover inspections move fast, so a repeatable checklist matters more here than almost anywhere else in your painting program. Walk each room the same way every time: ceiling first, then walls left to right, then trim and doors last.
- Check walls under raking light for scuffs, grease stains, and nail holes
- Look for water staining near windows, under sinks, and around HVAC vents
- Run a hand across previously patched areas to feel for sheen mismatch
- Inspect trim and doors for chipping at high-contact points (handles, kick plates)
- Confirm sheen uniformity across walls painted at different times
Common areas take more traffic and need higher-durability finishes, typically eggshell or satin instead of flat, with inspections on a shorter interval than individual units. A scuff that wipes clean with a damp cloth needs nothing. A stain that bleeds through primer, a hole larger than a quarter, or more than three touch-up spots on one wall means the whole wall gets repainted, not spot-primed.
Every defect you log should capture the same fields: room, wall or fixture location, defect type, recommended fix, and a photo. That consistency is what turns a walk-through into a defensible acceptance record instead of a memory you're trying to reconstruct three weeks later.
What Prep Steps Belong In Every Painting Scope?
Prep is where painting projects succeed or fail long before the first coat goes on, and it's the part contractors are most tempted to shortcut on a tight bid. The sequence should read the same way in every scope you write: clean, treat mildew, pressure wash, cure, scrape, sand, patch, prime, then finish coats.
Mildew needs a bleach solution or a dedicated cleaner before painting, not just a rinse, because paint applied over active mildew growth fails within a season. Benjamin Moore recommends this step explicitly for both interior and exterior surfaces, along with sanding glossy trim so new coats actually bond. Sherwin-Williams is direct about the baseline: surfaces have to be clean, dry, and solid, with loose paint scraped, patches sanded flush, and primer applied to bare or repaired spots before any topcoat goes on.
Require primer whenever the scope includes new drywall, stain blocking, a major color change, bare wood, or masonry. Weather rules belong in the contract, not left to a painter's judgment call: tie them to the product data sheet's temperature and humidity range, and write in a no-coat rule for rain within the forecast window.
- Drop cloths and masking on all fixtures, flooring, and landscaping
- Respirators or masks rated for sanding dust and solvent-based primers
- Safety glasses and gloves for any scraping or chemical cleaning step
- Ventilation fans for occupied interior units during application
Pro Tip: Ask contractors to photograph bare substrate after scraping and before priming. It's the single easiest way to prove prep actually happened, and most contractors won't think to offer it unless you ask.
What Should A Painting Contract Require From Bidders?
A vague scope is the root of most painting disputes, and it's entirely avoidable with a one-page requirement sheet attached to every bid request. List the areas covered, the substrates involved, and what is explicitly excluded (fences, sheds, interior closets, whatever isn't part of this job). Assign a color code and sheen to every area by name, not by "as discussed."
Require submittals before the contractor mobilizes:
- Product Data Sheets and Safety Data Sheets for every coating used
- A labeled color and sheen schedule matching the contract areas
- A signed test area or mock-up approved before full production starts
- Proof of insurance and a written site safety plan
- A lead-paint handling protocol for any building built before 1978
EFC Contractors frames this correctly for portfolio work: define the scope precisely before pricing, require test areas, and collect closeout documents before final payment goes out. A photo log tied to each test area approval gives you a paper trail if the finished work doesn't match what was approved.
| Submittal item | Why it matters |
|---|---|
| Test area sign-off | Locks in color, sheen, and adhesion before full production |
| PDS/SDS | Confirms product specs and safety handling requirements |
| Color/sheen schedule | Prevents mismatched touch-ups later |
| Insurance certificate | Protects the property if something goes wrong on site |
Mid-Project And Final Walkthrough Quality Control
Daily site discipline predicts final quality better than almost anything else you can inspect. Check masking integrity, overspray containment, and trash removal every day the crew is on site, especially in occupied buildings where tenants notice mess faster than they notice good work.
During the project, look for:
- Even coverage with no visible lap marks in raking light
- Clean, straight cut lines at trim, ceilings, and fixtures
- Consistent sheen across each wall and elevation
- Protection still intact on flooring, fixtures, and landscaping
- Dated progress photos at each major stage
At final walkthrough, run through acceptance in this order:
- Confirm adhesion with a light scratch test on a low-visibility area
- Check sheen consistency wall to wall and room to room
- Inspect for overspray on hardware, glass, and flooring
- Verify leftover paint is labeled by location and product code
- Confirm PDS/SDS and a warranty document are in hand before releasing final payment
Fine Homebuilding's exterior checklist puts it plainly: don't start any coat until 100 percent of prep is done. That same discipline applies to your final sign-off, too. Don't release payment until 100 percent of the documentation is in hand. In occupied buildings, map worker staging and pedestrian routes clearly each day, because tenant goodwill erodes faster than a bad paint job ever could if people feel unsafe navigating their own hallways.
Closeout Documents And A Realistic Maintenance Schedule
A repaint isn't finished when the last coat dries. It's finished when you're holding the paperwork that makes the next repaint faster and cheaper.
Your closeout package should include:
- Product Data Sheets and Safety Data Sheets for every coating used
- A finalized color and sheen schedule by area
- The complete dated photo log from prep through final walkthrough
- Labeled leftover paint, sealed and stored with location tags
- A written warranty period and a defined touch-up response plan
Set a follow-up inspection cadence rather than waiting for complaints to surface. Check at 30 to 60 days for early adhesion issues, at 6 months for seasonal stress, at 12 months for a full-cycle review, and again at 18 to 24 months to plan ahead. Commercial repaint programs that work well tend to pair annual touch-ups with full repaints on a 3 to 7 year cycle, backed by a standing color and product library so touch-ups always match. Budget touch-ups as operating expense and full repaints as capital expense, since that distinction usually determines which fund pays for the work. Building this cadence into your broader maintenance planning system keeps painting from becoming a surprise line item every few years.
How Much Should A Property Painting Project Cost?
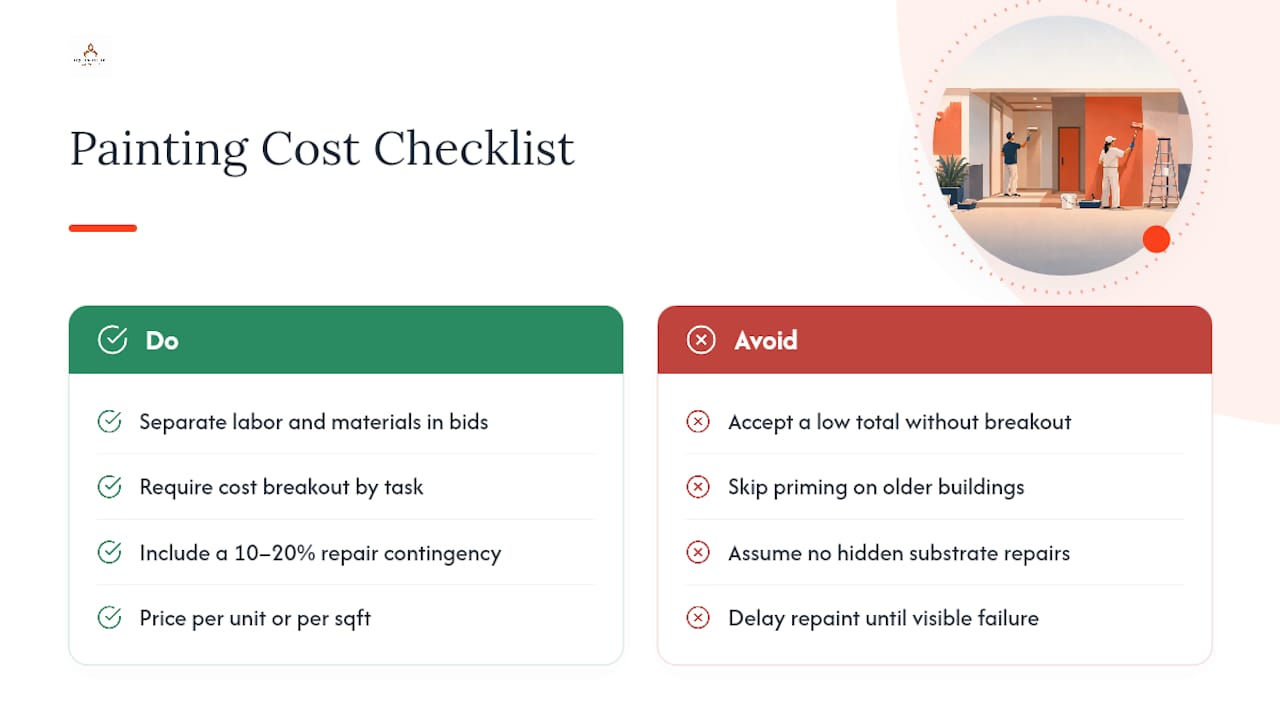
Painting costs on managed properties swing on four variables: square footage, substrate condition, number of coats, and access difficulty (multistory buildings need lifts or scaffolding, which changes labor pricing fast). Budgeting accurately starts with separating labor from materials in every bid you receive, because a low total price that hides thin prep hours is the most common way property managers get burned.
Ask every bidder to break out cost by task: pressure washing, repairs, priming, and finish coats. That breakdown lets you compare bids on substance instead of just a bottom line, and it flags a contractor who's padding one line to undercut another. A bid that skips a separate line for priming on an older building with known moisture issues is a bid that's planning to skip priming.
Build in a contingency for substrate repair you can't see until prep starts. Stucco cracking, wood rot behind trim, and rusted railings under old paint routinely add 10 to 20 percent to a project once the surface is actually opened up. Write that contingency into your budget request up front rather than treating it as a surprise change order later.
For multi-building portfolios, price per unit or per square foot rather than per job, since that number is what lets you compare bids across properties and track cost creep year over year. Multi-year planning matters here too: a property that repaints every 3 to 7 years on a standard cycle spends less overall than one that waits for visible failure, because deferred prep on a badly weathered surface always costs more than prep on a surface caught early.
How Should Property Managers Handle Paint Waste And Disposal?
Leftover paint, used solvents, and scraped debris all carry disposal rules that vary by material and by local hazardous waste program, so build disposal into your contract scope rather than assuming the contractor handles it correctly by default. Latex paint is generally not classified as hazardous once fully dried, but oil-based paints, solvents, and old lead-based coatings usually require dedicated hazardous waste drop-off.
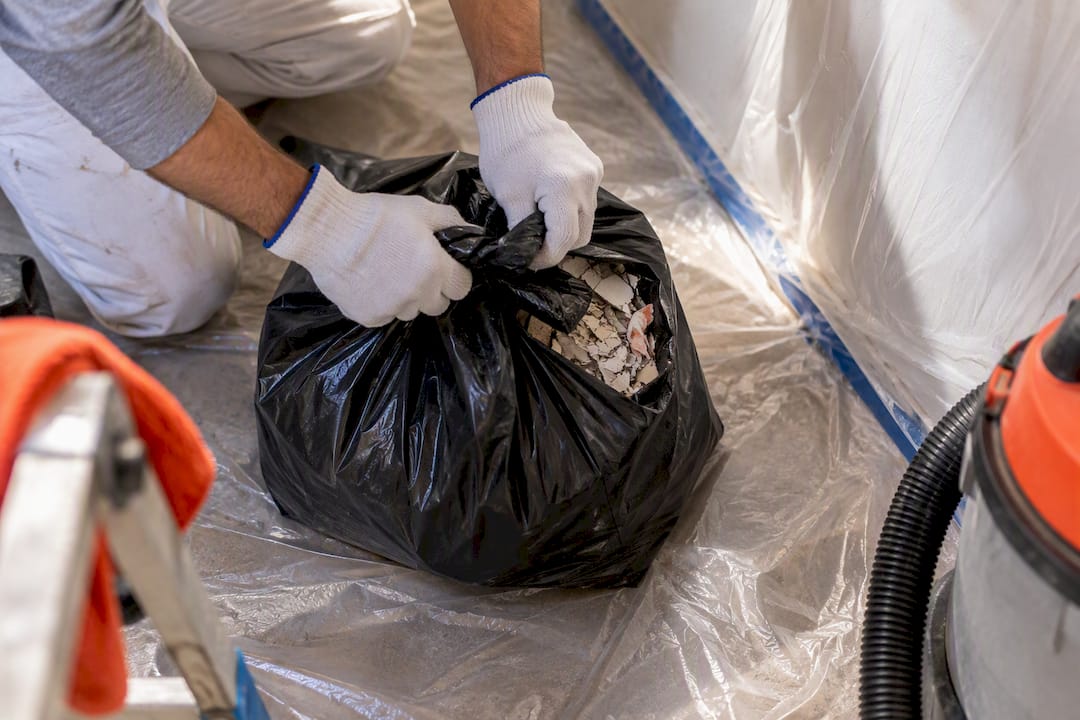
Scraped debris from pre-1978 buildings deserves particular attention. Paint chips and dust from that era can contain lead, and containment (plastic sheeting, HEPA vacuum cleanup, sealed disposal bags) should be written into the scope as a requirement, not an assumption. Require the contractor to document how debris was contained and where it was disposed.
For usable leftover paint, labeling and storage matter more than most managers realize. A sealed, labeled can with the product code and application area saved on a shelf turns a future touch-up into a 20-minute job instead of a full repaint. Unlabeled leftover paint is functionally useless within a year, since nobody remembers which can matched which building.
Ask contractors about their disposal practices before signing, not after the job. A contractor who has a clear answer about where solvents and hazardous debris go is a contractor who's done this correctly before. One who shrugs is a liability you're inheriting.
How Tru Painting Applies This Checklist
Many painting contractors build projects around the same discipline this checklist demands: thorough preparation, documented test areas, and premium products backed by clear paperwork. Three-tier packages can let you match acceptance criteria in this guide to a budget that fits your property without cutting corners on the parts that determine how long the paint actually lasts.
— Kyle
Let Tru Painting Run The Checklist For You
A painting contractor can be the alternative to chasing down contractor paperwork yourself. Crews may handle site surveys, signed test area mock-ups, and full documented closeout packages, PDS/SDS, color schedules, photo logs, and a written warranty, as standard practice on projects.

If you're managing a residential community or a commercial property and want a partner who inspects, documents, and stands behind the work, request a quote through our services page or schedule a site survey directly. We'll walk the property with you, propose the right service tier, and give you the acceptance paperwork before a single coat goes on.
Sources
- How to prep walls, surfaces & rooms for painting — Sherwin-Williams
- Preparing walls for painting — Benjamin Moore
- NCR-133: Painting and surface moisture guidance — Purdue Extension
- A checklist for exterior painting — Fine Homebuilding
- Commercial Building Repaint Checklist for Fort Myers property managers — EFC Contractors
FAQ
What Is A Property Manager Training Checklist For Painting?
It's a documented set of inspection points, acceptance criteria, and submittal requirements that a manager (or a new staff member) follows to evaluate painting bids and finished work consistently. It typically covers substrate inspection, prep verification, test area sign-off, and closeout document collection, so evaluations don't depend on one person's memory.
What Are The Three Main Types Of Maintenance Requirements For Managed Properties?
Managed properties generally split maintenance into preventive (scheduled inspections and touch-ups), corrective (repairs triggered by identified defects like peeling paint or rot), and capital (full repaints or major system replacements budgeted separately from operating costs). A painting program touches all three when you combine annual touch-ups with a longer repaint cycle.
How Long Should Surfaces Dry Before Painting?
Manufacturer product data sheets typically call for 24 to 72 hours of dry time after pressure washing before priming or painting, and Purdue Extension recommends enforcing that window strictly on masonry. Painting over damp or insufficiently cured surfaces is one of the most common causes of early paint failure.
How Often Should Painted Properties Be Inspected?
A reasonable schedule checks new work at 30 to 60 days, then again at 6 months, 12 months, and 18 to 24 months to catch adhesion or sheen issues early. Common areas with heavy traffic often need shorter intervals than individual units.
Does Tru Painting Offer Different Service Levels For Different Budgets?
Yes. Tru Painting offers three tiers, Cosmetic Refresh, Enhanced Prep & Durability, and Maximum Prep & Protection, so property managers can match the level of prep and product investment to each building's condition and budget. Details on each tier are available on the services page.