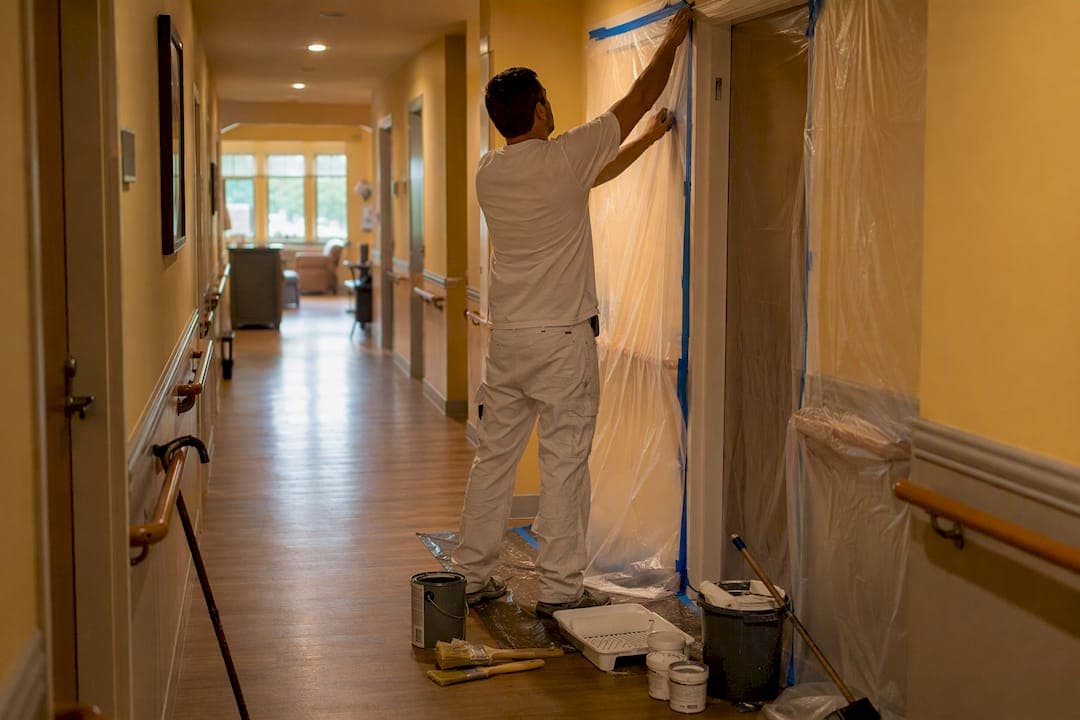
Before any brush touches a wall in a retirement community, five things need to be true: exterior work needs association approval through a formal Request to Paint, interior projects need zero or low-VOC paint, occupied areas need proper containment, work needs to happen in small phases around meals and medication schedules, and the contractor needs to hand over real documentation before starting. Skip any one of these, and you're looking at fumes drifting into a neighbor's apartment or a color dispute that drags on for months.
Here's what to do right now if a project is coming up:
- Confirm your community's approval process with the HOA or management office, and ask how long a decision typically takes.
- Request the exact paint labels or receipts the contractor plans to use, so you can verify VOC levels yourself.
- Ask for a written containment and phasing plan before any work begins.
- Get three proof documents from the contractor: current insurance certificate, safety data sheets (MSDS) for every product, and a written schedule.
Key Takeaways
Resident-sensitive painting succeeds when association approval, zero-VOC materials, containment, phased scheduling, and contractor documentation all work together rather than being handled as separate afterthoughts.
| Point | Details |
|---|---|
| File approval early | Submit a Request to Paint with color codes, receipts, and scope details well before the desired start date. |
| Choose zero-VOC, scrubbable paint | Pick finishes under 5 g/L VOC in eggshell or satin for occupied resident areas. |
| Demand contractor documentation | Require insurance certificates, MSDS sheets, and a written phasing plan before work starts. |
| Phase work in micro-zones | Limit disruption to one small area at a time, avoiding meal and medication windows. |
| Confirm disposal practices | Ask how leftover paint and solvent-soaked materials will be handled before the crew leaves. |
Table of Contents
- What Are the Retirement Community Painting Guidelines for Approvals?
- How Do You Choose Safe Paint and Containment for Occupied Units?
- Which Colors and Contrast Levels Work Best for Senior Living?
- How Should Painting Be Scheduled Around Resident Routines?
- What Does Proper Unit Turnover and Cleanup Look Like?
- What Should You Require From a Painting Contractor in Writing?
- A Quick Before, During, and After Checklist
- Which Local Regulations Govern Paint Disposal?
- Talk to Residents Before, During, and After the Work
- What Are the Health and Safety Protocols During Painting Near Elderly Residents?
- What the Guidelines Get Right, and Where They Fall Short
- Sources
What Are the Retirement Community Painting Guidelines for Approvals?
Getting a paint job approved in a retirement community isn't like painting a rental unit. Most exterior projects trigger a formal review, and skipping it can mean repainting the same wall twice, once for you and once to match code.
Here's how the process usually plays out, based on how established communities structure it:
- File a Request to Paint. Communities like Legacy Villas require a formal application for exterior color or material changes, with decisions typically rendered within a few weeks of submission.
- Attach the specifics. That means exact color codes, receipts or photos of the paint can label, a scope plan describing what's being painted, and current photos of the surface.
- Expect a "material change" review for color shifts. Wynmoor's Architectural Committee guidelines treat exterior color changes as material changes, which can require a formal owner vote or board sign-off rather than a quick staff approval.
- Plan around the maintenance cycle. Most stucco exteriors hold up well for five to seven years between repaints. If your building is approaching that window, coordinate with management early. Capital projects covering multiple units move faster when everyone submits requests together instead of one at a time.
How Do You Choose Safe Paint and Containment for Occupied Units?
Paint that's perfectly fine in an empty new-construction home can be a real problem in a room where someone is recovering from surgery or managing a respiratory condition. This is where retirement community painting guidelines diverge sharply from standard residential advice.
Look for zero-VOC formulas, with very low VOC content, paired with a scrubbable eggshell or satin finish for resident rooms and corridors. Traditional oil-based or alkyd paints don't belong in occupied senior living spaces at all. They off-gas for days, carry strong solvent odors, and take far longer to cure than water-based alternatives, which is exactly the wrong combination when residents can't simply leave for the weekend.
Containment is just as important as the product itself. A solid setup typically includes:
- Plastic sheeting sealing off the work zone from hallways and common areas
- Temporary walls for larger common-area projects
- Negative air machines with HEPA filtration pulling fumes and dust away from resident spaces
- Odor-neutralizing additives mixed into the paint or used as a post-application treatment
- Same-day ventilation equipment to clear the space faster than passive airflow would
Fast-curing coatings paired with odor-eliminating additives can cut off-gassing time from days to just hours, according to guidance from Moorhouse's senior living painting resource. That difference matters enormously for turnover speed when a unit needs to be ready for a resident's return or a new move-in within 24 hours.
Which Colors and Contrast Levels Work Best for Senior Living?
Color choice in a retirement community does double duty. It needs to look good and coordinate with the rest of the property, but it also needs to function as a safety tool for residents with vision or cognitive changes.
Strong contrast between walls, floors, doors, and handrails helps residents judge depth and distance more accurately, which cuts down on trip-and-fall incidents near thresholds and stairwells. For memory care wings, color-coded zones and gradual tonal transitions between areas reduce confusion and wandering risk far more effectively than a uniform beige hallway ever could.
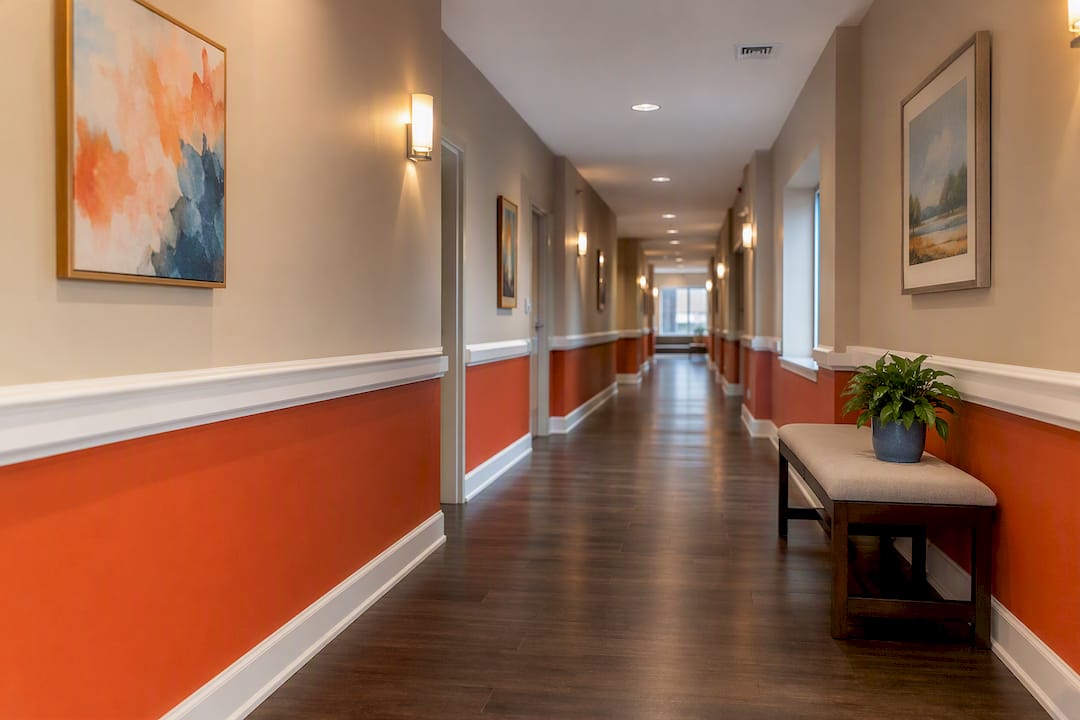
Most associations keep exterior palettes tight: one base color, one trim color, and sometimes an optional accent. Wynmoor's guidelines cap it at exactly that structure. If you want to propose a change for safety reasons, like adding a contrasting handrail color, frame it as a small, testable pilot in one hallway rather than a community-wide overhaul. That's a much easier sell to a committee protecting visual consistency across dozens of buildings.
Pro Tip: Bring paint swatches and a one-page before/after mockup to your committee meeting. Boards approve concrete, low-risk pilots far more often than open-ended color requests.
For interior accent walls or built-in cabinetry, pairing wall tone with cabinet finish takes some coordination. Resources like this cabinet color combination guide can help residents and facility managers land on combinations that read as cohesive rather than clashing.
How Should Painting Be Scheduled Around Resident Routines?
The biggest mistake in retirement community painting isn't a bad color choice. It's bad timing. A crew that shows up mid-morning and runs loud equipment straight through lunch service creates chaos that has nothing to do with the paint itself.
Here's a phasing approach that works:
- Break the project into micro-zones by wing or floor so only a small section is ever out of service. Nobody should lose access to more than one hallway or a handful of units at a time.
- Coordinate directly with nursing and activities staff before locking in dates, avoiding medication passes, therapy sessions, visiting hours, and meal service windows.
- Notify residents and families at least one week ahead, then post a simple daily schedule at the entrance to each work zone.
- Assign one contractor contact residents can ask questions to, instead of a rotating cast of crew members.
- Restrict noisy or dusty work, like sanding or spraying, to midday hours when fewer residents are resting, and use low-noise tools wherever the scope allows it.
A facility-specific assessment mapping these routines before work starts is what makes phased scheduling actually hold up once the crew arrives.
What Does Proper Unit Turnover and Cleanup Look Like?
Unit turnover between residents runs on a tight clock, and the paint process needs to keep up without cutting corners on air quality.
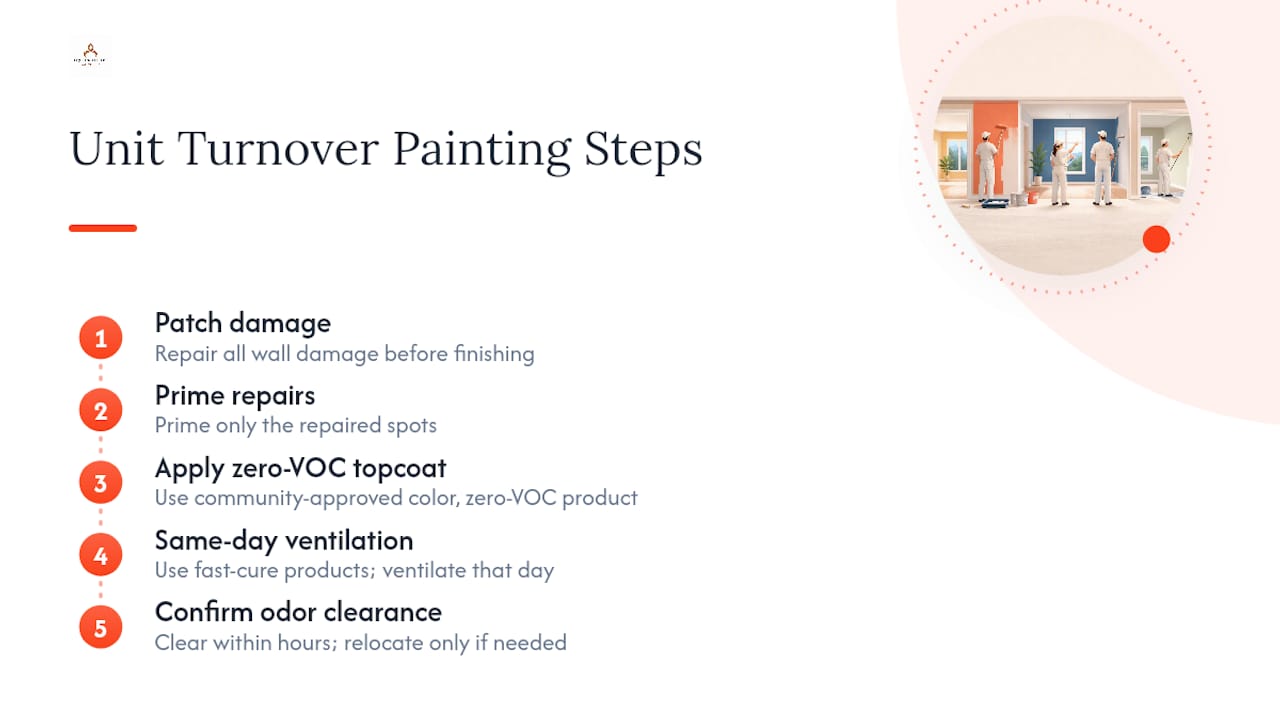
A standardized make-ready package works best: patch any wall damage, prime the repaired spots, then apply a zero-VOC topcoat in the community's approved color. Same-day ventilation and fast-cure products let most units clear odor within hours rather than a full day, which matters when a new resident is scheduled to move in tomorrow. Temporary relocation should stay a last resort, reserved for residents with respiratory sensitivities or units needing more extensive repair work.
For corridors and shared activity rooms, containment barriers need to come down and the space needs a full cleanup before the next meal service or scheduled activity, no half-finished zones left overnight. Exterior work carries its own version of this discipline: covered walkways protect residents from drips and overspray, clear signage marks any temporarily blocked entrances, and crews should never block more than one access point to a building at once. Checking current exterior finish options ahead of time helps residents and management agree on durability expectations before the crew shows up.
What Should You Require From a Painting Contractor in Writing?
Not every painting contractor is equipped to work in an occupied senior living environment, and the difference shows up in the paperwork they're willing to provide before day one.
Ask for these documents upfront, in writing, not verbally promised:
- Current business license and proof of general liability insurance
- Certificates of competency for the crew handling the work
- Safety data sheets (MSDS) for every product going on the walls
- Product receipts or can labels confirming VOC content and sheen
- A written site assessment specific to your building's layout and resident routines
- A phasing plan detailing containment, HEPA filtration strategy, and daily cleanup commitments
A contractor worth hiring will walk the property before quoting, not just measure square footage from a satellite photo.
A facility-specific assessment that maps meal times, medication passes, therapy schedules, and high-traffic corridors is what lets a crew phase work without disrupting the routines residents depend on every day.
Tru Painting LLC structures projects around exactly this kind of groundwork, offering three-tier service packages so a community can choose the level of prep, product quality, and containment that fits its budget without cutting corners on resident safety. Every job starts with a real site walk-through and ends with an inspection, not a rushed final coat and a quick exit. For common-area and corridor work specifically, reviewing a contractor selection checklist before signing anything gives residents and management a shared reference point during negotiations.
A Quick Before, During, and After Checklist
Print this out or save it to your phone before the first coat goes on.
- Before work begins: Confirm the Request to Paint (or equivalent approval) is filed and approved, verify paint labels match what was proposed, and confirm the contractor's insurance certificate is current.
- During the project: Check that containment barriers are actually in place, a daily schedule is posted at the work zone entrance, and residents know who the single point of contact is.
- After work wraps: Confirm ventilation ran its full cycle, walk the finished space with the contractor and take photos, and get the touch-up policy and warranty terms in writing.
Which Local Regulations Govern Paint Disposal?
Paint and painting materials don't just disappear once the job is done, and retirement communities carry extra responsibility here because of shared waste systems and higher resident foot traffic near dumpster areas.
Leftover latex paint generally can't go straight into regular trash once it's still liquid. Most municipal programs require it to be dried out or solidified first, or dropped off at a household hazardous waste facility. Oil-based products, solvents, and thinners almost always fall under hazardous waste rules and need separate handling. This is one more reason zero-VOC, water-based products make sense for retirement communities beyond air quality alone: they're simpler and safer to dispose of.
A responsible contractor handles this without residents needing to think about it. Ask upfront how excess paint, used rollers, and empty cans will be disposed of, and confirm it's not just getting bagged with regular unit trash. Rags and materials used with any solvent-based product need separate containment too, since oily rags pose a fire risk if left balled up in a standard bin. Contractors working in occupied buildings should also cap any lingering odor sources, like open cans or unsealed containment plastic, at the end of each shift rather than leaving them until the next morning. Ask your management office whether the community has an existing hazardous waste vendor relationship before a project starts. It saves a scramble later.
Talk to Residents Before, During, and After the Work
Nothing sours a painting project faster than residents finding out about it from a stranger in coveralls standing outside their door. Communication needs to happen well before the first drop cloth goes down.
Start with a written notice at least a week ahead, posted in common areas and, where possible, delivered directly to affected units. Include the start date, expected duration, which specific areas will be affected, and what residents should expect in terms of noise or smell. A single point of contact, either from the contractor or the facility, gives residents someone to actually ask instead of guessing.
Daily posted schedules at the entrance to any active work zone keep things predictable. Residents with memory or cognitive changes benefit especially from this kind of consistency, since an unexpected barrier or unfamiliar noise can be disorienting even when the change itself is minor. Update the posted schedule if timelines shift, and communicate delays as soon as they're known rather than after residents have already noticed the crew didn't show up.
For residents with mobility challenges, flag any temporary changes to walking routes well in advance, especially if a usual path gets blocked by containment. A short one-on-one conversation from staff, not just a flyer, goes a long way for residents who might miss a posted notice. Following up after the work is done, confirming everyone's satisfied and noting any touch-up requests, closes the loop and builds trust for the next project.
What Are the Health and Safety Protocols During Painting Near Elderly Residents?
Older adults are more vulnerable to airborne irritants than the general population, and painting crews working in occupied senior communities need to plan around that reality rather than treating it as an afterthought.
Ventilation is the first line of defense. Negative air machines with HEPA filtration should run continuously during active work and for a set period afterward, pulling contaminated air out rather than just circulating it. Residents with COPD, asthma, or other respiratory conditions may need temporary relocation to an unaffected part of the building during especially intensive phases, even when the paint itself is zero-VOC.
Exposure limits matter for staff too. Crews should follow standard occupational safety practices around ventilation breaks and personal protective equipment, especially when using any product that isn't fully water-based. Even low-odor paints can trigger headaches or nausea in sensitive individuals if a room isn't adequately ventilated during application.
Physical safety matters just as much as air quality. Wet floor signage, secured drop cloths that won't create a trip hazard, and clear barriers around wet paint all need attention in a building where balance issues and mobility aids are common. Equipment cords should never cross a walking path. A crew that's worked in senior communities before will already have these habits built in. One that hasn't may need explicit direction from facility management before day one.
What the Guidelines Get Right, and Where They Fall Short
Most retirement community painting guidelines focus heavily on approvals and color compliance, and not nearly enough on the human experience of living through the work. That's backward. A resident dealing with fumes drifting under a door doesn't care whether the trim color matched the HOA's approved palette. Get the safety and disruption piece right first, and the paperwork becomes a formality instead of a battle.
The most overlooked lever in the guidance available is the facility-specific assessment. Committees will happily approve a color swatch in five minutes, but few communities actually map medication passes and therapy schedules before a crew shows up. That single step prevents more resident complaints than any product spec sheet ever will.
If you take one thing from this: don't let color approval eat all your attention. Push just as hard for a written containment plan and a named point of contact. Those two items predict whether a project goes smoothly far better than which shade of beige ends up on the wall.
— Kyle
Ready to plan a resident-friendly repaint for your community? Tru Painting LLC's commercial interior painting services are built around the phased, low-VOC, documentation-first approach retirement communities need, from common-area corridors to individual unit turnovers.
Sources
- Senior living and assisted living facility painting: Resident-sensitive execution (Moorhouse blog)
- Legacy Villas Homeowner’s Association – Exterior Paint Selections and Requirements (2025)
- Wynmoor Architectural Committee guidelines (2022)
- Painting for safe senior living communities (W.T. Kenney)