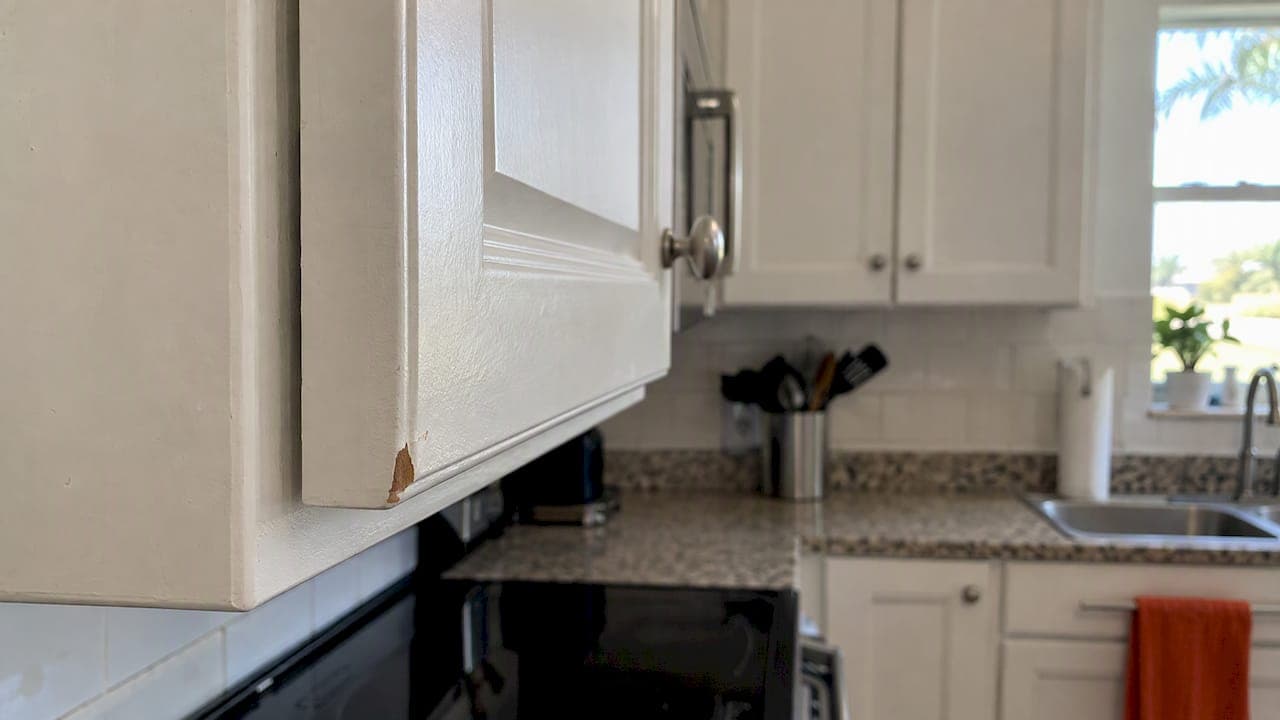
Chipped cabinet paint almost always means the finish never fully bonded to the wood underneath. The usual culprits are grease or dust on the surface, skipped sanding, the wrong primer, a coat applied too thick, or paint that never got the chance to fully cure. The fix is straightforward: scrape away the loose paint, sand and clean the surface, apply a bonding primer, repaint with a cabinet-grade finish, and give it the full cure time. If chipping shows up across many doors or drawers at once, that points to a bigger adhesion problem best handled by a refinishing pro.
TL;DR:
- Test damage by lifting a chip gently: flakes reaching bare wood indicate adhesion failure, while soft, swollen, or musty areas require moisture repair first.
- For repairs, scrape loose paint, feather edges, degrease, apply bonding primer and thin cabinet paint coats, then wait for full cure before use.
- Match both color and sheen, test paint in a hidden spot and let it fully cure; feather the patch to avoid a hard edge.
- Laminate needs deglossing and primer made for slick surfaces, while exposed MDF edges need sealing; ordinary primer may not grip laminate.
- When chips cover many doors or drawers, ask a refinisher about preparation, primers, topcoats, cure times, and warranty coverage before hiring.
Table of Contents
- Why painted cabinets chip: causes explained
- How to inspect and assess the damage
- Step-by-step DIY fix for chipped cabinet paint
- Prevention and maintenance to reduce future chipping
- Tips for matching new paint layers to existing cabinet finishes for seamless repair
- How to handle different cabinet materials (wood, MDF, laminate) and their specific paint adhesion challenges
- Potential underlying damage signs to address before repainting
- When to call a professional and what to expect from pro refinishing
- How Tru Painting handles chipped and peeling cabinet paint
- FAQ
- Sources
Why painted cabinets chip: causes explained
Paint chips because something got between the finish and the wood, or because the finish itself never had a fair chance to grip. Cooking grease, dust, and silicone residue from old polish are the most common saboteurs. Even a thin, invisible layer of oil on a cabinet door will keep paint from forming a real bond, no matter how many coats go on top.
Sanding gets skipped more often than it should. A factory finish or old paint layer is slick by design, and paint needs a bit of texture, called tooth, to hold on. Skip the sanding step and you are painting a surface that was never meant to accept a new coat.
Product choice plays a bigger role than most homeowners expect. A bonding primer is built to grab onto glossy or stubborn surfaces, while a standard wall primer is not. Pairing the wrong primer with a high-use surface like a cabinet door sets the finish up to fail early.
Moisture is a quieter but serious factor. Research on wood coatings found that moisture content in wood affects how well varnish adheres, since dampness works into seams and weakens the chemical bond between the coating and the wood. That is why cabinets near sinks, dishwashers, and stoves tend to chip first: steam and splashes keep that wood slightly damper than the rest of the kitchen.
Finally, application habits matter:
- Paint applied too thick skins over on the outside while staying soft underneath, which leads to cracking.
- Recoating before the prior layer has cured traps solvents and weakens the whole stack.
- High-contact zones, like handles, door edges, and the area under the sink, simply take more daily abuse than the rest of the cabinet.
How to inspect and assess the damage
Before buying supplies, figure out what you are actually dealing with. A quick inspection tells you whether this is a weekend touch-up or a job for a professional.
- Press a fingernail or the edge of a plastic scraper under a chip and lift gently. If paint comes away in small flakes down to bare wood, that is a true adhesion failure.
- Look at how many layers are involved. If you see multiple colors or a soft, swollen patch instead of hard wood, you may have delamination or rot underneath.
- Note the failure zones. Chips clustered at edges, around hardware, near the sink, stove, or on wood knots usually trace back to moisture, grease, or stress points.
- Decide whether the problem is isolated to one door or drawer front, or if it shows up across most of the kitchen. Widespread chipping across many surfaces usually signals a prep or product issue from the original paint job rather than normal wear.
That last distinction is the one that decides your next move: a single chipped drawer front is a repair, a kitchen full of peeling doors is a redo.
Step-by-step DIY fix for chipped cabinet paint
Once you know the damage is contained, repairing it is a methodical process, not a guessing game. Gather your materials first: a plastic or metal scraper, sandpaper in 80 and 220 grit, a degreasing cleaner, tack cloths, a bonding primer, cabinet-grade paint, a quality brush or mini-roller, and a respirator with good ventilation.
- Scrape away all loose or flaking paint, then feather the edges with sandpaper so there is no visible ridge between old paint and bare wood.
- Sand or deglosser the surrounding finish so the new primer has something to grip, since glossy paint will reject a fresh coat just like it rejected the last one.
- Wipe the whole surface down with a degreaser and let it dry completely, paying close attention to areas near sinks or dishwashers where residual moisture lingers.
- Apply a bonding primer in thin, even coats, following the product's instructions for dry time between coats. Our guide to choosing the right primer for your substrate breaks down which formula suits wood, MDF, or laminate.
- Apply your topcoat in thin layers rather than one heavy coat, respecting the recoat window listed on the can.
There is a real difference between paint feeling dry to the touch and paint being fully cured. Dry-to-touch can happen before full chemical cure, when the finish reaches its maximum hardness and chip resistance. Cure time depends on the product. Rushing this step can cause repaired cabinets to chip again.
Pro Tip: Hold off on reinstalling hardware or closing doors firmly until the paint has had its full cure window; our hardware reinstallation checklist walks through safe wait times so you do not dent a finish that looks dry but is still soft underneath.
Prevention and maintenance to reduce future chipping
The right products and a few daily habits do more to prevent chipping than any amount of touch-up work. Waterborne two-part urethanes and dedicated cabinet-grade paints are built to flex and resist scuffing in ways that standard wall paint cannot match, which is worth the extra cost on surfaces that get touched every day.
Sheen matters more than people expect, as explained in the best color to paint interior doors guide. Satin and semi-gloss shed grease and fingerprints better than flat or matte finishes, which is why they hold up longer on doors and drawer fronts that see constant hand contact.
A few habits protect the investment once the paint is on:
- Let the finish reach full cure before loading cabinets with heavy use or reattaching hardware.
- Keep indoor humidity reasonably stable, since swings in moisture stress the bond between paint and wood over time.
- Skip harsh cleaners and abrasive scrub pads; a soft cloth and mild soap go a long way.
- Add small felt bumpers to cut down on slamming, and keep a small touch-up kit on hand for the inevitable minor scuff.
Our guide to protecting painted surfaces long term covers more of these maintenance habits in detail.
Tips for matching new paint layers to existing cabinet finishes for seamless repair
Blending a touch-up into an older finish takes a little patience, since paint ages and shifts tone slightly over time, even when it came from the same can. Before committing to a full repair, test your paint on an inconspicuous spot, like the inside edge of a door, and let it cure fully before judging the match.
Sheen consistency matters as much as color. A satin touch-up on a semi-gloss door will look dull and out of place even if the color is spot-on, so always match both the color code and the sheen level of the original job.
Feathering is the technique that saves most repairs. Instead of painting a hard-edged patch, thin out your brush strokes at the perimeter of the repair area so the new paint gradually blends into the old rather than stopping abruptly. Working in natural light, rather than under warm kitchen bulbs, helps you catch color mismatches before they become permanent.
If the original paint has yellowed or faded from sun exposure near a window, a small single-door repair may look different from its neighbors. In that case, doing the whole run of cabinets, rather than a spot repair, is often the more satisfying outcome.
How to handle different cabinet materials (wood, MDF, laminate) and their specific paint adhesion challenges

Solid wood cabinets move with humidity, expanding and contracting across seasons, which puts ongoing stress on the paint film at joints and panel edges. Sanding wood thoroughly and choosing a flexible, cabinet-grade finish helps the paint keep up with that natural movement.
MDF, by contrast, does not move much, but it absorbs moisture readily at cut edges and can swell if primer is skipped. Sealing exposed MDF edges with primer before painting is critical, since an unsealed edge will soak up topcoat and still look chalky or uneven once dry.
Laminate is the trickiest of the three because it is designed to resist adhesion by nature. A standard primer will struggle to bond to its slick, factory-sealed surface, which is why laminate cabinets need both a thorough deglossing and a primer specifically formulated for slick substrates. Skipping that step can cause laminate cabinet paint jobs to chip.
Research on painted wood more broadly backs this up. A review of the factors that determine paint longevity on wood identified substrate type and quality, paint composition, and application technique as major drivers of how soon a finish fails, alongside design choices that keep the wood dry and the severity of local exposure.
Potential underlying damage signs to address before repainting
Sometimes chipping paint is a symptom, not the main problem. If you find soft, swollen wood under a chip, or the area has a musty smell, that points to water damage that needs to dry out and possibly be repaired before any new paint goes on.
Dark speckling or a fuzzy texture under lifted paint can indicate mold growth, which should be cleaned and treated before repainting, since paint applied over mold will not stop it from spreading underneath.
Persistent chipping concentrated around a single sink, dishwasher, or window is often a sign of an ongoing leak rather than a one-time spill. Chasing the paint problem without finding that moisture source means the new finish may fail in the same spot again. Worth checking: cabinet moisture content and adhesion are directly connected, as studies on water-borne varnish performance have shown, with two-part polyurethane varnish achieving its best adhesion on oak at around 8 to 10 percent moisture content and higher moisture levels reducing adhesion for some products.
When to call a professional and what to expect from pro refinishing
Call a refinisher when chipping shows up across several cabinets, when you suspect moisture or structural issues under the paint, or when you want a durable finish. Professional refinishing typically includes controlled stripping or deglossing, spray-applied primers and topcoats for a smoother finish than brush work allows, and moisture mitigation where needed, often backed by a workmanship warranty.
Before hiring anyone, ask about their prep process, the specific primers and topcoats they use, expected cure times, warranty terms, and whether they can show before-and-after photos from past jobs.
— Kyle
How Tru Painting handles chipped and peeling cabinet paint
We built our cabinet refinishing service around thorough preparation, premium products, and skilled craftsmanship, which is exactly what stops chipping from coming back. Our three-tier packages, from Cosmetic Refresh up through Maximum Prep & Protection, let you choose the level of prep and durability that fits your cabinets and your budget.

- Widespread chipping across many doors can point to a prep issue that a spray-applied, professionally primed finish may help address.
- Ask about the workmanship warranty and what it covers.
If your cabinets need more than a touch-up, visit our cabinet refinishing page to see our process and request an estimate.
FAQ
How can I fix chipped paint on my cabinets?
Scrape away loose paint, sand the edges smooth, clean the surface with a degreaser, and apply a bonding primer before repainting with a cabinet-grade finish. Let the repaired area reach full cure, not just dry-to-touch, before closing doors or reattaching hardware.
What can I put over painted cabinets to prevent chipping?
A durable topcoat, such as a waterborne two-part urethane or a dedicated cabinet-grade paint in a satin or semi-gloss sheen, resists scuffing better than standard wall paint. Felt bumpers on doors and drawers also reduce the daily impact that causes chips near hardware.
What is the best kitchen cabinet paint that won't chip?
No paint is chip-proof, but cabinet-grade paints formulated for high-contact surfaces, paired with a bonding primer suited to your substrate, hold up far better than general-purpose wall paint. Our primer guide for cabinets breaks down which primer pairs best with wood, MDF, or laminate.
Can I just paint over chipped paint?
Painting directly over chipped paint without scraping and sanding first usually fails quickly, since the new coat bonds to loose, unstable paint rather than solid wood. Removing the damaged area and feathering the edges before repainting gives the new finish a surface it can actually grip.
How long does cabinet paint need to cure before normal use?
Cabinet paint may feel dry to the touch before it is fully cured. The time to reach maximum hardness depends on the product. Our hardware reinstallation checklist outlines safe wait times before handling painted doors and drawers normally.