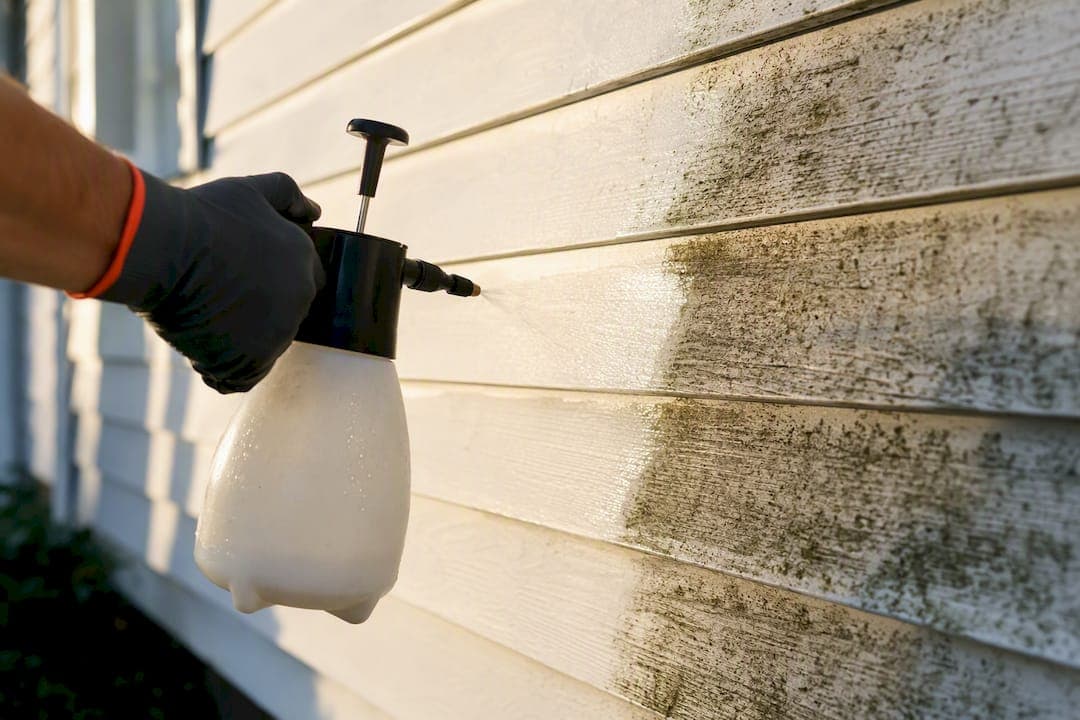
Mildew on exterior paint is almost always removable with a proper cleaning solution, but you cannot paint over it and expect the problem to disappear. Your first move is a quick bleach spot test to confirm what you're dealing with, then a bleach or mildewcide wash and a thorough rinse. If the growth covers a large section of your home or keeps coming back season after season, it's time to call a painting contractor rather than keep fighting it yourself.
TL;DR:
- The bleach test confirms mildew if the stained patch lightens or disappears within one to two minutes; otherwise, it’s likely dirt or algae.
- Mildew frequently reappears on shaded, damp areas fed by water sources like gutters, sprinklers, or roof leaks, especially on porous or older paint.
- Proper cleaning involves a one-to-three bleach-to-water ratio, thorough rinsing, and avoiding pressure washing on delicate siding to prevent damage.
- Painting over existing mildew without complete removal results in quick regrowth, making mildew-resistant primers and paints essential for lasting protection.
- Addressing water drainage, trimming vegetation, and routine maintenance are crucial to preventing mildew recurrence before considering professional intervention.
Table of Contents
- Is It Mildew, Mold, or Just Dirt? Here's the Bleach Test
- Why Mildew Keeps Showing Up on the Same Spots
- Gear Up Before You Clean: Safety Comes First
- The Step-by-Step Removal Process (and When to Skip the DIY Route)
- Repainting the Right Way: Primers, Mildewcides, and Timing
- Your Maintenance Checklist to Keep Mildew From Coming Back
- When to Call a Pro (and What Tru Painting LLC Does Differently)
- What Homeowners Get Wrong About Mildew
- Let Tru Painting Handle the Removal, Repair, and Repaint
- Sources
Is It Mildew, Mold, or Just Dirt? Here's the Bleach Test
Mildew shows up as flat, dusty patches, usually black, gray, or greenish, clustered on the shadier sides of your house. It smudges easily if you run a finger across it, unlike dirt, which tends to sit on the surface without lifting into a smear.
The most reliable way to confirm it is a bleach spot test. Here's how it works:
- Dab a drop or two of fresh household bleach directly onto the suspicious patch.
- Watch the spot for one to two minutes.
- If it lightens or disappears, you're looking at mildew, according to Forest Products Laboratory testing guidance.
- If the color stays put, you're probably dealing with dirt, algae staining, or a paint defect instead.
The test has limits. It won't tell you how deep the mildew has penetrated the paint film, and it won't catch mold growing beneath the surface. If patches keep returning in the same spot after cleaning or if you notice a musty smell along with visible growth, a closer inspection is worth the time before you grab a sprayer.
Why Mildew Keeps Showing Up on the Same Spots
Mildew needs moisture, shade, and something organic to feed on, and most homes offer all three somewhere on the exterior. The north side of a house, areas tucked under deep eaves, and anything shielded by overgrown shrubs stay damp longer after rain or morning dew, which gives spores exactly the environment they need.
Water sources make the problem worse, and they're often easy to miss:
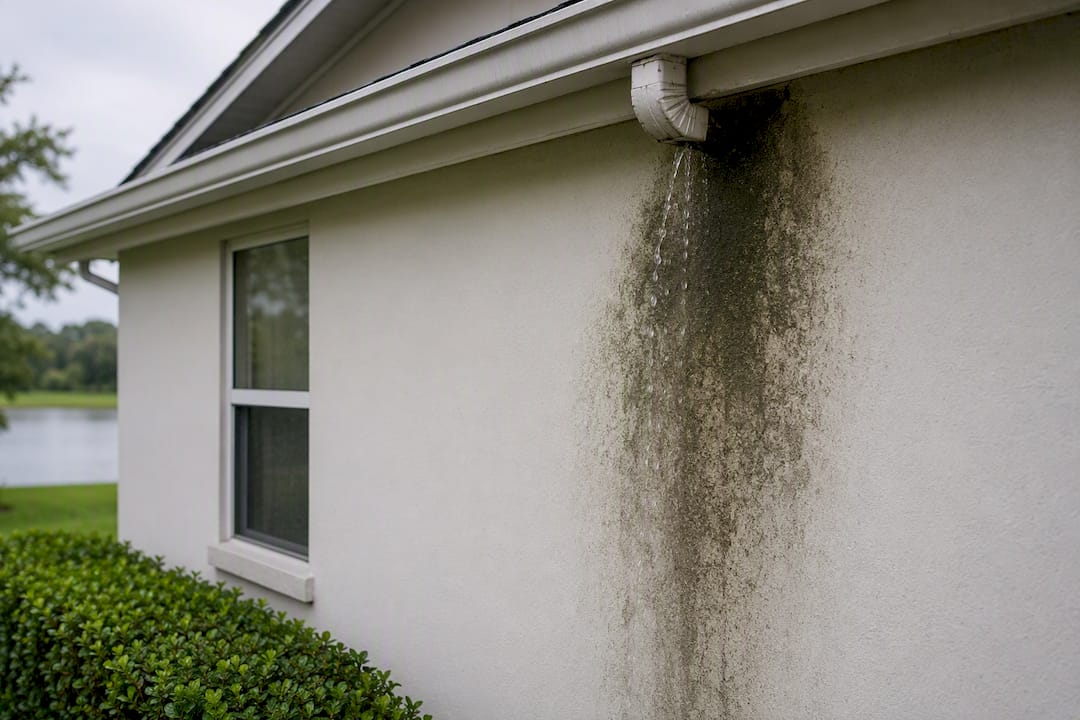
- Clogged or leaking gutters that dump water down the siding instead of away from it.
- Sprinkler heads aimed at the house instead of the lawn.
- HVAC condensate lines dripping onto one section of wall day after day.
- Small roof leaks that keep a patch of siding damp behind the paint.
Paint quality plays a role, too. Flat and oil-based finishes, along with older, chalking paint, hold moisture and organic debris more readily than a fresh acrylic latex coat, according to Purdue Extension guidance on exterior coatings. Porous stucco and untreated wood siding are more vulnerable for the same reason.
Gear Up Before You Clean: Safety Comes First
Before you touch a sprayer, put on rubber gloves and eye protection, and work in a well-ventilated area if you're near windows or vents. Never mix bleach with ammonia or other cleaners. That combination produces fumes that can cause serious respiratory harm, a warning the CDC's mold and health guidance takes seriously for good reason.
- Cover nearby shrubs and flower beds with plastic sheeting or a tarp before mixing any solution.
- Wet plants and soil beforehand and rinse them again immediately after cleaning to dilute any runoff.
- Test your cleaning mix on a small, hidden patch of siding first and wait a few minutes to check for fading or discoloration.
Pro Tip: Test in a spot that's already in shade, like behind a downspout or under a windowsill. If the paint is going to react to bleach, you'll want to know before you've covered the whole front elevation.
The Step-by-Step Removal Process (and When to Skip the DIY Route)
The standard method, backed by Benjamin Moore's own cleaning guidance, uses a simple ratio: one part household bleach to three parts water.
- Mix the solution in a pump sprayer or bucket and apply it generously to the affected area.
- Let it sit for one to five minutes, adjusting based on how stubborn the staining looks.
- Scrub gently with a soft bristle brush. Avoid stiff wire brushes, which can scratch the paint film and create new spots for mildew to grip.
- Rinse thoroughly with a garden hose, working from the top down so dirty runoff doesn't streak clean sections below.
If you'd rather skip bleach, oxygen bleach and commercial mold and mildew removers work as gentler alternatives. They're less likely to lighten nearby fabrics or plants if you get overspray, though they typically need longer contact time and a bit more scrubbing to match bleach's results on tough patches.
One decision matters more than people expect: pressure washing versus soft washing. A high-pressure stream can strip aging paint, force water behind siding seams, and even etch stucco, especially on homes with coatings more than a few years old. Contractors generally favor soft washing with chemical cleaners specifically because it lifts mildew without blasting away paint that's already thinning. If your siding shows chalking, peeling, or hairline cracks, a soft wash and a professional eye are the safer call. According to Good Housekeeping, DIY cleaning generally handles small patches well; anything larger tends to need more than a garden hose and a Saturday afternoon.
Repainting the Right Way: Primers, Mildewcides, and Timing
Painting over mildew doesn't hide it. It grows straight through new paint within weeks, which is why Sherwin-Williams and most manufacturers are blunt about removing it completely before any topcoat goes on. The EPA echoes this: paint applied over mold or mildew is likely to peel, wasting the labor and the product.
Once the surface is clean and fully dry, product choice determines how long you stay mildew free:
- Acrylic latex paint is the most mildew resistant option among water based paints, per Forest Products Laboratory testing.
- Zinc oxide in the topcoat provides a mild, ongoing inhibiting effect against fungal growth.
- Mildewcide additives blended into premium paint by the manufacturer tend to outperform mildewcide added later by a dealer, when applied under proper conditions.
- Look for paint specifically labeled mildew resistant, particularly for shaded walls or humid climates.
Follow the manufacturer's stated drying and recoat window rather than guessing. Painting too soon over a surface that looks dry but isn't traps moisture right where mildew wants it.
Your Maintenance Checklist to Keep Mildew From Coming Back
Cleaning mildew off once solves today's problem. Keeping it from returning means addressing why it grew there in the first place, and that usually comes down to water and airflow.
- Clean gutters and downspouts twice a year, and confirm they're actually directing water away from the foundation.
- Regrade any low spots near the house where water pools against the siding after rain.
- Trim back shrubs and tree limbs so air can move across the wall and sunlight can reach shaded sides.
- Redirect sprinkler heads away from siding, and run irrigation early enough that walls dry before evening.
- Walk the exterior after every humid season and check the usual trouble spots: north walls, under eaves, and behind landscaping.
Pro Tip: If one wall keeps growing mildew no matter how often you clean it, stop treating the symptom. Check what's feeding the moisture first, whether that's a gutter, a sprinkler, or a shrub that's grown too close to the siding.
When to Call a Pro (and What Tru Painting LLC Does Differently)
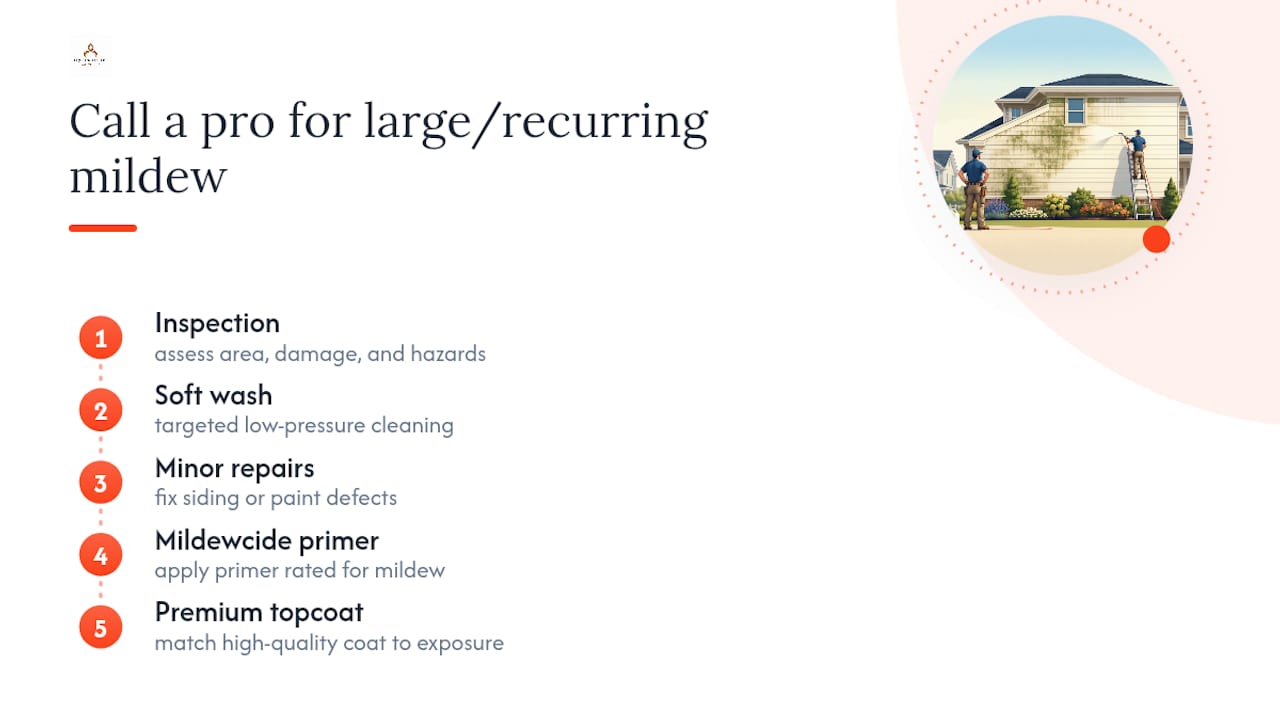
Coverage larger than roughly 10 square feet, mildew that keeps returning after cleaning, visible paint or siding damage, or work that requires a ladder near power lines all point to hiring a professional. This type of work is typically handled with an inspection, targeted soft washing, minor repairs where needed, a mildewcide-rated primer, and a premium topcoat matched to the home's exposure. Before hiring anyone, ask about insurance, references, exact scope, warranty coverage, and a written estimate.
What Homeowners Get Wrong About Mildew
Most homeowners treat mildew as a cosmetic problem solved by a bucket of bleach and a Saturday afternoon, and that's exactly where the conventional advice runs thin. Cleaning removes what's visible, but if the gutter that's been overflowing onto your north wall for two years stays untouched, you're scheduling a repeat performance, not solving anything.
The bigger blind spot is paint selection after cleanup. Homeowners spend real effort scrubbing a wall, then grab whatever exterior paint is on sale rather than checking for mildewcide content or acrylic latex resin, which the Forest Products Laboratory data shows performs meaningfully better against fungal growth over time. That's a wasted opportunity, especially on a shaded wall that's going to face the same moisture conditions all over again.
If there's one thing worth prioritizing, it's this: treat the moisture source as seriously as the stain. A clean wall with a leaking gutter above it is a temporary win. Fix the water path first, then clean, then choose paint built to resist what beat you the first time.
— Kyle
Let Tru Painting Handle the Removal, Repair, and Repaint
Hiring a professional is often more practical than piecing together your own ladder, sprayer, and bleach mix for a job that can involve more repair work than it first appears; the benefits of professional pressure washing your home include safe and effective mildew removal along with proper surface care. Professionals handle the soft washing, mildew-aware surface prep, priming with mildewcide-rated products, and full repainting in one coordinated visit, potentially offering tiered service packages to fit different levels of protection and budget.

What sets us apart isn't just the cleaning step. It's the thorough prep beforehand and the premium product selection afterward, the two things most DIY jobs and budget crews skip. If mildew has taken hold of your Lake County or Central Florida home, get a written estimate through our residential exterior painting services page and see exactly what a properly prepped, mildew-resistant repaint looks like for your specific siding.
Sources
- WOOD FINISHING: MILDEW ON HOUSE PAINTS (Forest Products Laboratory)
- Mold and health (CDC)
- How to Prevent and Remove Mildew (Benjamin Moore)
- A brief guide to mold, moisture, and your home (EPA)