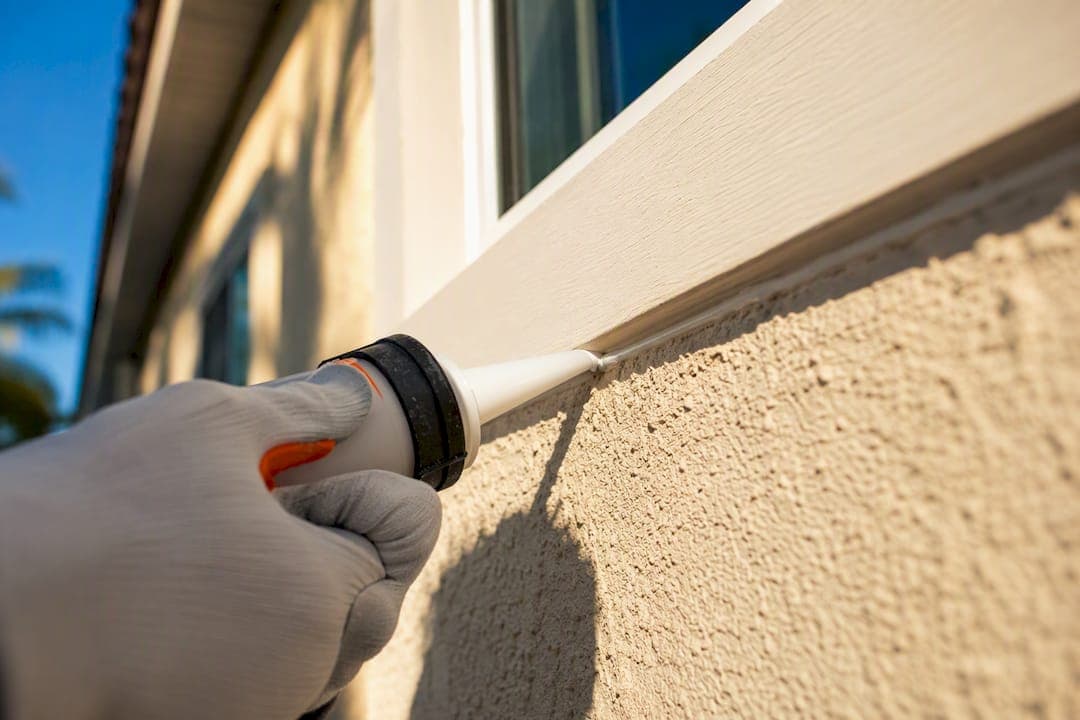
Caulk before you paint your home's exterior, except for siding lap joints, because the right paintable caulk seals gaps, blocks moisture, and gives your paint job a longer service life. The exception matters: sealing lap joints traps water instead of letting it escape. Check the label for "paintable" or "paint-ready," confirm the cure time, and only work in dry, mild weather.
TL;DR:
- Caulk should be applied to seal gaps around trim, windows, and doors to prevent water intrusion, pest entry, and paint cracking, with acrylic latex or polyurethane being the best options.
- Siding lap joints must remain unsealed because they provide necessary drainage; sealing these can trap moisture and cause decay.
- Wait at least one full day after caulking before painting, as surface dryness does not guarantee full curing; weather conditions significantly affect cure time.
- Avoid caulking over silicone unless it is specifically formulated to accept paint, as paint will not adhere properly and peeling is inevitable.
- Proper surface preparation, including cleaning, scraping, priming, and using backer rods for wide gaps, is essential for long-lasting, professional results.
Table of Contents
- Why Caulk Before Painting Your Exterior?
- Where Should You Skip Caulking Before Painting?
- How Do You Choose the Right Exterior Caulk?
- How to Caulk Before Painting: A Step-by-Step Workflow
- How Long Should Caulk Dry Before Painting?
- What Goes Wrong After Caulking, and How to Fix It
- When Does This Job Call for a Professional?
- Ready for a Professional Exterior Paint Job?
- Sources
- FAQ
Why Caulk Before Painting Your Exterior?
Gaps around trim, windows, and door frames are where exterior paint jobs actually fail. Water works into those seams, wood swells and contracts, and paint on top of an unsealed joint cracks within a season or two. Caulk closes that gap before the brush ever touches the surface, which is exactly why sealing before painting produces a cleaner, longer-lasting finish than painting over gaps and hoping for the best.
Once painted, caulk stops acting like a separate material and starts acting like part of the paint film. That continuous layer keeps water from tracking behind siding and trim, which is where rot, mold, and peeling paint actually start. It also closes off the tiny gaps that ants, wasps, and other pests use to get into wall cavities.
The payoff shows up in a few concrete ways:
- Durability: Sealed joints resist the freeze-thaw and expansion-contraction cycles that crack unsealed paint.
- Energy efficiency: Fewer gaps around windows and doors means less conditioned air leaking out.
- Appearance: Caulked seams give you crisp, straight lines instead of shadowed gaps that show up in direct sunlight.
- Pest control: Sealed entry points around trim and utility penetrations keep insects from finding a way in.
Skip this step and you're not just risking a rougher-looking paint job. You're setting up the exact conditions that cause peeling, cracking, and callbacks within a year or two.
Where Should You Skip Caulking Before Painting?
Not every seam wants to be sealed, and this is the part most DIY guides skip entirely. Siding lap joints, where one piece of horizontal siding overlaps the piece below it, need to stay open. That gap is a designed drainage path, not a flaw. Seal it shut and you trap moisture behind the siding instead of letting it drain and evaporate, which is exactly how paint failure starts. Sherwin-Williams' surface prep guidance is direct on this point: don't caulk lap joints, and if old caulk in one is already cracking, dig it out and prime the bare wood instead of resealing it.
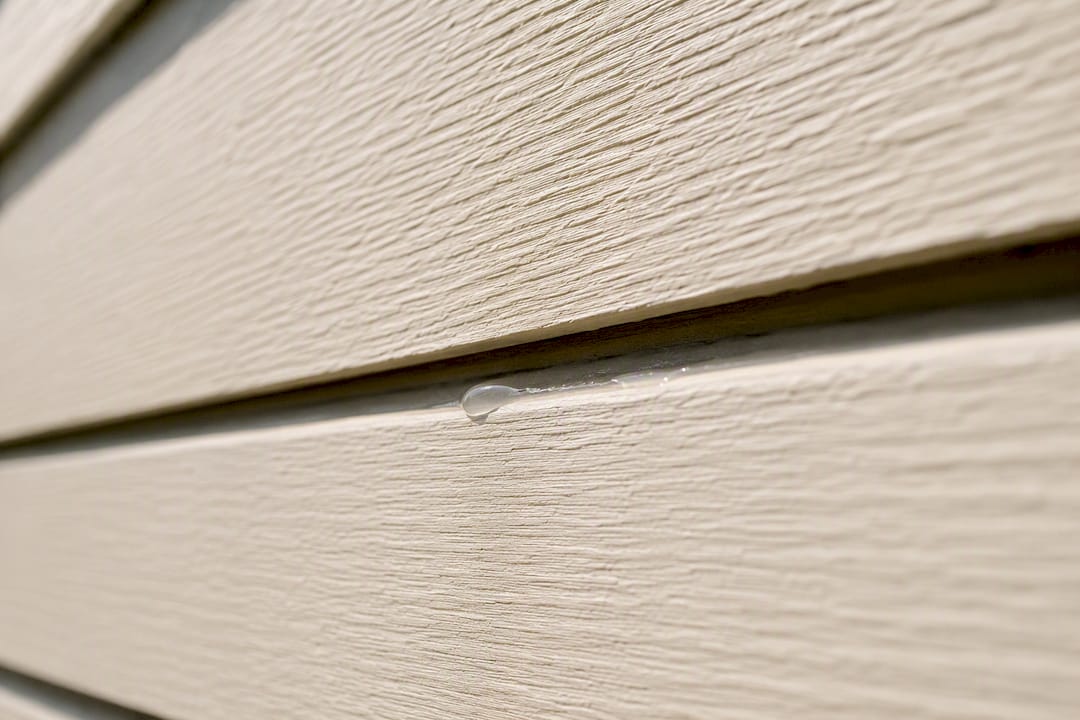
Butt joints, where two pieces of trim or siding meet edge to edge, are a different story. Those do need caulk, since there's no drainage function to protect.
A few ways to tell them apart before you grab the caulk gun:
- Lap joints run horizontally and shadow slightly, since one board sits in front of the other.
- Butt joints meet flush, with both pieces on the same plane.
- If you can see daylight or a consistent shadow line along a horizontal seam, leave it alone.
- When a joint's function isn't obvious, check your siding manufacturer's installation guide or ask a painting contractor before sealing it.
How Do You Choose the Right Exterior Caulk?
The material you buy determines whether your paint job lasts five years or fails in one. Not all caulk accepts paint, and that single fact causes more DIY paint failures than any application mistake.
Acrylic latex caulk is the standard choice for most exterior trim, siding seams, and window frames. It's paintable, cleans up with water, and flexes enough to handle normal seasonal movement. Polyurethane caulk costs more but holds up better against UV exposure and heavy movement, and it's also paintable, though it often needs a longer cure window than acrylic latex. 100% silicone, by contrast, is the one to watch for. Manufacturers explicitly warn against painting over it because paint simply won't bond to its surface, and peeling isn't a matter of if but when.
Statistic Callout: Acrylic latex exterior caulks are typically paintable in about one to four hours under normal drying conditions, while polyurethane formulas can take considerably longer to reach a paint-ready state. Some newer latex formulas, like DAP Dynaflex Ultra, advertise paint-ready times as fast as one hour, but that's a manufacturer claim specific to that product, not a category-wide rule.
Reading the tube matters more than reading a blog post. Look for the words "paintable" or "paint-ready" printed directly on the label, then check the cure time listed there rather than assuming a number. Manufacturer data sheets, like the ones Benjamin Moore publishes for its products, are the most reliable source for substrate compatibility and safe paint timing.
Match the product to the job:
- Use acrylic latex for standard trim, window, and door gaps under a quarter inch.
- Reach for polyurethane on high-movement joints or areas with heavy sun exposure.
- Never use 100% silicone anywhere you plan to paint.
- For joints wider than roughly a quarter inch, install backer rod before caulking so the bead cures to the right shape instead of sinking or cracking.
How to Caulk Before Painting: A Step-by-Step Workflow
Good caulking is mostly good prep. Skip the cleaning and scraping steps and even premium caulk will fail early.
What you'll need:
- Paintable acrylic latex or polyurethane caulk (sized to your joints)
- A quality caulk gun with a smooth trigger action
- Backer rod for gaps wider than a quarter inch
- A 5-in-1 tool or plastic putty knife for scraping old caulk
- A wire brush, rags, and mild soap and water for cleaning
- Painter's tape
- Exterior primer for bare wood or metal
- A damp rag or your finger (in a glove) for tooling the bead
Step 1: Strip out failing caulk. Old, cracked, or peeling caulk has to go first. Use a 5-in-1 tool or a sharp putty knife to dig it out completely. Half-removed caulk gives new material nothing solid to bond to, and it will fail again within months.
Step 2: Scrape loose paint and debris. Any flaking paint around the joint needs to come off before you clean. Leaving loose paint under new caulk just means it'll flake off later, taking the caulk with it.
Step 3: Clean and dry the joint completely. Wipe down the seam with mild soap and water, rinse, and let it dry fully. Caulking a damp or dirty joint is one of the most common reasons DIY seals fail within a year, since caulk needs a clean, dry surface to grip.
Step 4: Prime bare substrates. If scraping exposed bare wood or metal, prime it before caulking. This isn't a step to skip. Pros typically prime first because caulk adheres better to a primed surface, and priming makes it easier to spot gaps you might otherwise miss.
Step 5: Install backer rod on wide gaps. For any joint wider than about a quarter inch, push in a length of backer rod before caulking. It gives the caulk something to sit against instead of sinking into the gap.
Step 6: Cut your nozzle and load the gun. Cut the tip at a 45 degree angle, sized to match your joint width. Too wide a cut wastes caulk and makes tooling harder.
Step 7: Run a steady bead. Hold the gun at a consistent angle and pull it along the joint in one smooth motion, letting the caulk fill the gap rather than sit on top of it.
Step 8: Tool the bead. Run a damp finger or a tooling stick along the bead immediately after application. A properly tooled bead should be concave and touch both sides of the joint without adhering to the backer rod underneath. That shape lets the seal flex with seasonal movement instead of cracking under stress.
Step 9: Clean up excess before it skins over. Wipe away smears with a damp rag while the caulk is still workable.
Pro Tip: Run painter's tape along both sides of the joint before you caulk, then pull the tape immediately after tooling the bead. You get razor-straight lines without touching up smears later, and it saves more cleanup time than any other trick in this process.
For more on how these steps fit into a full exterior repaint, see this breakdown of exterior paint preparation best practices, and check this guide on prepping exterior walls before painting for surface-specific tips. If you're prepping trim or old doors alongside your siding, this piece on painting versus replacing old doors walks through similar surface prep decisions.
How Long Should Caulk Dry Before Painting?
"Dry to the touch" and "fully cured" are not the same thing, and confusing the two is where a lot of DIY paint jobs go wrong. Caulk can feel firm on the surface within an hour while the material underneath is still soft and moving. Paint applied too early can crack, wrinkle, or peel as the caulk continues to cure and shift underneath it.
Statistic Callout: Paint-ready times for acrylic latex caulk commonly fall in the one to four hour range, but that's a guideline, not a guarantee for every product or every job site.
A safe rule of thumb is to wait a full day before painting unless the manufacturer's label specifically indicates a shorter drying time. Several factors stretch that window out:
- Cold temperatures slow every chemical cure, sometimes dramatically.
- High humidity keeps moisture-cure caulks, including many polyurethanes, from setting properly.
- Thick beads take longer to cure through than thin ones, even if the surface looks dry.
- Polyurethane formulas generally need more time than acrylic latex, regardless of weather.
Weather conditions on caulking day carry as much weight as the product you chose. For a closer look at how temperature and humidity affect your whole exterior painting timeline, this guide on how weather affects exterior painting is worth a read before you schedule the job.
What Goes Wrong After Caulking, and How to Fix It
Most caulking problems trace back to one of three mistakes, and all three are avoidable once you know what to look for.
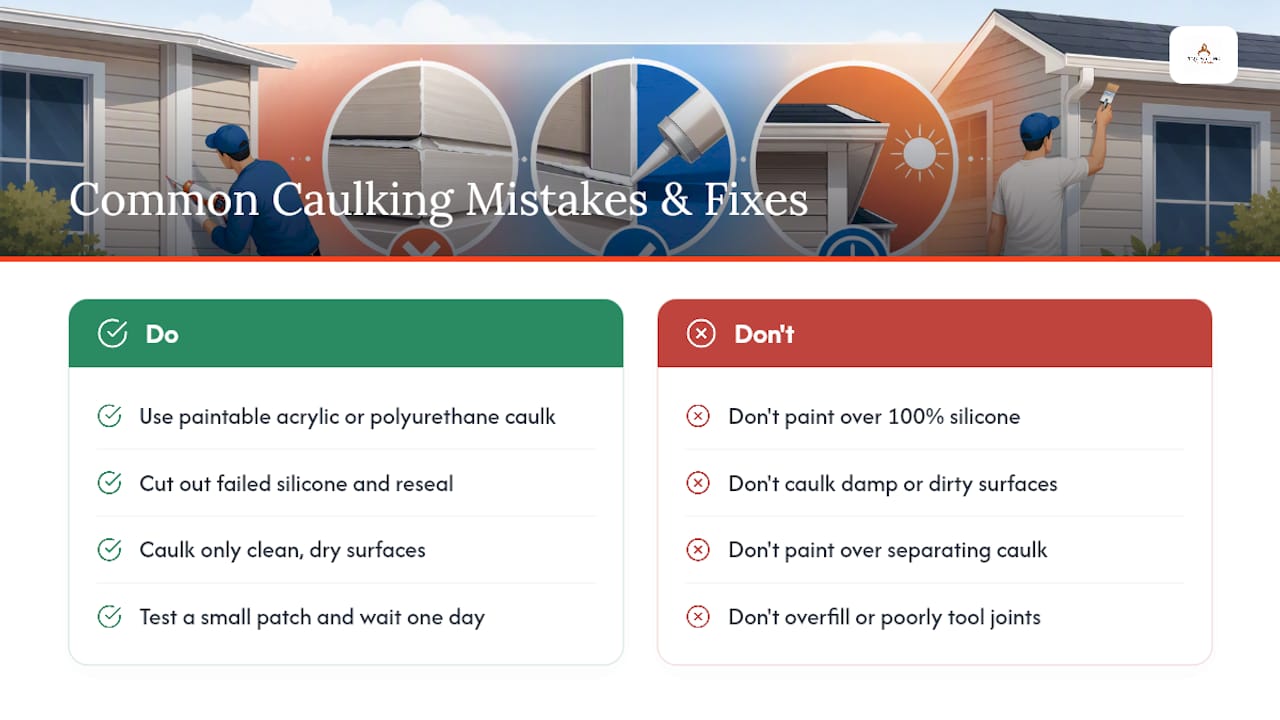
Painting over non-paintable silicone is the most common. Paint applied over 100% silicone will bead up, refuse to level, or peel away in sheets within days or weeks. There's no fix except removal: cut out the silicone completely, clean the substrate, and reseal with a paintable acrylic latex or polyurethane before repainting.
Caulking dirty or damp surfaces causes the bead to lose adhesion, sometimes visibly pulling away from the joint edges within a few weeks. If that happens, dig out the failed section, let the area dry completely, clean it, and recaulk. Don't paint over a caulk line that's already separating from the surface.
Overfilled or poorly tooled joints dry with visible ridges or cracks once painted. Small touch-up areas usually blend fine with a light hand and matching paint sheen, but if a full trim run or panel shows inconsistent texture, repainting the whole section reads far better than patching spots. A handful of forum threads on DIY caulking confirm the same pattern: the safest move before committing to a full repaint is testing a small patch first and giving it a day to prove itself.
When Does This Job Call for a Professional?
Professional crews generally follow a specific order: scrape, sand, prime, caulk, then paint. Priming before caulking isn't a preference, it's because caulk bonds better to a primed surface, and priming first makes hidden gaps easier to spot before they're sealed over.
Consider bringing in a contractor when the project involves a full exterior repaint, when failing caulk shows up in multiple areas at once, or when you're not confident telling a lap joint from a butt joint. That last one matters more than most homeowners realize. Sealing the wrong seam can trap moisture behind siding for months before anyone notices.
We build every exterior job around thorough preparation first, which is why our three-tier service packages let homeowners choose how much protection and attention their project gets without cutting corners on the prep work itself. If you want to go deeper on the reasoning behind this sequence, our posts on exterior paint preparation and prepping exterior walls cover it in more detail.
— Kyle
Ready for a Professional Exterior Paint Job?
Getting caulking right is one part of a much bigger prep sequence, and it's the part most DIY paint jobs get wrong first. We build every residential exterior project around that same scrape, clean, prime, and seal sequence before a drop of paint goes on, so you get a finish that holds up through Central Florida's heat and humidity instead of cracking a season later.

Our residential exterior painting services start with a site visit where we walk your home, flag failing caulk and problem joints, and give you straightforward, transparent pricing before any work begins. There's no guessing about what you're paying for or why. If your trim has other issues beyond caulk and paint, like doors or cabinets that need attention too, ask us about that during the same visit. Request an estimate today and find out what proper prep actually looks like on your home.
Sources
- Should you seal or paint first? Here's what DIYers need to know- GE Sealants
- Best exterior caulk | BobVila
FAQ
How Long Before You Can Paint Exterior Caulk?
Acrylic latex caulk is typically paintable in one to four hours, but drying times vary depending on the product and conditions. Polyurethane and thicker beads usually need longer, especially in cold or humid weather.
Should You Paint Over Exterior Caulking?
Yes, as long as the caulk is labeled paintable or paint-ready. Never paint over 100% silicone caulk, since paint won't bond to it and will peel.
Should Caulking Be Done Before Painting?
Yes, in nearly every case, caulking should happen before painting so the paint forms one continuous protective layer over the sealed joint. The one major exception is siding lap joints, which should stay unsealed to allow drainage.
Can I Paint Straight After Caulking?
Only if the manufacturer's label states a safe paint time that has already passed and the caulk is fully cured through, not just dry on the surface. When in doubt, wait longer and test a small patch before painting the whole area.
What Kind of Caulk Should I Use Before Painting Exterior Trim?
Acrylic latex caulk works for most standard trim and window gaps, while polyurethane suits high-movement joints exposed to heavy sun. Confirm "paintable" appears on the label before buying either type.