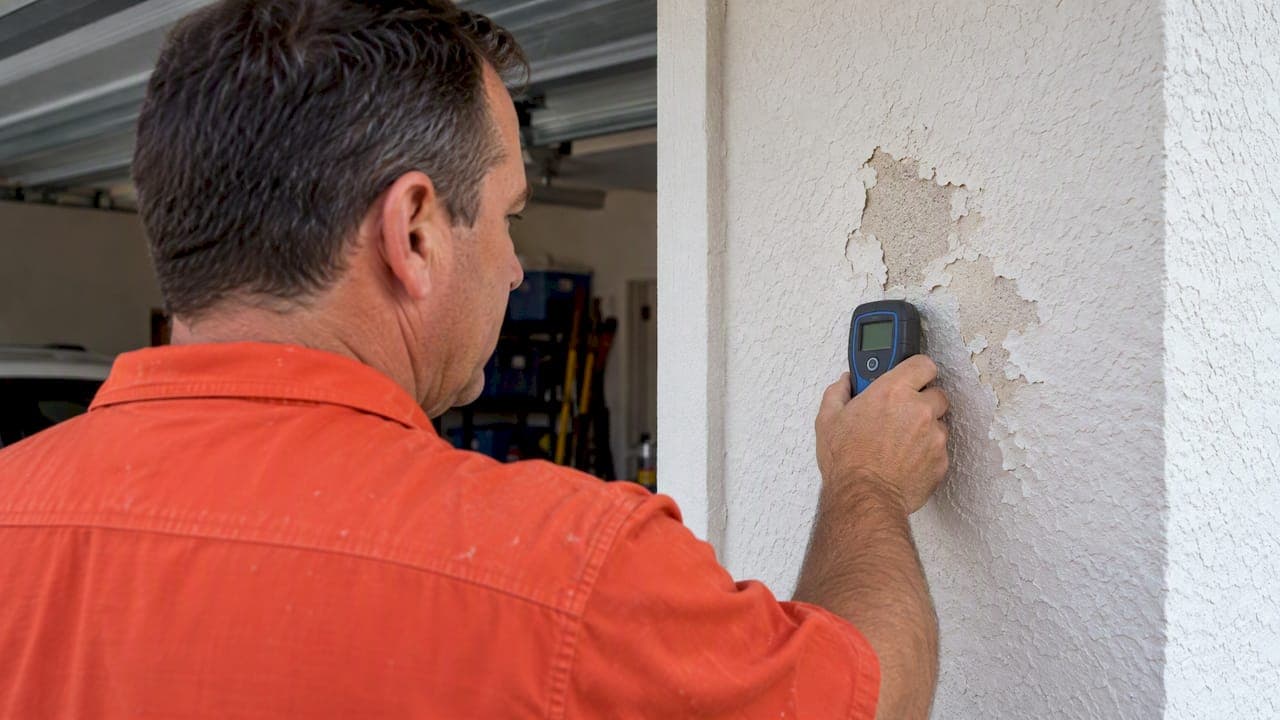
Yes, Florida's high humidity and trapped moisture are the most common causes of exterior paint peeling, and the fix starts before you ever open a paint can. Stop the moisture source first: cover active leaks, clear gutters, and let the wall dry fully. Map where the peeling shows up, and if your home was built before 1978, check lead-safe work practices under EPA RRP guidance before any scraping begins.
TL;DR:
- Map peeling by height, orientation, and nearby rooflines or windows; compare morning moisture readings with dry areas, and call a specialist if readings remain high.
- Paint below roughly 70% relative humidity, and wait until stucco or masonry soaked by rain has had several dry, sunny days to dry fully.
- For homes built before 1978, use lead safety procedures before scraping; then clean, dry, repair cracks, and choose primer for the surface.
- Choose 100% acrylic or masonry coatings for stucco and block; elastomeric products bridge hairline cracks but may trap moisture when walls cannot dry behind them.
- Patch isolated peeling yourself only after fixing its source; widespread damage, repeat failures, or peeling across multiple walls warrants a professional inspection.
Table of Contents
- How humidity and Florida's climate make paint fail
- How to diagnose the moisture source before you repaint
- When to paint in Florida without inviting another peeling cycle
- Surface prep and repairs that stop peeling from coming back
- Which paints and primers actually resist Florida humidity
- Maintenance that keeps peeling from starting over again
- How Tru Painting handles humidity-driven peeling
- Spotting the visual signs before they spread
- How Florida's heat compounds the humidity problem
- Quick decision checklist: DIY or call a professional
- Book a humidity-focused exterior inspection with Tru Painting
- FAQ
- Sources
How humidity and Florida's climate make paint fail
Paint does not usually fail because the product was bad. It fails because moisture got underneath it and pushed it off, or because the film never cured properly in the first place.
Stucco, block, and brick behave like reservoirs. They soak up rain and humidity, then release that moisture outward as the sun heats the wall. When the paint film cannot let that vapor pass fast enough, pressure builds behind it and the paint blisters, bubbles, or peels off in sheets. Wall assembly choices, including the permeance of the weather-resistant barrier behind the cladding, affect how much of this inward-driven moisture a wall holds onto, according to a Department of Energy building science analysis.
High humidity also attacks paint at the chemical level while it is still curing. Latex and acrylic paints rely on surfactants, soap-like additives that help the paint flow and level, which are supposed to disperse evenly as the film dries. In humid conditions, drying slows down and those surfactants migrate to the surface instead, forming a weak, water-soluble layer that undermines adhesion. This process, known as surfactant leaching, shows up as streaky or blotchy residue soon after painting.
A laboratory study published in the journal Polymers tested how acrylic and styrene-acrylic paint binders age under different humidity levels and found distinct degradation patterns at elevated relative humidity, including surfactant migration and hydrolysis that weakens the binder over time (MDPI, 2022).
- Heat and UV exposure accelerate chalking, breaking down the binder that holds pigment to the wall.
- Thermal cycling, hot days and cooler nights, expands and contracts the substrate, stressing the paint film at the microscopic level.
- Trapped moisture combines with both of these factors to turn a minor adhesion weakness into visible peeling within a single season.
At high relative humidity, laboratory aging tests show acrylic paint binders degrade through surfactant migration and hydrolysis, a chemical breakdown that weakens the paint film from the inside out (MDPI polymer study, 2022). That finding matters for Florida homeowners because our climate spends much of the year at the exact humidity levels where this degradation happens fastest.
How to diagnose the moisture source before you repaint
Repainting over a moisture problem buys you a year, maybe two, before the same peeling returns in the same spot. Finding the source first is what actually solves it.
- Map the peeling pattern. Note the height above grade, compass orientation, and distance from rooflines, window corners, or control joints. Peeling clustered near a roofline often points to flashing, while peeling near ground level often points to splash-back or grading.
- Test the substrate with a moisture meter. A pinless meter is faster for scanning large areas, while a contact pin meter gives a more precise reading at a specific spot. Take several readings around each peeling area and compare them to a dry section of the same wall for a baseline.
- Check the usual suspects. Walk the perimeter looking at roof flashing, gutters and downspouts, window and door flashing, AC condensation drip lines, and the slope of the ground against the foundation.
- Bring in a specialist when readings stay high. If moisture content remains elevated after a few dry days, or if you cannot identify an obvious external source, an infiltration specialist or experienced contractor can trace it further.
Pro Tip: Take moisture readings in the early morning before the sun warms the wall, since afternoon heat can mask a damp substrate by evaporating surface moisture while deeper layers stay wet.
When to paint in Florida without inviting another peeling cycle
Florida's rainy season runs roughly from late spring through fall, which overlaps with our highest humidity months and makes exterior painting riskier during that stretch. Mornings tend to be more humid than afternoons here, since overnight dew has not yet burned off, so many painting crews prefer to start mid-morning once surfaces have dried.
Manufacturer and contractor guidance generally points to painting when relative humidity sits below roughly 70% and temperatures fall in a moderate range, since high humidity slows drying and curing and raises the risk of adhesion failure, blistering, and mildew growth later on (BHG, 2025).
- Avoid painting if rain fell within the past day or two and the wall has not had time to dry through.
- Watch the overnight forecast: if dew point is expected to rise sharply within 24 hours, the still-wet film can trap moisture before it cures.
- After a heavy rain, give stucco and masonry at least a few dry, sunny days before painting, since these materials hold water longer than wood or siding.
- Skip painting in the late afternoon during rainy season, when a sudden storm can hit a half-dried wall.
Surface prep and repairs that stop peeling from coming back
Prep work determines whether a paint job lasts five years or fifteen. Skipping it is the single most common reason peeling returns.
- Handle lead-safe removal first on older homes. If your home was built before 1978, EPA RRP guidance calls for extending plastic sheeting at least 10 feet beyond the work area and using HEPA-equipped tools to contain lead dust during scraping (EPA RRP). Extra precautions apply when work occurs within 10 feet of a property line.
- Clean thoroughly. Pressure wash to remove dirt, chalk, and mildew, then give the surface adequate drying time, often a full day or more in humid weather, before any patching or priming.
- Repair the substrate. Patch cracks in stucco and masonry, re-skim badly damaged stucco sections, and re-point mortar joints where needed so water cannot find a new entry path.
- Choose the right primer for the surface. Chalky, powdery substrates need a penetrating sealing primer, while slick or glossy surfaces need a bonding primer. Sherwin-Williams project guidance notes that removing loose paint, cleaning mildew, and applying the correct primer are the steps that actually prevent flaking from recurring, more so than the paint brand itself.
Proper prep, including full drying time and correct primer selection, is consistently cited by painting professionals as the deciding factor in whether an exterior paint job holds up in a humid climate (Sherwin-Williams). For a deeper walkthrough of this sequence, our guide to prepping exterior walls before painting covers the order of operations step by step.
Which paints and primers actually resist Florida humidity
Not every exterior paint performs the same way on a Florida wall, and the differences show up fastest on stucco and block.
- 100% acrylic paints offer a good balance of vapor permeability and flexibility, letting some moisture vapor escape while still resisting water intrusion.
- Elastomeric coatings bridge hairline cracks well and work on masonry, but their lower permeability can trap moisture if the wall assembly is not drying properly behind it.
- Masonry-specific coatings are formulated for the alkaline surface of stucco and concrete block and typically outperform generic exterior paint on those substrates.
- Mildew-resistant formulations with built-in mildewcides are worth the upgrade in humid, shaded areas where mildew returns year after year.
Sheen matters too. Flat finishes on horizontal or low-slope surfaces tend to hold moisture and dirt longer, so satin or semi-gloss finishes on trim, doors, and other exposed areas shed water more effectively and clean up easier. Whatever product you choose, follow the manufacturer's stated temperature and humidity application range on the label. Our breakdown of low-maintenance exterior paint options and our Lake County paint recommendations go deeper into specific product categories.
Maintenance that keeps peeling from starting over again
A little routine upkeep stretches the life of an exterior paint job significantly in our climate.
- Clean gutters and downspouts regularly so water does not splash back onto walls or pool against the foundation.
- Check that the grade around your home slopes away from the foundation to prevent reservoir saturation at the base of walls.
- Inspect attic and soffit ventilation and AC condensation lines, since trapped indoor humidity can work its way outward through walls.
- Walk the exterior twice a year, looking for early blistering or cracking you can spot-prime before it spreads.
- Pressure wash on a routine schedule to remove mildew and chalk buildup before it undermines the paint film.
Pro Tip: A coat of paint in good condition that just has mildew growth often only needs a thorough cleaning, not a full repaint. Save the repaint budget for when the film itself is actually failing.
Most well-prepped, quality exterior jobs in Central Florida hold up for several years before needing attention again, though shaded, moisture-prone walls may need earlier spot maintenance.
How Tru Painting handles humidity-driven peeling
We start home inspections for peeling paint with moisture mapping, not a paint can. We trace the pattern back to its source, whether that is a flashing issue, grading problem, or a substrate that never dried properly, and repair it before any repainting begins. Our three service tiers, Cosmetic Refresh, Enhanced Prep & Durability, and Maximum Prep & Protection, let homeowners choose how much substrate repair and protection their project needs.
On pre-1978 homes, we follow lead-safe work practices during scraping, including proper containment, consistent with EPA RRP guidance. When you talk to any contractor about peeling paint, ask how they test for moisture, what primer and paint system they plan to use, what their workmanship warranty covers, and how much substrate repair is included in the bid.
Spotting the visual signs before they spread
Different failure patterns point to different causes, and learning to read them saves time before you even call a contractor.
Blistering and bubbling usually mean moisture is trapped beneath the film, pushing it away from the wall as it heats up during the day. Map cracking, a web-like pattern of fine cracks, often shows up on older, brittle paint layers that have lost flexibility over multiple heat and humidity cycles. Peeling in sheets is the most advanced stage, where adhesion has failed completely and the paint separates cleanly from the substrate. Chalking, a powdery residue that rubs off on your hand, signals UV breakdown of the paint binder rather than a moisture problem.
Mapping where each type of damage appears, by height, orientation, and proximity to joints or rooflines, gives you a diagnostic trail that is far more useful than judging a wall by how bad it looks from the curb. A cluster of blistering near a window, for example, points toward flashing, while chalking spread evenly across a south-facing wall points toward sun exposure rather than a leak.

How Florida's heat compounds the humidity problem
Humidity rarely acts alone here. Florida walls routinely swing from cool, damp mornings to surface temperatures well above the surrounding air by early afternoon, and that daily cycle stresses the paint film in a way that drier climates do not replicate.
Heat accelerates the same chemical breakdown that humidity starts: UV exposure breaks down the binder that holds pigment and film together, while the day's heat speeds up chalking and brittleness. When a humid, moisture-soaked wall then bakes in direct sun, the trapped moisture tries to escape as vapor, and a film already weakened by UV exposure has less flexibility to let that vapor pass without blistering. That combination, not either factor alone, is why Florida exterior paint often shows damage sooner than the same product would in a milder climate. Choosing a vapor-permeable, UV-resistant paint system and keeping up with maintenance both matter more here than in most parts of the country.
Quick decision checklist: DIY or call a professional
Small, isolated peeling in one spot, especially if you can trace it to an obvious source like a cracked caulk line, is reasonable to patch and prime yourself. Widespread peeling, recurring failures in the same area, or peeling across multiple walls calls for a professional inspection. Always fix the moisture source before repainting, and on pre-1978 homes, hire a lead-safe certified contractor rather than scraping it yourself.
— Kyle
Book a humidity-focused exterior inspection with Tru Painting
If peeling keeps coming back no matter how many times you repaint, the fix usually is not a different paint brand, it is a different process. We start every exterior project with an inspection focused on moisture sources, not just surface appearance, so the repair actually holds.

Here is what that looks like in practice:
- A full exterior inspection, including moisture mapping around flashing, grading, and AC drain lines
- Cleaning and mildew removal before any patching begins
- Stucco, masonry, and wood repairs matched to what the inspection finds
- A paint and primer system chosen for Florida humidity, applied under our Residential Exterior service
To prepare, clear access to your exterior walls, note any areas where you have seen peeling return more than once, and have any past repair history on hand. From there, we scope the project and walk you through which of our three protection tiers fits your home and budget.
FAQ
What can I do about paint peeling due to humidity?
Stop the moisture source first, whether that means fixing a flashing issue, clearing gutters, or improving grading, then let the wall dry fully before repainting. Once dry, scrape loose paint, clean and repair the substrate, and apply a primer and paint system suited to humid conditions, following Sherwin-Williams repair guidance.
What are the worst months for humidity in Florida?
Florida's rainy season runs roughly from late spring through fall, and that stretch generally brings the highest humidity levels of the year. Painting projects scheduled during this window carry a higher risk of trapped moisture and slow curing.
How humid is too humid to paint?
Manufacturer and contractor guidance generally advises against exterior painting when relative humidity climbs much above 70%, since drying and curing slow down and adhesion problems become more likely (BHG, 2025). Checking the forecast for rising dew points over the next 24 hours matters as much as the humidity reading at the moment you paint.
How fast does paint dry in 90 degree weather?
Heat alone speeds up surface drying, but high humidity can offset that effect and slow full curing even at elevated temperatures. A film that feels dry to the touch can still be curing underneath for days, so avoid a second coat or pressure washing too soon after painting in hot, humid conditions.
Does cleaning vinyl siding help prevent paint and moisture problems?
Regular cleaning removes mildew, pollen, and grime that hold moisture against the surface, which helps limit the conditions that lead to peeling nearby trim or painted surfaces. For a practical cleaning method, see this guide to cleaning vinyl siding.
Sources
- LEAD SAFE Renovation, Repair and Painting
- Data Fusion Approach to Simultaneously Evaluate the Degradation Process Caused by Ozone and Humidity on Modern Paint Materials
- Should You Paint Inside if It’s Humid Out? Here's What the Experts Say
- How to Fix and Repair Paint Flaking | Sherwin-Williams
- Building Science analysis on vapor-permeable exterior insulation and moisture performance