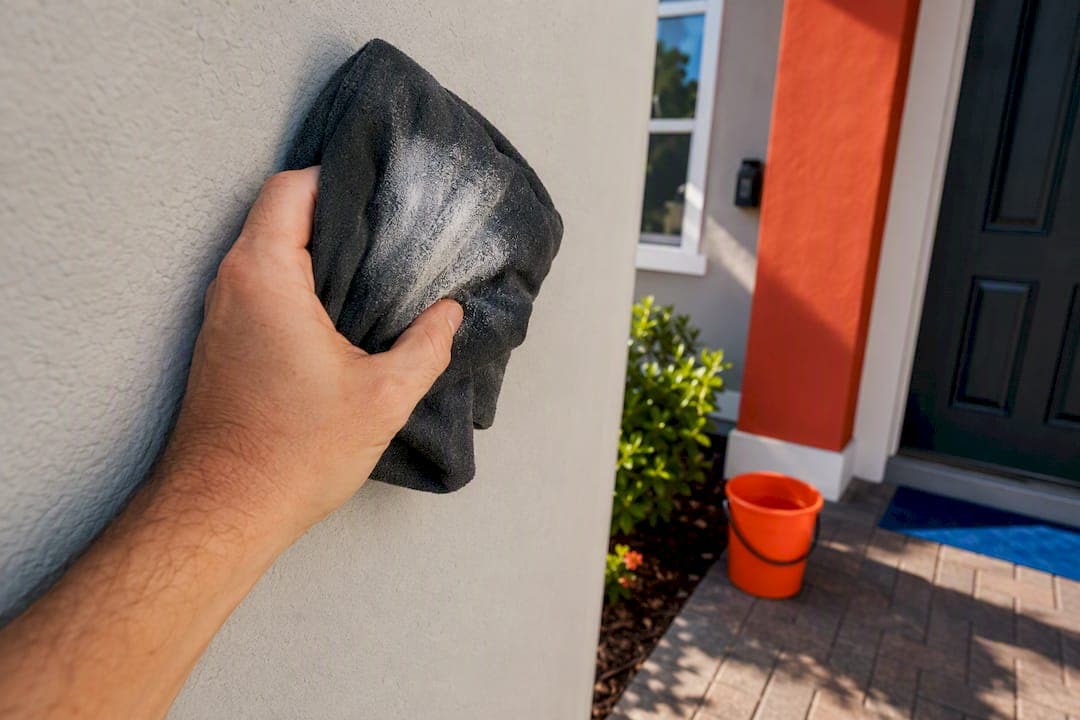
Yes, in most cases you can repaint over chalking paint, as long as you clean the surface thoroughly and prime it correctly. The only exception is heavy, persistent chalking, which signals the old paint film has broken down and needs full removal. Before you buy a single gallon of paint, run the rag test: wipe a dry cloth firmly across the surface and see how much powder comes off. That result tells you exactly how much work stands between you and a finish that lasts.
TL;DR:
- Light chalking can often be removed with simple washing and pressure washing, but heavy chalking indicates the paint film has failed and requires complete removal.
- A rag test helps determine chalking severity: a faint powder suggests cleaning suffices, while heavy residue means significant preparation before painting.
- Applying a compatible primer—such as adhesion, chalk-binding, or sealer—depends on the surface condition and chalking level, with proper testing essential.
- Repainting over chalking surfaces without thorough cleaning and correct primer choice risks premature failure and repeated costs.
- Professional pressure washing and substrate repairs are recommended for extensive chalking or hard-to-clean surfaces, especially on higher or steep roof areas.
Table of Contents
- How to Test and Judge Chalking Severity
- Step-by-Step Cleaning: Washing, Scrubbing, and Pressure-Washing Chalk Away
- Scraping Loose Paint, Sanding, and Minor Repairs
- Which Primer or Additive Works Best on Chalky Surfaces?
- Choosing the Right Topcoat and Applying It Correctly
- When to Call a Painting Contractor
- Keeping the New Paint From Chalking Again
- What Homeowners Get Wrong About Chalking Paint
- Ready to Repaint Without the Guesswork?
- Sources
How to Test and Judge Chalking Severity
The rag test is the single best diagnostic tool you have, and it takes about thirty seconds. Wipe a clean, dark colored rag firmly across a few square feet of wall in three or four spots around the house, since sun exposure varies by elevation. A light, fine powder residue on the cloth means light chalking, which usually clears up with a good wash. If your hand comes away caked in chalk after one pass, or the rag looks like it hit a flour bin, you're dealing with heavy chalking.
Chalking shows up most on stucco, masonry, older exterior acrylics, and some oxidized metal finishes exposed to years of UV rays and weather. It's a natural byproduct of paint resin breaking down over time, not necessarily a sign of a bad paint job.
Before you assume it's ordinary chalking, rule out other culprits:
- Efflorescence (a white, crystalline salt deposit on masonry that dissolves differently than chalk)
- Active moisture intrusion behind the wall, which will make any new paint fail regardless of prep
- Substrate failure, like crumbling stucco or rotted wood trim, that needs repair before anything else
If persistent heavy chalking returns after cleaning, the paint film underneath has already failed, and cleaning alone won't fix it.
Step-by-Step Cleaning: Washing, Scrubbing, and Pressure-Washing Chalk Away
Cleaning is where most repaint jobs succeed or fail. Skip it, and even the best primer won't bond. Here's the sequence we recommend to every homeowner, whether you're doing this yourself or handing it to a contractor.
- Run the rag test on a few sections to confirm how much chalk you're dealing with.
- Mix a cleaning solution. A TSP substitute mixed per label directions, or a dedicated exterior house wash, works for most light-to-moderate chalking. Wear gloves and eye protection, and protect nearby plants with a water rinse before and after.
- Wash with a soft brush or sponge, working from the bottom up to avoid streaking, then rinse top to bottom.
- Escalate to a pressure washer for larger areas or stubborn chalk. Stick to 1,200 to 1,800 psi on siding and stucco, hold the nozzle at a 45-degree angle, and keep the wand at least 12 to 18 inches from the surface to avoid gouging softer materials.
- Repeat the rag test. If the cloth still shows heavy powder, wash again. Manufacturers recommend repeating this cycle until only a faint dusting remains.
- Rinse thoroughly and let the surface dry completely, typically 24 to 48 hours depending on humidity, before moving to prep or primer.
Brick with heavy chalk run-down staining below window sills or roof lines can be tougher to fully lift, and repeated pressure washing sometimes just pushes the discoloration into the mortar joints. If a wash-and-scrub cycle isn't clearing it after two attempts, that's a sign to call in a professional cleaning service rather than keep hammering the same spot.
Pro Tip: If your home was built or painted before 1978, treat this step with caution and test for lead paint before scraping or sanding anything. The EPA's lead-safe guidelines exist for good reason, and skipping them isn't worth the risk to your family.
For a full exterior prep walkthrough beyond just the wash, see our guide on how to prep exterior walls before painting. If you'd rather hand off the pressure-washing step entirely, Florida Cleaning Crew's guide to pressure washing house exteriors covers the same psi and distance principles in more depth.
Scraping Loose Paint, Sanding, and Minor Repairs
Once the surface is clean and dry, inspect it for loose or peeling paint. Any section that flakes off with a putty knife needs to come off now, not after you've primed over it. Scrape those areas back to sound paint or bare substrate, then feather the edges with sandpaper so the transition doesn't telegraph through your topcoat.
This is also the moment to fix what the wash exposed:
- Fill small stucco cracks with a flexible masonry patch before priming
- Sand wood checks smooth and spot-prime bare wood
- Touch up failing mortar joints on brick or block
Wipe away all sanding dust with a tack cloth or damp rag, and let everything dry fully. Homeowners often assume the primer or paint brand matters most, but honestly, the quality of this prep stage determines how long your paint job lasts more than any product on the shelf. If you suspect lead paint, follow the same EPA precautions here as during cleaning. For stucco-specific cracking, our stucco repair guide walks through patching techniques in more detail.
Which Primer or Additive Works Best on Chalky Surfaces?
This is where most DIY repaints go wrong, and it's an easy fix once you understand the options. You have three real paths, and picking the wrong one wastes both time and paint.
- Adhesion primers, like KILZ ADHESION, are modified acrylic formulas built to grip tough, glossy, or lightly chalky surfaces, and they can reduce or eliminate the need for aggressive sanding on dense substrates.
- Chalk-binding primers, like Dunn-Edwards SURFACO Select, are formulated specifically to lock down chalk residue on masonry and stucco repaints, with added alkali resistance for concrete and block.
- Clear sealers, like KILZ KLEAR, penetrate and bind chalky, porous surfaces without changing the existing color, a smart pick if you're repainting the same shade and don't want a visible primer coat underneath.
For stucco and masonry specifically, a Valspar masonry and stucco primer/conditioner offers similar chalk-binding penetration and works well on new, uncured masonry too.
If you'd rather work with your existing paint instead of buying a dedicated primer, a bonding additive is worth considering. Emulsa-Bond mixes directly into water-based paint, and manufacturer guidance suggests roughly 30% for surfaces that are sound but lightly chalky, up to 50% for porous or heavily chalked substrates.
Always test any primer or additive combination on a small, inconspicuous section first and let it cure before committing to the whole house. One more thing: don't mix different primer brands or binder types across the same wall. Differing resins and sheens can cause "sheen telegraphing," where patches show through the topcoat in different light. Follow the label's recoat window, typically one to four hours for most primers, before applying your topcoat. More detail on sequencing this correctly is in our exterior paint preparation best practices guide.
Choosing the Right Topcoat and Applying It Correctly
Once your primer has cured, reach for a high-quality 100% acrylic exterior paint. Acrylic resins flex with temperature swings and resist UV breakdown far better than older oil-based or budget latex formulas, which is exactly what prevents chalking from coming back prematurely.
A few application rules matter more than people expect:
- Apply within the manufacturer's temperature and humidity range, typically 50 to 90°F and under 85% humidity, to avoid poor film formation
- Maintain full film build with two coats rather than stretching one thin coat to cover more wall
- Back-roll any sprayed sections to work paint into the texture and avoid a skim coat that peels early
- Skip priming only if the surface tested completely chalk-free on your final rag test, and even then, a primer coat adds insurance on older paint systems
Before you call the job finished, press a strip of painter's tape onto a dried test section and pull it back. If paint lifts with the tape, adhesion failed somewhere in the process and needs another look before you finish the rest of the house.
When to Call a Painting Contractor
Some jobs are worth handing off, and chalking projects hit that line faster than most homeowners expect. Call a professional when you're facing:
- Large elevations or a full house exterior with heavy, widespread chalking
- Signs of moisture intrusion or efflorescence you can't diagnose confidently
- Second-story or steep-roof access that isn't safe with a homeowner ladder setup
- Structural repairs to stucco, wood trim, or masonry beyond a simple patch
A contractor like Trupainting LLC brings a documented inspection process, professional-grade pressure washing equipment, and substrate repair experience that catches problems a rag test alone won't reveal. Professional crews also validate adhesion with test patches and years of pattern recognition on what a given paint system needs, then back the work with a warranty that removes the guesswork. If your exterior is heading toward that scope, our residential exterior painting services page outlines what a full professional prep and repaint includes.
Keeping the New Paint From Chalking Again
A little maintenance goes a long way toward protecting the work you just did. Build these habits into your yearly routine:
- Rinse siding and trim gently once a year with a garden hose or mild soap solution to clear dirt and pollutants before they break down the paint film
- Choose a quality 100% acrylic system at repaint time rather than a budget formula that chalks faster under UV exposure
- Fix gutters, downspouts, and grading issues that trap moisture against walls, since damp surfaces accelerate resin breakdown
- Trim back shrubs and trees touching the house to cut down on trapped humidity and debris buildup
- Spot-clean stained or dirty areas as they appear instead of waiting for a full wash cycle
Pro Tip: Mark your repaint date on a calendar reminder five to seven years out. Most quality acrylic exteriors start showing early chalking signs right around that window, and catching it early means a wash and a fresh coat instead of a full strip-down.
For more on stretching the life of your finish, check our guide on protecting painted surfaces long term.
What Homeowners Get Wrong About Chalking Paint
Most homeowners treat chalking as a paint-quality problem when it's really a maintenance-timing problem. Paint chalks because UV exposure breaks down resin over years, not because someone bought the wrong brand a decade ago. The mistake isn't the original paint choice. It's skipping the wash-and-test cycle before assuming a fresh coat will fix things.
The conventional advice you'll find online tends to jump straight to "prime and paint," skipping the diagnostic step entirely. That's backwards. The rag test costs nothing and takes thirty seconds, yet it's the difference between a homeowner buying the right primer once and a homeowner repainting the same wall twice in three years because chalk kept bleeding through.
If there's one thing worth prioritizing above product selection, it's patience during cleaning. A $40 gallon of premium primer can't compensate for a wall that wasn't washed enough. Get the rag test clean, let the surface dry fully, and the primer and paint choices become much less complicated than the internet makes them sound.
— Kyle
Ready to Repaint Without the Guesswork?
If everything above sounds like more scraping, testing, and mixing ratios than you want to handle on a ladder, that's exactly the gap Trupainting LLC fills for homeowners across Lake County and Central Florida. Instead of guessing at psi settings or primer combinations, you get a crew that's already run the rag test on hundreds of homes and knows which chalk-binding primer or bonding additive a given stucco or siding needs before the first wash even starts.

Our three-tier service packages let you pick the level of prep and protection that fits your home and budget, from a straightforward wash-and-repaint to full substrate repair with premium primer systems. Every job includes professional pressure washing, adhesion testing, and a workmanship warranty you won't get from a weekend DIY attempt. If your exterior is showing chalk this season, get a bid on our residential exterior painting services and find out what proper prep actually costs before you commit to doing it yourself.
Sources
- Flood E-B Emulsa-Bond 1 Gal Exterior Latex Paint Bonding Additive (Lowe's product page)
- KILZ® ADHESION Primer (KILZ product page)
- How to Fix Paint Chalking (Sherwin-Williams project center)
- Chalking (Dunn-Edwards paint problem solver)