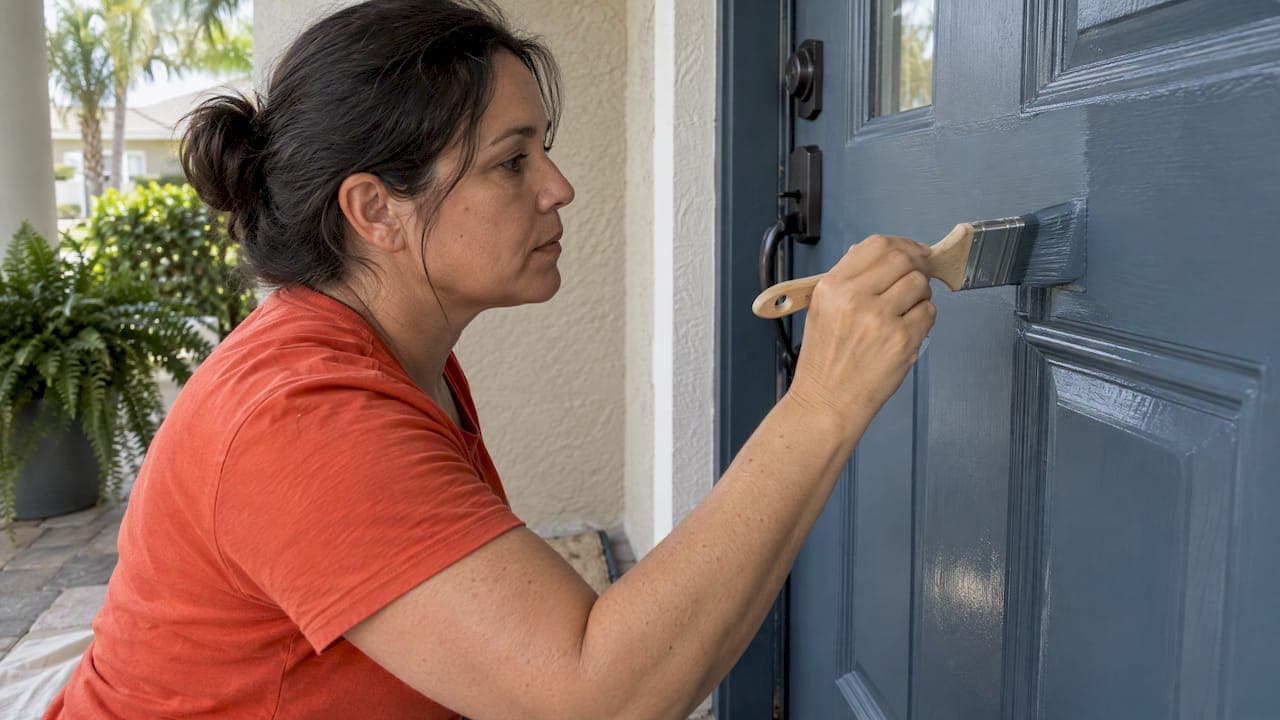
The fastest route to a neat, durable front door finish is careful prep, the right primer for your door's material, and thin, even coats of semi-gloss door-and-trim enamel. Remove the door and spray it only when you want a factory-smooth result. Paint it in place for a modest refresh on a sound door, and call a pro when the prep is heavy.
TL;DR:
- Test existing paint with denatured alcohol first; choose bonding primer for fiberglass, ferrous metal primer for steel, and stain blocking primer for tannin prone wood.
- Brush recessed panels first, roll the flats while the paint remains wet, and apply thin coats; sand lightly with 220 grit between coats.
- DIY materials cost roughly $30 to $80, compared with $100 to $500 for professional work; heavy prep, multiple doors, or spraying can favor hiring.
- Paint in shade on a calm, mild day with moderate humidity; follow the label for recoating, and allow overnight drying between coats for durability.
Table of Contents
- What tools and materials do you need before you start?
- How do you prep a front door so the paint sticks?
- Which primer and paint should you choose for your door?
- How do you paint a front door in place, step by step?
- Should you remove and spray the door or paint it in place?
- How long should you wait, and what weather is best?
- How do you fix common problems and keep the finish looking good?
- What does it cost to paint a front door yourself versus hiring a pro?
- What do we bring to front door painting?
- How do you choose a front door color that boosts curb appeal?
- What safety precautions should you take when painting an exterior door?
- How do you handle decorative glass and intricate door designs?
- What is our take on painting a front door yourself?
- Need a hand with your front door? Tell us about it
- FAQ
- Sources
What tools and materials do you need before you start?
Nothing kills momentum like a mid-job run to the hardware store, so gather everything first. Here is what we put on the tailgate before any door job:
- Angled sash brush (2 to 2.5 inches): cuts clean lines around panels and trim.
- Mini foam or microfiber roller: leaves flat areas smooth with less texture than a brush.
- Sandpaper in coarse, medium and fine grits: coarse for stripping failing paint, medium for smoothing, fine for scuffing between coats.
- Scraper: lifts loose, flaking paint that sanding alone would only smear.
- Primer matched to your door: bonding primer for slick fiberglass, ferrous-metal primer for steel, and a stain-blocking primer for tannin-heavy wood.
- Semi-gloss exterior door-and-trim enamel: the finish that holds up to hands, weather and wiping.
- Denatured alcohol and cotton balls: for testing what kind of paint is already on the door.
- Tack cloths: pick up sanding dust that would otherwise end up in your wet paint.
- Painter's tape and drop cloths: protect glass, hardware, the threshold and the porch floor.
- Wood filler or putty and a putty knife: fills dents and gouges.
Sanding and scraping do different jobs. Scraping removes paint that has already let go, while sanding feathers the edges so those spots do not show through your new coat. Skip either one and the repair telegraphs through the finish.
Optional pro gear includes an airless or HVLP sprayer and a respirator. A sprayer pays off if you plan to remove the door and want that smooth, brush-mark-free surface. A respirator earns its place whenever you sand old paint or spray.
Pro Tip: Buy enough primer and paint for the job, even if the label suggests you need less. Running short halfway through a coat leaves a visible seam.
How do you prep a front door so the paint sticks?
Prep decides how long the finish lasts, and it is where we spend the most time on every job. Our exterior paint preparation best practices go deeper on the principles. Here is the door-sized version:
- Clean the door thoroughly. Wash both faces, the edges and the trim with a mild degreasing detergent and warm water, paying attention to the bottom rail where grime collects. Rinse and let the door dry completely before anything else. Paint over moisture or film traps it and fails early.
- Test the existing paint. Rub a cotton ball soaked in denatured alcohol on an out-of-the-way spot. Benjamin Moore explains that if the paint rubs off, it is water-based, and if it stays put, it is oil-based. That result tells you which primer and topcoat will bond properly.
- Remove peeling and loose paint. Scrape anything flaking, then sand the edges of the bare spots until you cannot feel a ridge with your fingertips. Feathered edges keep patches from showing.
- Sand the whole door. Scuff intact paint so primer has something to grip. On bare wood, work with the grain and finish with 220. On glossy fiberglass or steel, a light scuff sanding is enough; the bonding primer does the rest.
- Fill dents and gouges. Press filler into damage, let it cure, then sand it flush. Run your hand across the repair with your eyes closed. If you can feel it, you will see it under semi-gloss.
- Remove dust. Wipe every surface with a tack cloth, including the edges and the recessed panel corners where dust hides.
- Deal with hardware. Unscrew the handle, deadbolt, hinges' faceplates if you can, and the knocker. If something cannot come off, tape it carefully with a fresh, sharp edge. Removal gives the cleanest result, because tape lines on metal always leave a hint of ridge.
- Protect glass and surroundings. Tape glass edges, lay drop cloths on the porch, and tape off trim you are not painting.
If the door is extremely dirty or sits on a grimy entry, pressure washing the surrounding surfaces first makes the whole area cleaner. For that kind of heavy-duty prep, a contractor such as All Day Power Washing shows what professional-level washing looks like, though a door itself needs only a gentle hand wash.
Which primer and paint should you choose for your door?
Match the primer to the door's material, then top it with a durable semi-gloss. For more on how sheens behave outdoors, see our guide to types of exterior paint finishes.
- Fiberglass: use a bonding primer. Fine Paints of Europe's how-to pairs fiberglass with its Key Primer for this reason.
- Steel: use a ferrous-metal primer to stop rust before it starts.
- Wood: use an oil-based or stain-blocking primer, especially on tannin-heavy species that bleed brown through light colors.
- Previously painted doors: match the primer to what your denatured alcohol test showed.
A versatile option for many substrates is Zinsser Bulls Eye 1-2-3. Its technical data sheet describes a fast-drying primer that bonds to glossy surfaces without de-glossing, resists mildew and can be topcoated in about one hour under recommended conditions.
For the topcoat, semi-gloss is the standard answer. Consumer Reports recommends a semi-gloss finish for front doors because it lasts longer, produces smoother surfaces and is easier to clean. Satin is acceptable if you want a softer look, though it shows less sheen and wipes clean a little less easily.
Water-based or oil-based? Water-based (acrylic) enamels dry faster, clean up with water and resist yellowing. Oil-based enamels tend to level out beautifully and brush smoothly, but they dry slowly and are better reserved for situations like tannin bleed on bare wood. Whatever you choose, do not put an incompatible product over what is already there: that is exactly why the alcohol test matters.
How much do you need? A standard single entry door usually takes enough primer and paint for two coats. Add a little if the door has sidelights or you are making a dramatic color change.
A semi-gloss finish is recommended for front doors because it lasts longer, produces smoother surfaces, and is easier to clean. That is the practical reason we reach for it first. (Consumer Reports)
How do you paint a front door in place, step by step?
Painting in place is the common homeowner route, and with good technique it can look excellent. The goal is thin coats, a wet edge and a disciplined order.
- Set up hardware. Remove it or tape it with fresh, crisp edges. Wedge the door open slightly or prop it so it cannot swing while you work.
- Spot-prime. Prime any bare wood, metal or filled areas. Prime the whole door if you changed paint types or the surface is glossy and you did not use a bonding primer. Let the primer dry per the can.
- Lightly scuff and dust. A pass with 220 grit and a tack cloth makes primer feel like glass.
- Start with the recessed panels. Sherwin-Williams project guidance says to brush recessed panels first, then roll the flat areas. Use your angled brush to work the corners and edges of each panel, brushing into the corners first and then out along the molding.
- Roll the flats right after. While the panel paint is still wet, use the mini roller to fill the flat sections. Sherwin-Williams' technique summary describes painting edges first and then filling the center, which keeps you from leaving dry lines.
- Follow the door's construction. On a paneled door, work in this order: panels, then the center vertical stile, then the horizontal rails from top to bottom, then the outer vertical stiles. Each section runs into the one next to it while the edge is wet.
- Keep a wet edge. Overlap each new stroke into the paint you just laid down, and do not return to fiddle with an area that has started to set. Fiddling is what makes lap marks and brush drag.
- Lay off lightly. Finish with long, light strokes in the direction of the grain or the rail, using only the tip of the brush.
- Apply thin coats. Heavy coats pool and sag. Thin, even coats let the enamel self-level.
- Let it dry, scuff, and recoat. Follow the can for recoat times. A very light sanding with 220 grit and a quick tack-cloth wipe between coats gives the second coat a better grip and a smoother finish.
- Paint the edges. Do not forget the top, bottom and latch edge. Moisture getting into unsealed edges is a classic cause of failure.
- Pull the tape at the right moment. Remove it while the final coat is still slightly tacky, pulling slowly at a low angle so you do not lift paint.
Pro Tip: Work from a wet edge, not a dry one. If you step away for a snack mid-panel, you will see the line later.
Using the angled brush and mini roller well
An angled sash brush loads best when you dip only a third of the bristles and tap, not wipe, off the excess. Hold it like a pencil so you can control the tip along the panel moldings. For the roller, keep it lightly loaded and roll in a slow, steady pattern, finishing each pass with a light roll back across the area to even the texture. A foam or fine-nap roller leaves the smoothest surface.
Why timing and weather matter while you work
Heat and sun are your enemies here. Sherwin-Williams notes that paint dries faster in heat and direct sun, which can prevent proper self-leveling, so painting in shade in the early morning or late afternoon helps you get a smooth finish. Wind carries dust and bugs onto the wet surface, so pick a calm day. In Central Florida, humidity also slows drying, which is why our guide to how weather affects exterior painting is worth a read before you pick a weekend.
Finishing checks before you call it done
Step back and look at the door from several angles, including a low side angle where light rakes across it. That is where runs, sags and missed spots show. Fix wet defects right away by lightly re-brushing, and leave any dried flaws until after cure. Then wait before you reinstall the hardware: reattaching handles too early can stick to or mar still-soft paint.
Should you remove and spray the door or paint it in place?
Both methods work. Which one is right depends on your standards, time and budget.
- Remove and spray: Sherwin-Williams practitioner guidance notes that achieving a factory-smooth finish usually requires removing the door and spraying it flat, while painting in place risks drips and uneven coverage. Lying the door flat lets gravity help the finish level, and spraying eliminates brush and roller marks. This approach is especially worth it for paneled doors and bold, dramatic colors where every flaw shows.
- Paint in place: it is faster, cheaper and needs no sprayer, a second set of hands or a place to lay the door flat. On a sound door, a good in-place job with thin coats and proper technique is more than acceptable for a refresh.
- Labor and cost trade-offs: removal and spraying add time, equipment and sometimes the need to secure your home while the door is off. Painting in place keeps your home secure and your schedule simple.
- When a pro makes sense: heavy prep, multiple doors, a deep color change on a paneled door, or a desire for a sprayed finish without buying a sprayer. A pro can also handle the heavy lifting and the reinstallation.
Choose in-place painting for a modest refresh, and choose removal and spraying when the finish itself is the point.
How long should you wait, and what weather is best?
Always follow the paint can first. In general, expect the surface to be tack-free in several hours and ready for a second coat after the recommended interval, while full hardness takes days. Overnight drying between coats gives the best durability, which lines up with the Fine Paints of Europe procedure of applying thin coats with overnight drying.
Mild temperatures, moderate humidity and shade give you the best self-leveling. Avoid painting in direct sun, in high wind, or when rain is coming. Spring and fall are good seasons, as Family Handyman suggests.
A few practical habits help while the paint cures:
- Leave the door slightly open or use a door stop so a fresh surface does not stick to the frame.
- Keep pets, kids and bikes away from the entry.
- Be gentle when removing tape, and wait on weatherstripping and hardware until the paint has had time to harden.
How do you fix common problems and keep the finish looking good?
Small defects happen even to experienced painters, and most are fixable once the paint has fully cured.
- Runs, sags and brush marks: let them dry completely, sand the spot smooth with 220 grit, wipe with a tack cloth and repaint with a thin coat, feathering it into the surrounding area.
- Bubbling or peeling: this almost always traces back to poor prep, moisture under the paint or the wrong primer. Scrape back to a sound edge, sand, prime and repaint. Prevent it by cleaning, testing the old paint and priming correctly.
- Dust or bugs in the finish: sand lightly once cured and touch up.
- Routine care: wipe the door with a soft cloth and mild soap a few times a year, and touch up chips quickly before moisture gets in.
- Plan ahead: a door in harsh sun or heavy weather may need repainting sooner. Watch for fading, chalking or cracks at the edges as signals.
What does it cost to paint a front door yourself versus hiring a pro?
Set expectations before you commit your Saturday. PaintPricing's 2026 cost guidance puts a professional front door paint job at about $100 to $500, while a DIY homeowner spends roughly $30 to $80 on materials.
Pro: about $100 to $500. DIY materials: about $30 to $80. The main cost drivers are prep, door material, and whether the door is removed and sprayed. (PaintPricing)
Labor often dominates a pro quote. Removing and spraying adds cost but improves the finish. Painting both faces costs more than one, and heavy prep such as stripping, filling or repairing damage pushes the price up.
Before you ask for quotes, gather:
- The door material (wood, steel or fiberglass)
- The number of doors and whether there are sidelights
- The current condition: peeling, rust, dents or glossy paint
- Whether you want one face or both, and the color you have in mind
With that, any painter can give you a sharper number.
What do we bring to front door painting?
We are a locally owned painting contractor serving Lake County and Central Florida. Our team handles exterior and interior painting, cabinet refinishing, pressure washing and specialty coatings, and our approach comes down to thorough preparation, premium products and clear communication. That is the same prep-first logic you read about above, applied across a whole house.
The technique here reflects how we think about every door: clean it, test it, prime it correctly, and keep coats thin. If you want to see how we work on residential projects, our residential exterior services page lays out what we do.
How do you choose a front door color that boosts curb appeal?
Color is where a door earns its attention. Start with samples, as Family Handyman recommends: brush swatches on poster board, tape them to the door and look at them in morning, midday and evening light, because color shifts dramatically with the sun.

Think about your home as a whole. A door can echo an accent in your roof, shutters or landscaping, or deliberately contrast with a neutral body color. Bold, bright front door colors make a statement, while deeper tones like navy, charcoal or forest green read as classic and polished. A white or cream house often carries nearly any color well, and a brick or stone facade pairs nicely with colors that pick up its undertones.
Consider the setting too. In sunny Central Florida, saturated colors can look different under strong light, so test outdoors. We rounded up trends in front door paint colors for Central Florida if you want local inspiration.
Finally, think beyond the door. A fresh coat looks even better with tidy planting and clean walkways, and Divine Landscaping's curb appeal guide shows how landscaping can pair with a newly painted entry to strengthen the whole first impression.
What safety precautions should you take when painting an exterior door?
Door painting is a gentle project, but a few precautions keep it that way.
- Ventilate and protect your lungs. Open nearby windows and doors when you sand, prime or use oil-based products. Wear a dust mask or respirator while sanding, and a proper respirator if you spray.
- Be careful with old paint. Older homes may contain lead paint. Do not dry-sand or scrape suspected lead paint without proper precautions, and consider having it tested or hiring a certified professional.
- Protect your eyes and skin. Safety glasses and gloves are cheap insurance when sanding, handling denatured alcohol and working with oil-based paints.
- Handle solvents and rags responsibly. Keep denatured alcohol and oil-based products away from flames and sparks. Rags soaked with oil-based finishes can heat up and ignite, so lay them flat outdoors to dry before disposal, following the product label.
- Stay steady. Use a stable stepladder if you reach the top of a tall entry, and keep tools off the floor where you walk.
- Keep the house secure. If you remove the door to spray it, plan how to protect the opening, and keep kids and pets clear of wet paint and open cans.
Always follow the manufacturer's label for the specific products you use.
How do you handle decorative glass and intricate door designs?
Doors with glass inserts, sidelights or ornate molding reward patience.
For glass, run painter's tape along the edge of the pane, pressing it down firmly with a putty knife, and trim excess later with a sharp razor blade if needed. Many painters prefer to paint right up to the glass and then carefully scrape any overlap once the paint has fully cured. Fresh, high-quality tape and slow work matter more than any trick.

For intricate molding and raised details, a small angled brush is your best tool. Load it lightly so paint does not pool in the crevices, and work from the detail outward into the flatter areas. Prime carved or grooved surfaces thoroughly, since bare spots show quickly on detail work. If the design is complex, a sprayer can reach corners that a brush struggles to, which is another reason many pros choose to remove and spray detailed doors.
For stained or leaded glass, avoid any contact with the glass itself and use removable masking. Take your time on one panel at a time, and check your lines in raking light as you go.
If the design is very elaborate or the glass is valuable, this is a good moment to call a professional.
What is our take on painting a front door yourself?
Here is what we believe: most front door paint jobs fail before the first brush touches the surface. The conventional advice obsesses over color and brand, but those matter far less than what happens in the first hour. The unglamorous steps, washing, testing the old paint with denatured alcohol, scraping, sanding and priming for the specific door material, help determine whether your door looks great or starts peeling.

What is overrated? Thick coats. People think more paint equals better protection, and the opposite is true: thin coats level, dry and bond better. Also overrated is the idea that a premium topcoat can rescue poor prep. It cannot.
What should you do first? Run the denatured alcohol test and choose your primer before you buy paint. Then pick your weekend for mild, shaded conditions, and keep your cost checkpoints honest: if the prep is heavy, the door is detailed or you want a sprayed finish, getting a quote is smart rather than a failure of DIY nerve.
— Kyle
Need a hand with your front door? Tell us about it

If you would rather skip the sanding and spend your weekend elsewhere, we are glad to take it on. We do the prep first, because that is what makes a finish last, and we back our workmanship with warranties. Here is what we can do for your entry:
- Residential exterior painting for doors, trim and the surfaces around them
- Enhanced Prep & Durability and Maximum Prep & Protection packages for doors that need more than a refresh, plus Cosmetic Refresh for lighter updates
- Tiered service options so you can match the level of protection to your budget
Contact us when the prep is heavy, you want a sprayed finish, or you have multiple doors. Tell us the door material, the condition and what color you have in mind, and we will walk you through what to expect from an estimate. See our services and request a quote and we will get you on the schedule.
FAQ
Can you paint over an already painted door?
Yes, as long as the surface is clean, sound and properly prepped. Scrape any loose paint, sand to scuff the surface, and prime where needed, using the denatured alcohol test to match your primer and topcoat to the existing paint.
How easy is it to paint a front door?
It is a manageable weekend project if you respect the prep. The painting itself is simple, while cleaning, sanding and priming take the most time and matter most for a front door painting result that lasts.
Is front door paint better oil-based or water-based?
Both work. Water-based enamels dry faster and clean up easily, while oil-based products level smoothly and can help with tannin bleed on bare wood, though they dry slowly. Choose based on your door's material and what is already on it.
How much does it cost to have a front door repainted?
PaintPricing's 2026 guidance lists about $100 to $500 for a professional job versus roughly $30 to $80 in DIY materials. Prep, door material and whether the door is sprayed move the price.
Sources
- Sherwin-williams
- Best Exterior Paints for Doors and Trim - Consumer Reports
- How To Paint A Front Door | Benjamin Moore