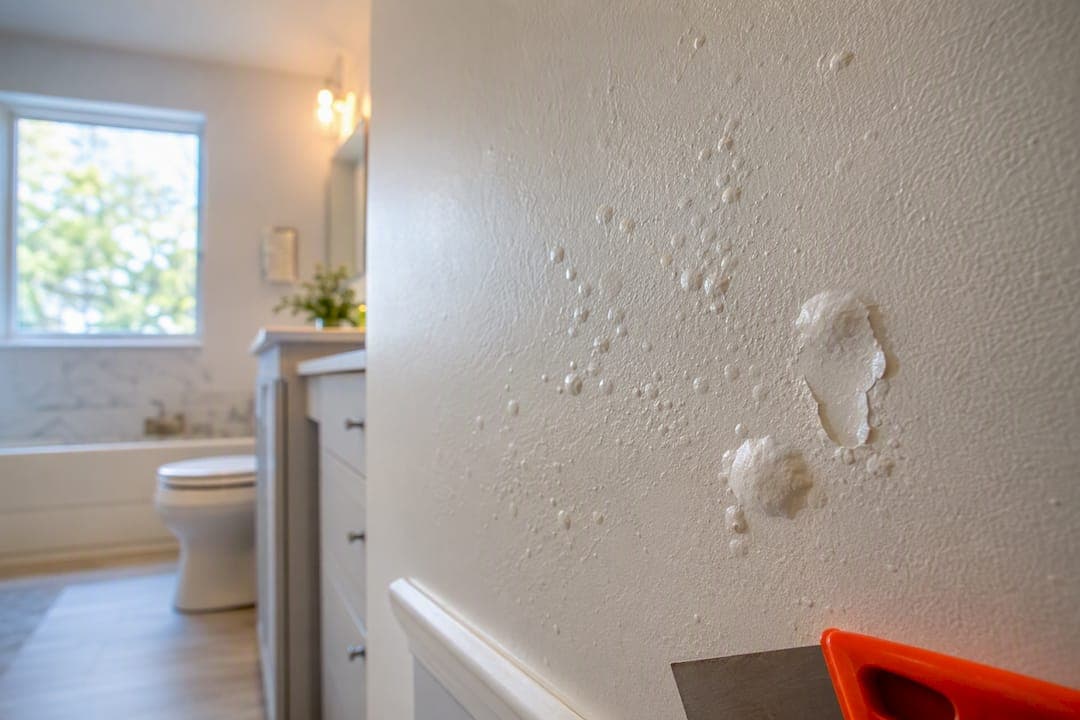
Humidity and condensation are a leading cause of paint bubbling, but they're not the only one. If you spot bubbles or blisters, your first move is simple: stop the moisture source (run a fan, dehumidifier, or exhaust vent) and press on the bubble to check if the surface underneath is damp before you touch a scraper or a repaint plan.
TL;DR:
- High indoor humidity above 50% significantly increases the chance of condensation, leading to persistent paint bubbling and blistering.
- Confirm moisture issues by pressing on bubbles, inspecting for dampness underneath, and using a hygrometer to measure room humidity relative to surface temperature.
- Proper preparation, such as controlling humidity during painting, fully drying surfaces, and fixing insulation or ventilation problems, can prevent most bubbling before it occurs.
- Always eliminate the moisture source and thoroughly dry the area before repairing, as repainting over active moisture causes the problem to return within months.
- Recurring bubbling or bubbles that reappear after repair often indicate hidden leaks or structural moisture issues requiring professional inspection and fixes.
Table of Contents
- What Paint Bubbling and Blistering Actually Look Like
- How Humidity and Condensation Push Paint Off the Wall
- Is It Humidity, a Leak, or Bad Application? Here's How to Tell
- Preventing Paint Bubbles Before They Start
- Fixing Humidity-Damaged Paint: A Step-by-Step Repair
- When Bubbling Signals a Bigger Problem
- Why Chasing Paint Instead of Moisture Costs You More
- Let Tru Painting Handle the Diagnosis and the Fix
- Where to Read More
- Sources
- FAQ
What Paint Bubbling and Blistering Actually Look Like
Bubbling and blistering describe the same defect: pockets where paint has lifted away from the surface underneath, forming raised, soft or hollow spots. Peeling is the next stage, where the paint film separates completely and curls away. Cratering is different, small pinhole dents from trapped air during application, not moisture.
You'll usually spot bubbles by sight first, a slightly shiny or discolored patch, then confirm by touch. Press gently. If it gives like a small pocket of air or gel, that's a blister. Humidity-driven bubbles show up most often in bathrooms, kitchens, basements, and exterior walls that face the afternoon sun in Florida's thick summer air.

How Humidity and Condensation Push Paint Off the Wall
Paint bubbling in humidity comes down to physics, not bad luck. Warm, moist air holds water vapor until it hits a surface cold enough to bring it below its dew point. At that moment, the air can't hold onto the moisture anymore, and it condenses right on (or behind) your painted surface. If that surface has already been painted, the water has nowhere to go but under the film, and it pushes the paint up from below.

The EPA recommends keeping indoor relative humidity between 30% and 50% for exactly this reason. Once indoor air humidity goes above recommended levels, the odds of condensation forming on cooler surfaces, window frames, exterior walls, and pipe runs increase significantly.
Central Florida homes deal with this from a few directions at once. Showers and cooking add vapor indoors. Basements and crawl spaces (less common here, but present in some builds) trap ground moisture. And in hot, humid climates like ours, there's a phenomenon called inward vapor drive: intense afternoon heat and humidity actually push moisture into the wall assembly from the outside, rather than the more familiar pattern of indoor moisture pushing out. That's why a coastal or Central Florida home can develop bubbling on exterior-facing walls even when nothing inside looks wet at all.
Is It Humidity, a Leak, or Bad Application? Here's How to Tell
Before you fix anything, figure out what actually caused it. Three culprits mimic each other, but they call for different repairs.
Start with the physical checks:
- Press test: Push on the blister. Firm and shell-like usually points to trapped solvent or an application issue. Soft and squishy suggests moisture.
- Cut-open test: Slice one blister open with a utility knife. A damp, discolored substrate underneath confirms moisture. A dry underside with a smooth, intact surface points to heat or solvent entrapment during the original paint job.
- Hygrometer check: A basic humidity meter, often $10 to $50, tells you the room's relative humidity. Compare that reading against the wall's surface temperature; if the surface sits below the dew point for that humidity level, condensation is your answer.
- Pattern check: Bubbles that reappear in the exact same spot after repainting, or that cluster near plumbing lines, roof penetrations, or window sills, usually point to an ongoing leak rather than ambient humidity.
Preventing Paint Bubbles Before They Start
Most bubbling is preventable, and prevention costs a lot less than a repaint. The goal is controlling the air around your project as carefully as you control the paint itself.
- Hold relative humidity between 30% and 50% while painting and during cure time. Run a dehumidifier or your AC, and avoid working when a room reads above 60% RH.
- Time the job around the weather. Skip painting when surfaces are likely to condense moisture overnight or when a cold front is due right after you finish, PPG's guidance specifically warns against painting under conditions that favor trapped moisture.
- Prep the surface fully. Clean off dust, grease, and mildew, and let the substrate dry completely before the first coat goes on.
- Fix the cold-surface problem, not just the paint. Add insulation or address ventilation so the wall itself stops running colder than the dew point.
- Vent moisture at the source. Bathroom and kitchen exhaust fans should vent outside, not into an attic, and that single fix solves more bubbling problems than any paint product ever will.
- Apply thin coats and respect dry times. Thick coats trap solvent and moisture underneath; manufacturers recommend extending dry and recoat times in humid conditions rather than rushing the next coat.
Pro Tip: A wall can feel dry to the touch within an hour while the paint underneath is still curing for days. In Florida's humidity, give exterior coats extra time before you judge the job finished or add a second coat.
Fixing Humidity-Damaged Paint: A Step-by-Step Repair
Once you've confirmed humidity or condensation caused the bubbling, the repair follows a specific order. Skipping steps is how the same bubbles come back six months later.
- Eliminate the moisture source first. Fix the exhaust fan, run a dehumidifier, or address the ventilation gap before you touch the wall. Repainting over an active moisture problem is a guaranteed repeat.
- Confirm the area is dry. Give it at least 24 to 48 hours after the fix, longer in Florida's summer humidity, and recheck with your hygrometer or a moisture meter on the substrate.
- Scrape and sand. Remove every loose flake of paint down to a sound edge, then feather-sand the perimeter so the repair blends into the surrounding surface.
- Inspect the substrate closely. Look for soft drywall, rotted wood, or dark mold staining. Any of those means the repair goes deeper than paint, Family Handyman's remediation steps call for replacing damaged material before moving forward. If your walls need patching, this drywall repair versus replace checklist will help you decide how far to go.
- Clean and disinfect if mold is present, following the EPA's remediation guidance, then let the area dry fully.
- Prime with a stain-blocking, high-adhesion primer. This step matters more than the topcoat itself for moisture-prone areas. For new drywall sections, choosing the right primer makes a real difference in adhesion.
- Repaint in thin coats and extend cure time beyond what the can recommends, especially if humidity is still above 50%.
If blisters go all the way to the substrate, or you find rot or active mold, that's your signal to fix the structural moisture source before any paint goes back on the wall.
When Bubbling Signals a Bigger Problem
Call a professional when moisture keeps returning after drying, you find rot or mold behind the paint, or bubbles reappear in the same spot after repair. A contractor checks flashing, roof and wall penetrations, insulation, and hidden moisture paths, then handles substrate replacement, siding or flashing repair, and ventilation upgrades a scraper and primer can't touch.
Why Chasing Paint Instead of Moisture Costs You More
A single bubble from a steamy shower or one humid painting day is nothing to lose sleep over, scrape it, prime it, move on. What worries me is the homeowner who repaints the same spot three summers in a row without ever pulling out a hygrometer.
Recurring bubbling is data, not bad luck. Measure the room, note where the pattern repeats, and treat that as a moisture question before it's a paint question, catching it early is cheaper than a mold remediation bill and a wall full of rotted drywall. If the diagnosis feels murky, pair your own checks with a professional's eye. That combination beats guessing every time.
— Kyle
Let Tru Painting Handle the Diagnosis and the Fix
Homeowners who'd rather skip the hygrometer and the guesswork can bring the job to a locally owned painting contractor serving Lake County and Central Florida. Rather than competing on the lowest price, this contractor builds its reputation on thorough prep, premium products, and skilled craftsmanship, which matters most on moisture jobs, where a rushed prep step is exactly what brings the bubbles back.

A service visit typically starts with a diagnostic look at the affected area: checking substrate moisture, identifying whether you're dealing with condensation, a leak, or an old application issue, and scoping the right repair. From there, their three-tier service packages let you choose the level of prep and protection that fits both your home and your budget. Interior painting, drywall repair, stucco painting, and specialty coatings are all part of the full service lineup. If bubbling has become a repeat visitor in your home, request an estimate and let a pro settle the question for good.
Where to Read More
The EPA's mold and moisture control guide and manufacturer troubleshooting pages from Sherwin-Williams and Benjamin Moore cover diagnostics and remediation in more depth.
Sources
- How to fix paint bubbling | Family Handyman
- A Brief Guide to Mold, Moisture, and Your Home (EPA)
- How to fix paint blistering | Sherwin-Williams
- How to fix paint blistering | PPG Pro Tips
- Paint bubbling & blistering | Benjamin Moore
FAQ
Can High Humidity Cause Paint to Bubble?
Yes. High humidity raises the odds that a surface will drop below its dew point, and once that happens, condensation forms underneath the paint film and pushes it up into a blister. Keeping indoor relative humidity between 30% and 50% is the most direct way to cut that risk.
How Humid Is Too Humid to Paint?
Most manufacturers advise against painting when relative humidity is high, as paint dries and cures more slowly and may trap moisture underneath. Aim for the 30% to 50% range and extend your dry times in humid conditions even when the humidity reading looks acceptable.
Can You Paint in 100 Degree Weather?
Extreme heat causes its own version of bubbling, since it dries the outer paint surface too fast while solvent or moisture underneath is still trying to escape. It's better to paint in early morning or evening hours and avoid direct sun on a hot surface, regardless of the humidity reading.
Is There a Difference Between Blistering and Bubbling?
Not really. Blistering and bubbling describe the same defect, paint lifting away from the surface in raised pockets, and the terms are used interchangeably by manufacturer troubleshooting guides. Peeling is the more advanced stage, where the lifted paint fully separates and curls off the wall.
How Do I Know If Bubbling Means a Bigger Moisture Problem?
If bubbles keep reappearing in the same location after you've repaired and repainted, that's a strong sign of an ongoing leak or structural moisture issue rather than a one-time humidity event. Contractor troubleshooting guidance treats recurring bubbling as a diagnostic clue worth a professional inspection, not another coat of paint.