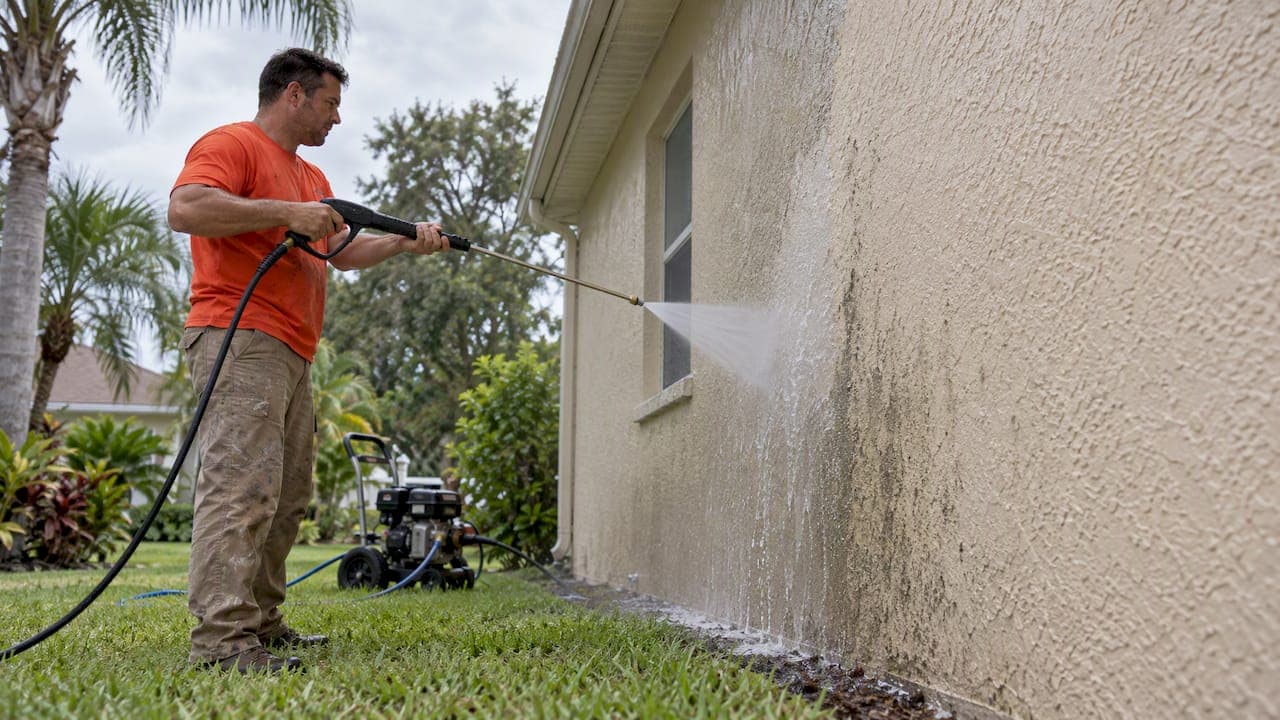
Yes, you should clean your exterior before you paint it, and a pressure washer is often the fastest way to do it. But the washer is a cleaning tool, not a paint stripper. Used at low pressure with the right detergent, then given a full drying window, it gives new paint a clean surface to grip. Used carelessly, it pushes water behind your siding and sets up the very peeling and blistering you hoped to avoid.
We paint homes and businesses across Lake County and Central Florida, where algae, mildew and humidity are part of the job. Here is what we tell homeowners who ask whether to wash first, how to do it, and when the paint can go on.
TL;DR
- Clean the exterior before painting. Dirt, mildew, algae and chalky residue keep paint from bonding, and skipping this step is a leading cause of early paint failure.
- Use a fan tip, keep your distance and let detergent do the work. Never use a 0-degree (red) tip on siding, and never try to strip paint with the washer.
- Wait for the surface to dry completely. Sherwin-Williams puts it at typically 24 to 48 hours, and shaded or porous areas can take longer.
- If your home was built before 1978, test for lead before you wash. Uncontained washing of lead paint is a real hazard.
- Not sure about your siding, your ladder skills or your timeline? Hiring a painter who handles the washing and prep as one job removes most of the risk.
Table of Contents
- Why washing comes before painting
- Is pressure washing always the right choice?
- The lead paint check for homes built before 1978
- How to pressure wash a house before painting
- How long to wait after pressure washing before painting
- Mistakes that cause paint to fail
- Our perspective: prep is where the finish is won
- DIY or hire a painter?
- Let us handle the washing and prep
- FAQ
- Sources
Why washing comes before painting
Paint sticks to a surface, not to what is sitting on it. Pollen, dust, chalk, spider webs, mildew and algae all form a thin layer between your wall and the new coat. Paint applied over that layer may look fine for a few months and then flake off in sheets, taking the dirt with it.
Pressure washing is effective at lifting dirt, algae, mildew and oxidation, the contaminants that undermine adhesion. Professional prep standards boil down to one idea: the surface should be clean, sound, dull and dry. Washing handles the clean part and, once the wall has dried, helps you see what is still unsound.
In Central Florida this matters even more. Warm, damp weather feeds mildew on north-facing walls, under eaves and around landscaping. Mildew that is painted over, rather than killed, tends to come back through the new finish. We cover the details in our guide to stopping mildew on exterior paint with a bleach wash.

Is pressure washing always the right choice?
Not always. Some painters skip the pressure washer entirely and hand-wash with a soft brush and a mild cleaning solution. Their reasoning is fair: forced water can get behind siding, into window frames and into wall cavities, and trapped moisture later shows up as blistering paint.
The truth sits in the middle. A gentle, controlled wash is a normal prep step on many homes. A high-pressure blast is a problem on others. Here is how we think about it:
| Situation | Our approach |
|---|---|
| Newer vinyl, fiber cement or sound painted siding with light dirt | Low-pressure wash with detergent, then rinse |
| Stucco with hairline cracks | Gentle wash, careful rinse, repairs after it dries |
| Older wood siding or trim | Soft wash or hand scrub, test a small area first |
| Heavy mildew or algae | Pre-treat with a mildew solution, let it dwell, then rinse |
| Peeling or failing paint | Scrape and sand by hand. Wash first only to remove loose grime |
| Home built before 1978 | Test for lead before any washing |
Experienced contractors also point out that older homes need significantly gentler pressure than a recently repainted house, and that testing your technique on an inconspicuous spot comes first.
The lead paint check for homes built before 1978
This is the one step that is not optional. If your house was built before 1978, the paint may contain lead. The EPA's guidance on the Renovation, Repair and Painting rule says pressure washing is subject to the same containment requirements as other permitted work practices, and wastewater from lead-paint surfaces must be collected and handled properly, not dumped on the ground, down a storm drain or into a household sink.
The EPA's field guide for painting and renovation also warns against uncontained hydroblasting, because it spreads paint chips and dust beyond the work area and makes cleanup difficult.
What that means for you:
- If the house is pre-1978, have the paint tested before anyone washes or scrapes it.
- If lead is present, hire a contractor trained and certified for lead-safe work. This is not a weekend DIY job, especially with children or pregnant family members in the home.
- If you are unsure of your home's age or paint history, ask your painter before the first spray. A good one will bring it up without being asked.
How to pressure wash a house before painting
If your house is clear of lead concerns and you are comfortable doing the work, this is the sequence that protects the siding and the paint job to follow.
1. Walk the house first
Look for cracked caulk, loose trim, damaged window seals and gaps around doors. Water forced into these spots ends up inside the wall. Seal or note them before you start. Close windows, cover outlets and exterior light fixtures, and move or cover plants.
2. Pick the right nozzle and distance
Use a fan-spray tip, never a stream or 0-degree tip. The Spruce advises keeping a distance from 18 inches to 6 feet depending on the pressure and the material, to avoid etching the surface. Start farther back and move closer only if the grime does not budge. Spray downward at a slight angle so water runs off instead of up under lap siding.
3. Let the detergent work
The pros do not rely on raw force. Fine Homebuilding describes a solution of water, bleach to kill mildew and a degreaser or detergent such as TSP, applied with a pump sprayer and left to dwell before rinsing. The soap does the heavy lifting, which means you can use lower pressure and cause less damage.
Wear eye protection, gloves and closed shoes. Keep bleach solutions off landscaping, rinse plants before and after, and never mix bleach with ammonia-based cleaners.
4. Rinse from the top down
Work in sections, top to bottom, so dirty water does not streak over clean areas. Rinse thoroughly. Leftover detergent can interfere with primer and paint.
5. Check inside
While you wash, have someone watch the interior around windows and doors for moisture. If water is coming in, stop, fix the leak path and let the area dry before you continue.
6. Scrape and sand by hand
A pressure washer is not a paint remover. If you are washing hard enough to take paint off, you are probably washing hard enough to damage the siding. Remove loose paint with scrapers and sanders, and treat bare spots with primer.
How long to wait after pressure washing before painting
This is the question we hear most. The short answer: until the surface is truly dry, not just dry to the touch.
Sherwin-Williams lists 24 to 48 hours as a typical drying time after pressure washing and warns that painting over a damp surface is a major cause of blistering and paint failure. Its professional surface-preparation guidance adds that the surface must be dry and that exterior painting should not start right after rain or in fog.
In our experience in Central Florida, those numbers are a starting point, not a promise. Several things stretch the timeline:
- Shade. North walls and areas under heavy tree cover dry slowly.
- Material. Stucco and bare wood absorb water and hold it longer than vinyl or metal.
- Humidity and afternoon storms. A wall can look dry at noon and be damp again by evening.
- Heavy rinsing. The more water you put on the wall, the longer it takes to leave.
A practical check: look at the lowest, shadiest sections of the wall, the trim joints and the stucco near the foundation. If those are dry, the rest almost certainly is. A moisture meter on wood trim gives you a number instead of a guess. Our article on fascia board painting problems explains why moisture readings matter so much on trim.
Can you wash and paint the same day? On a hot, dry day with a light wash on a non-porous surface, some pros will get close. For a typical Florida home, we would not plan on it. The savings of a day are small compared with the cost of repainting. For more on timing, see how weather affects exterior painting.
Mistakes that cause paint to fail
Most failures trace back to prep, not paint. Industry guidance calls preparation the step that makes or breaks a project, and skipping or rushing the cleaning phase is a common reason for early failure. These are the mistakes we see most:
- Too much pressure. It gouges wood, etches stucco and drives water into walls.
- Painting too soon. Trapped moisture shows up as bubbles and peeling.
- Painting over live mildew. If it is not killed, it grows back.
- Ignoring chalking. Chalky residue acts like a layer of powder under the paint. Our 30-second rag test shows how to spot it.
- Washing but not repairing. Cracks, failed caulk and rot need fixing after the wash, before primer.
- Ignoring runoff. Wastewater from lead-painted surfaces needs proper handling, and bleach runoff can harm plants.
Our perspective: prep is where the finish is won
We do not compete on being the cheapest. We compete on how long your paint lasts, and that is decided before the first coat goes on.
When we look at a house, we do not ask "wash or no wash?" as a yes or no. We ask what is on the surface, what the surface is made of, how old the house is, and how much moisture it is holding. A sound, newer stucco wall with light dirt is a very different job from a shaded wood fascia with mildew and failing paint. The first might need a gentle wash and a rinse. The second needs treatment, hand scraping, repair, drying time and primer.

That is why our service packages are tiered by prep and protection: Cosmetic Refresh for homes that need a clean, fresh look, Enhanced Prep & Durability for more thorough preparation, and Maximum Prep & Protection for homes that need the most complete surface work. The right tier depends on what we find on your walls, and we explain the reasoning in plain language so you can choose with confidence. Our workmanship is backed by a warranty.
One more thing we have learned: homeowners are often relieved to hear that the job is not about blasting the house with the biggest washer available. A careful wash, patient drying and honest repairs beat brute force every time.
— Kyle
DIY or hire a painter?
If you have a single-story home, newer siding, no lead concerns and a free weekend, washing it yourself is realistic. Rent or buy a washer with adjustable pressure, use a fan tip and take your time.
Hiring a professional makes more sense when:
- Your home is two stories or taller. Ladder falls are a real risk, and so are high-pressure injection injuries in general, which is why safety matters with any pressure equipment.
- The house was built before 1978.
- You have stucco with cracks or old wood that needs repair.
- You have visible mildew, peeling paint or chalking.
- You do not have time to manage drying windows, weather delays and repairs.
An exterior repaint that includes washing, repairs, priming and painting under one scope also means one party is accountable for the result. See what a full exterior repaint includes for the full list of steps, or our walkthrough on prepping exterior walls before painting.
Let us handle the washing and prep
Tru Painting offers residential and commercial exterior painting, pressure washing, stucco painting and drywall repair in Lake County and Central Florida. We scope each job around your home's surfaces and condition, and we will tell you plainly whether your walls need a light wash, a mildew treatment or deeper repairs before paint.
Ready to talk? Learn more about our residential exterior painting, compare our three service packages, or schedule your appointment and we will take a look at your home.
FAQ
Should you pressure wash before painting?
In most cases, yes. Clean surfaces let paint bond properly, and washing removes dirt, mildew, algae and chalky residue. The exceptions are fragile or older surfaces where high pressure could do harm, and pre-1978 homes where lead must be tested first. In those cases a soft wash or hand cleaning is the safer route.
Can pressure washing damage the house or the paint?
Yes. Too much pressure can etch surfaces or inject water into walls, and trapped moisture can later cause paint failure. Use a fan tip, keep your distance, and never use the washer to strip paint. Test a small hidden area before you start.
How long should you wait to paint after washing?
Plan on at least 24 to 48 hours of dry weather, and longer for stucco, wood and shaded walls or after rain. The wall must be dry through, not just on the surface. When in doubt, wait another day.
Can you pressure wash and paint on the same day?
We do not recommend it for a typical Florida home. Even if the surface feels dry, moisture can remain in porous materials and trim. Painting over it risks blistering and peeling, so waiting is cheaper than redoing the job.
Will a 3000 psi washer remove paint?
It can, and that is the problem. If the washer is strong enough to take paint off, it is likely strong enough to damage the siding beneath it. Remove loose paint by scraping and sanding instead, and keep the washer for cleaning.
Sources
- How to Safely Pressure Wash Your House Before Painting, The Spruce
- How to Paint a House Exterior, Sherwin-Williams
- Surface Preparation, Sherwin-Williams
- Painting Preparation Video for Professionals, Sherwin-Williams
- Painting techniques, Sherwin-Williams
- The Art of Pressure Washing, Fine Homebuilding
- There's No Escaping the Scraping, Fine Homebuilding
- How do RRP requirements apply to pressure washing?, US EPA
- A Field Guide for Painting, Home Maintenance, and Renovation Work, US EPA