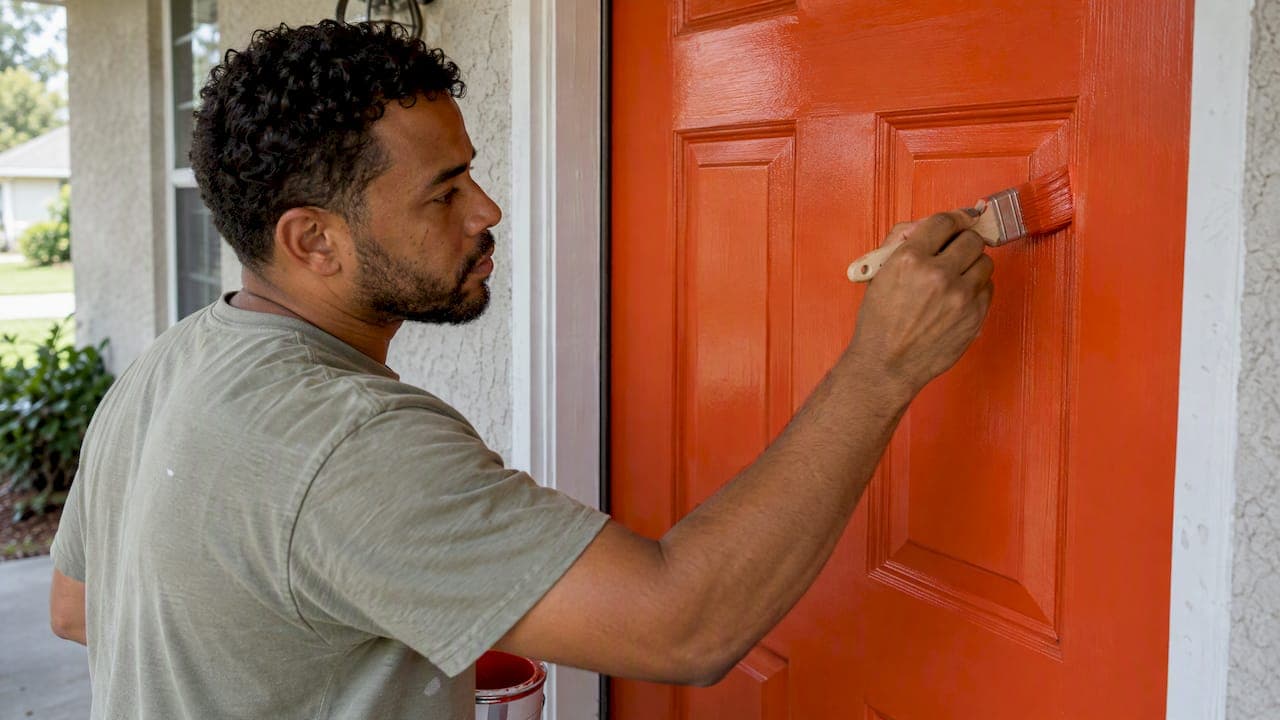
To repaint a front door, take off the hardware, wash and degrease the surface, sand it lightly, prime if you are changing colors or covering bare spots, then apply two thin coats of exterior paint, letting each dry fully. Work the recessed panels first, then the flat areas, and keep a wet edge so the paint levels out. Most of the quality comes from prep and patience, not from the brush.
We paint homes across Lake County and Central Florida, and the front door is the small job that changes how the whole house looks from the street. This guide walks through the full process, the paint and primer choices, the order that avoids streaks, the safety rules for older homes, and when it makes sense to hand the job to a pro.
TL;DR
- Clean, degrease, sand lightly and prime where needed. Skipping prep is the most common reason a door paint job peels or looks blotchy.
- Use exterior paint that resists UV and weather, in satin or semi-gloss, and apply two thin coats rather than one thick one.
- Paint recessed panels first, then the flat areas, and brush out rolled paint before it starts to set.
- If your home was built before 1978, treat old paint as if it contains lead and do not dry-sand it.
- Allow at least 24 hours between coats, more in humid weather, and keep the door closed gently until it has cured.
Table of Contents
- Before you start: is this a weekend job?
- Choose the right day
- Step 1: Remove or protect the hardware
- Step 2: Wash, rinse and dry
- Step 3: Scrape, sand and repair
- Step 4: Prime when it matters
- Step 5: Pick the paint and sheen
- Step 6: Paint in the right order
- Step 7: Second coat and curing
- Common situations
- Our perspective: where front door jobs go wrong
- When to hire a pro
- Let us handle your front door
- FAQ
- Sources
Before you start: is this a weekend job?
For a door in good shape, yes. Plan on one day for prep and the first coat, a second day for the final coat, and a few extra days before the door sees heavy use. If the door has rot, deep cracks, peeling down to bare wood or a sticky old finish, add repair time first.
The door itself matters too. A solid steel or fiberglass door takes paint differently than a stained wood door, and a door with glass inserts needs careful masking. Take a moment to look at yours in daylight. Press a screwdriver tip gently into the lower edge and bottom rail, where water collects. If the wood is soft, it needs a repair before any paint goes on.
What you need
- Degreasing cleaner, a sponge and clean rinse water
- Fine sandpaper or a sanding sponge
- Painter's tape, drop cloths and a screwdriver
- Exterior primer, if your situation calls for it
- Exterior paint, a quality angled brush and a small foam or mini roller
- Wood filler or exterior patching compound for dings
Choose the right day
Weather decides whether a door paint job looks smooth or ruined. Manufacturers publish their own limits. For example, the data sheet for a popular exterior line says to apply it to dry surfaces when air and surface temperatures are between 35°F and 90°F and will stay in that range for at least four hours. The same sheet notes that at 60°F to 70°F and 60 to 70 percent relative humidity, the paint needs at least an hour of drying before rain, and higher humidity can stretch that time.
In Central Florida, that humidity note is the one to take seriously. Summer afternoons bring sudden storms, and a door in direct sun can get hot enough to dry the paint's surface before it levels. Early morning, once the dew is gone, is usually our favorite window. Always read the can for your specific product, since limits vary by brand. Our own guide to how weather affects exterior painting goes deeper on timing.
Step 1: Remove or protect the hardware
Unscrew the handle set, deadbolt trim, knocker and house numbers if they are on the door. Removing them gives you clean edges and no tape lines. If a piece will not come off, mask it tightly with painter's tape and trim the tape edge with a blade after the paint has dried to the touch.
Decide whether to take the door off its hinges. Painting it flat on sawhorses is easier and avoids drips, but it adds work and leaves your entry open for a day. Painting in place is perfectly fine for most homeowners, especially if you tape and cover the threshold and floor below.
Step 2: Wash, rinse and dry
Paint does not stick to grime, body oils or the film that builds up around the handle. Sherwin-Williams' front door instructions call for washing with a degreasing cleaner, rinsing, and letting the door dry before you sand. Pay attention to the lower third of the door, the area around the lock and the bottom edge, which pick up the most dirt and splash.
Let the door dry completely. In humid weather that can take a few hours, and rushing it traps moisture under the new coating. If your whole entry looks tired, a wider cleaning and prep job might be worth planning; we cover that in our article on how to prep exterior walls before painting.
Step 3: Scrape, sand and repair
Scrape off any loose or flaking paint. Then sand the whole door lightly, just enough to dull the old gloss and feather the edges of any chips so they do not show through the new color. A sanding sponge works well in the grooves of paneled doors.

Fill dings and small holes with patching compound, let it cure, and sand it flush. Wipe away all dust with a damp cloth, then let the door dry again. Dust left behind is what creates the gritty texture people blame on the paint.
For a deeper look at why this stage matters on the rest of the house too, see our notes on exterior paint preparation best practices.
A safety note for homes built before 1978
If your home predates 1978, the door may carry lead-based paint under later layers. The EPA advises homeowners to treat paint in older homes as if it contains lead unless testing shows otherwise, to mist surfaces before sanding or scraping, and to lay protective sheeting beneath the work area. The agency's painting field guide adds that anyone creating lead dust should wear at least a NIOSH-approved respirator, and that power tools used on lead paint should be shrouded and attached to a HEPA vacuum.
In practice: do not dry-sand or power-sand an old door in a pre-1978 house, keep children and pets away, and clean up with wet wipes and a HEPA vacuum rather than sweeping. If the paint is deteriorating badly, call a contractor trained in lead-safe work. Dust, not fresh paint, is the hazard. Our neighbors in the inspection trade also cover prepping and painting after construction dust, which is useful if your door sits near a renovation zone.
Step 4: Prime when it matters
Primer is not always required, but it is worth it in these cases:
- You are covering bare wood, patched spots or exposed metal.
- You are going from a dark color to a light one, or the reverse.
- The old finish is glossy, stained or chalky.
Sherwin-Williams points out that when you paint over a dark surface, primer gives the best color coverage. For a white door turning black, a tinted primer gives the topcoat something closer to its final shade to grab onto, so you will need fewer coats.
Stained wood is its own case. Some products spell it out: the data sheet for one premium exterior paint requires two coats of primer over redwood or cedar, because natural tannins can bleed through and discolor the finish. If your door is stained wood of any species, sand off the gloss, wipe it clean and use a stain-blocking exterior primer. Check the paint maker's data sheet for the specific instructions.
Step 5: Pick the paint and sheen
Use a paint made for exteriors. Sherwin-Williams recommends UV- and weather-resistant exterior paint, and it names an acrylic latex door and trim formula as one example. It also notes that a higher sheen such as satin or semi-gloss helps hide imperfections and makes the door easier to wipe clean.
Here is how we think about it for Florida homes:
| Sheen | Look | Best for | Trade-off |
|---|---|---|---|
| Satin | Soft, low glow | Doors with minor wear, a modern look | Slightly less wipeable than semi-gloss |
| Semi-gloss | Polished, crisp | Doors you want to clean often, classic homes | Shows flaws more on a rough surface |
| High-gloss | Mirror-like | Very smooth, well-prepped doors | Reveals every dent and brush mark |
Color deserves a few minutes too. Test two or three samples on the door and look at them in morning light, midday sun and evening before you commit. Our guides on front door paint colors for Central Florida and exterior color selection can narrow the choices, and if you are weighing colors that pair with your siding, try samples next to the siding itself.
Step 6: Paint in the right order
The order is what prevents lap marks and drips. For a paneled door, we follow this sequence, which lines up with Sherwin-Williams' guidance to paint recessed and detailed areas first, then move to the flat areas while working over wet paint:
- Recessed panels. Cut in the corners and edges of each panel with the brush, then roll or brush the panel face.
- Horizontal rails. These are the cross pieces between panels.
- Vertical center stiles. The pieces running down the middle between panels.
- Outer stiles. The vertical edges on the left and right.
- Door edges. Paint them last or first, but wipe any smudges off the faces before moving on.
Family Handyman suggests painting the edges first and carefully wiping away any slop that lands on the door faces before you paint them. Either approach works, so long as you clean up drips before they dry.
Which edge gets which color
The hinge edge of the door should match the exterior color, and the latch edge should match the interior door color. That way, each color shows only on the side where you see it when the door is open.
Get a smooth finish
The goal is thin, even coats that level before they set. Family Handyman recommends using a mini roller, brushing out the rolled paint, and working in sections of no more than a quarter of the door at a time. It explains that rollers apply paint faster, while brushed paint usually levels better, so the combination gives you speed and a clean surface.
The common mistakes are overworking the paint and going back into a section that has started to dry. Sherwin-Williams says brush and roller marks can come from reapplying paint where it has partially dried or working it too much. If you spot a flaw after the paint has begun to set, leave it. Fix it after the coat cures by sanding lightly and recoating.
Step 7: Second coat and curing
Benjamin Moore advises two coats, with each drying at least 24 hours, and more time in humid or poor weather. Sherwin-Williams likewise says to apply a second coat after the first one dries. A door that feels dry to the touch is not fully cured, so go easy on it for several days. Do not slam it, hang a wreath with a tight hook, or let the weatherstripping press hard into fresh paint.

If you are painting the interior face as well, ventilate. The EPA recommends maximum ventilation during application and for at least 72 hours afterward when you apply paints and finishes. Leave a window open nearby and run a fan if you can.
Common situations
Painting a white door black
Dark colors on white are unforgiving because every stroke shows. Use a tinted or gray primer, then two thin coats of the dark topcoat. Work in quarter-door sections, roll and brush out, and avoid painting in direct sun. A satin finish forgives more than gloss. Also consider heat: a black door in full Florida sun gets hot, so choose a paint formulated for exterior use and check the manufacturer's guidance for dark colors.
Painting over a stained wood door
Sand to remove gloss, clean off dust, prime with a stain-blocking exterior primer (two coats on tannin-rich woods like cedar and redwood, as noted above), then apply two topcoats. Do not skip the primer, since stain bleed-through is hard to fix once paint is on.
Touching up versus a full repaint
If the finish is simply scuffed, a light sanding and a single fresh coat may be enough. If you see peeling, bubbling or bare wood, go through the whole process. Partial fixes on a failing coating rarely last.
Our perspective: where front door jobs go wrong
We have seen the same few mistakes on front doors across Lake County, and nearly all are about patience rather than skill.
The first is prep. A door gets handled more than almost any other painted surface on a house. Hands, groceries, keys, sunscreen and bug spray all leave residue, so a quick wipe is never enough. Degrease it properly, scuff it, and let it dry.
The second is paint that is too thick. People try to cover in one pass and end up with sags and ridges. Two thin coats look better and hold up longer than one heavy coat.
The third is the sun. Florida heat can dry paint too quickly, which is why we often schedule door work in the shade of morning or late afternoon. Humidity and surprise storms are the other half of the picture, and we check conditions before every exterior job.
The fourth is ignoring the house around the door. A fresh door against peeling trim or a chalky, faded wall looks like an upgrade that stopped halfway. When the surrounding surfaces are worn, we often suggest scoping the door together with the trim or the full exterior so the whole entry looks intentional.
We do not compete on being the cheapest. We compete on thorough preparation, premium products and clear communication, because those are what keep a finish looking good years later. That is why our work comes with warranties on workmanship, and why our three service levels, from a cosmetic refresh to maximum prep and protection, let you match the depth of the job to your home and budget.
— Kyle
When to hire a pro
A front door is a very approachable DIY project. It is worth calling a contractor when:
- The door or frame has rot, warping or deep damage that needs repair.
- Your home was built before 1978 and the paint is peeling or chipping, which raises lead-safe work questions.
- The door is part of a larger project, such as repainting stucco, trim or the whole exterior.
- You manage a community or business and need consistent results across multiple doors.
- You simply would rather not spend a weekend with a mini roller.
If you are curious what a professional exterior job covers beyond the door, our overview of what a full exterior repaint includes lays it out, and our step-by-step front door painting panel order is a good companion to this guide. If you are also thinking about the doors inside, we cover painting interior doors too.
Let us handle your front door
Tru Painting is a locally owned painting contractor serving Lake County and Central Florida. We take on front doors as part of residential exterior painting, and you can choose the level of prep and protection that fits your home through our three service packages: Cosmetic Refresh, Enhanced Prep & Durability, and Maximum Prep & Protection. You can see how they differ on our services page, then schedule your appointment when you are ready for a quote.

We explain what we will do, why, and what it involves before any work starts, so there are no surprises on the finished door.
FAQ
Do I need to sand a front door before repainting it?
Yes, a light sanding is part of proper prep. It dulls the old gloss so the new paint can grip and smooths the edges of chips. You do not need to strip good paint down to bare wood. On a home built before 1978, use wet methods and lead-safe practices rather than dry sanding.
How long should I wait between coats on a front door?
Wait at least 24 hours between coats, according to Benjamin Moore's front door instructions. Allow longer in humid or rainy conditions. Check your paint can, since drying times differ by product.
What is the correct order to paint a door?
Start with the recessed panels, then do the rails, the center stiles and the outer stiles, and finish with the edges, keeping a wet edge as you go. Wipe any drips off the faces right away. The hinge edge should match the exterior color and the latch edge the interior color.
Can I paint a white door black?
Yes. Prime first, ideally with a tinted primer, then apply two thin coats of exterior paint in sections, rolling and brushing out each one. Avoid direct sun and do not rework paint that has begun to dry. Satin hides small flaws better than gloss.
Should I use a brush or a roller?
Use both. A mini roller applies the paint quickly, and a brush smooths it out so it levels well. Use the brush for corners and recessed panels, and keep the sections small so the paint stays wet while you work.
Sources
- How to Paint a Front Door | Sherwin-Williams
- How To Paint A Front Door | Benjamin Moore
- How to Paint a Door (DIY) | Family Handyman
- Brush Marks and Stippling | Sherwin-Williams
- Behr Marquee Exterior Semi-Gloss Enamel Product Data Sheet
- Behr Ultra Exterior Satin Enamel Product Data Sheet
- Best Practices for Indoor Air Quality when Remodeling Your Home | EPA
- A Field Guide for Painting, Home Maintenance, and Renovation | EPA
- How to prep and paint after construction dust
- Siding Colors 2026: Pairings, Test Steps, And Fade Proof Picks