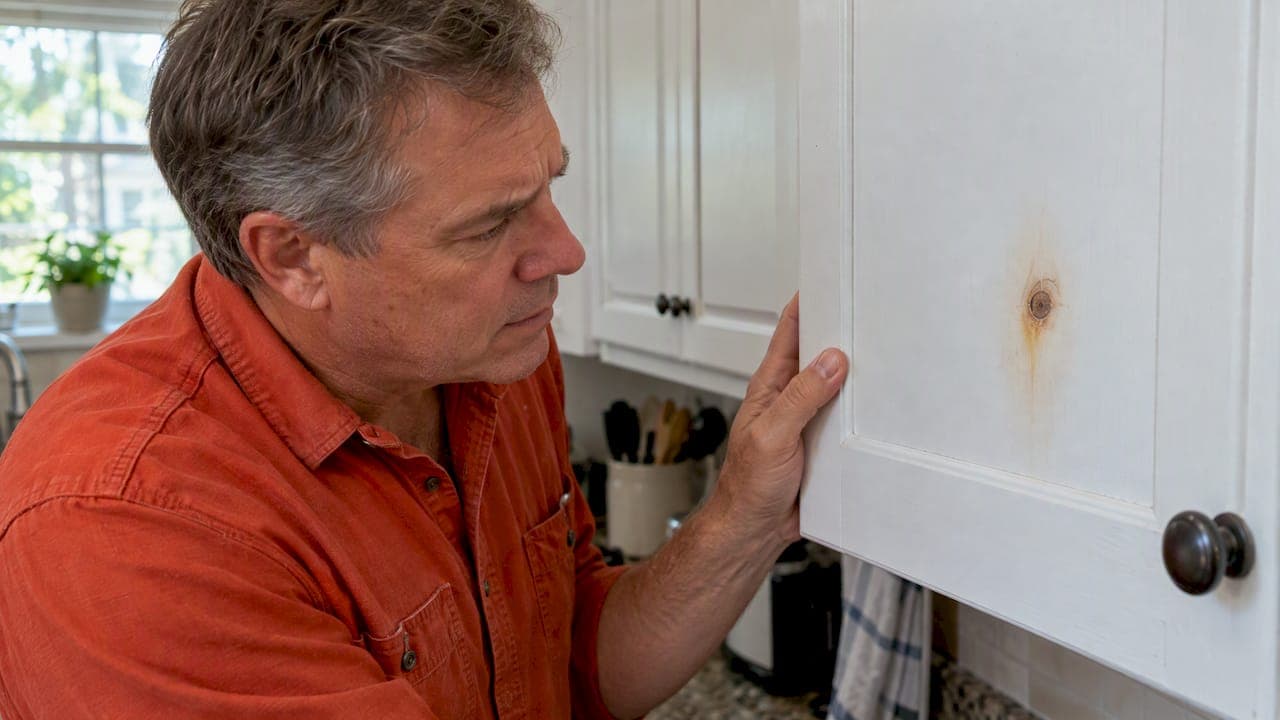
Brown or amber stains bleeding through paint are tannins or resin escaping from the wood underneath, and the most reliable immediate blocker is a shellac-based primer. We recommend applying it spot by spot over knots or suspect areas, with a second coat when the wood is especially resinous. Oil or alkyd primers work as a solid backup outdoors, but latex alone often lets the stain through.
TL;DR:
- Stains that recur over knots, grain lines, or heartwood, sometimes weeks after painting, point to tannins; humidity and heat can trigger delayed bleeding.
- Let new lumber acclimate for several days, then seal knots about an inch past their edges; resinous knots may need a second coat.
- For exterior trim where shellac is impractical, choose oil or alkyd stain blocking primer; reserve plain latex for wood with no history of bleeding.
- In homes built before 1978, test for lead or presume it is present before sanding; avoid dry or high speed sanding and use containment and HEPA filtered tools.
- If staining returns years later, inspect for roof leaks, irrigation spray, or condensation; new moisture can defeat a previously sealed knot.
Table of Contents
- How to recognize tannin bleed-through and when it appears
- The causes: how tannins and resin migrate through coatings
- How to prevent tannin bleed-through before you paint
- Step-by-step repair for existing tannin bleed-through on painted surfaces
- Safety, lead-paint guidance, and when to call a professional
- Expected longevity of tannin stain blocking measures and maintenance tips
- Environmental factors affecting tannin bleed-through post-painting
- Types of primers and sealers that block tannin bleed-through
- How different paint types perform against tannin bleed-through
- Contractor perspective: how Tru Painting approaches tannin-prone projects
- Let Tru Painting handle your tannin bleed-through problem
- FAQ
- Sources
How to recognize tannin bleed-through and when it appears
Tannin bleed-through shows up as tan, brown, or amber spots and streaks, usually right over knots or sections of heartwood. Sometimes it appears within hours of priming. Other times it waits weeks or months, triggered by a humid summer or a sudden heat spell that pulls moisture and resin toward the surface.
A few things make the pattern easy to spot:
- Discoloration concentrated around knots, grain lines, or heartwood rather than spread evenly across a wall or board.
- A yellowish or amber tint that looks like a water stain but will not wipe off.
- Staining that reappears in the same spot after repainting, even with a fresh coat.
Knotty pine, fir, cedar, and redwood are frequent offenders, and plywood with visible knots behaves the same way. If you are seeing this pattern on trim, paneling, or siding built from one of these woods, tannins are almost always the cause.
The causes: how tannins and resin migrate through coatings
Tannins and resins are natural compounds in wood called extractives, and many of them dissolve readily in water. When a waterborne latex primer goes on wet, those extractives can dissolve into the film and travel upward as it dries, landing right on the surface where you see them as a stain.
Knots make this worse because they concentrate resin in a small, dense area. Heat softens that resin and pushes it toward the surface, while moisture, whether from humidity, rain, or a leak, gives tannins a path to migrate through the paint film over time. Peer-reviewed research on tannin-rich wood shows that thermal modification reduces surface tannins and changes how wood interacts with coatings, which helps explain why some species and treatment histories bleed more than others.
New lumber with higher internal moisture is a bigger risk than wood that has had time to dry and stabilize. Film chemistry matters too: a primer's solvent determines whether it resists or absorbs those extractives, which is exactly why shellac performs differently than latex.
How to prevent tannin bleed-through before you paint
Prevention starts with the wood itself, not the paint can. A little extra time at this stage saves you from stripping and redoing a finish later.
- Inspect the wood and let new lumber acclimate for several days before painting, especially in humid conditions.
- Identify every knot and treat it as a high-risk spot, even if it looks dry and stable.
- Spot-seal knots with a shellac-based primer, extending the coat about an inch past the visible edge of the knot.
- Apply a second shellac coat over particularly resinous or large knots before moving on to your finish coat.
- For exterior trim or siding where shellac is not ideal, switch to an oil or alkyd stain-blocking primer instead.
- Reserve plain latex primer for wood with no tannin history, like kiln-dried poplar or most painted drywall transitions.
- Follow the manufacturer's recoat window and let the primer cure fully before topcoating.
- Wear gloves and work in a ventilated space when using solvent-based primers, since the fumes are stronger than latex.
If you are prepping cabinets with visible knots, our guide on choosing the right primer for cabinet substrates walks through matching primer type to wood grain. For exterior projects, our exterior prep best practices guide covers moisture diagnosis before you ever open a paint can.
Pro Tip: Prime knots before you prime the rest of the surface. That way, a weak spot shows itself before you have committed a full coat over it.
Step-by-step repair for existing tannin bleed-through on painted surfaces
If tannins have already bled through a finished paint job, you do not need to strip the whole surface, just isolate and treat the stained area correctly.
- Check adhesion around the stain and scrape away any loose or flaking paint.
- Lightly scuff or wet-sand the stained area to give the new primer something to grip.
- In homes built before 1978, stop and consider lead-safe precautions before sanding anything (more on that below).
- Apply a shellac-based spot primer centered directly over the stain, feathering it about an inch beyond the visible discoloration.
- Let the shellac dry fully, then apply a second coat if any shadow of the stain still shows through.
- For exterior trim where shellac is not practical, use an oil or alkyd stain-blocking primer over the same area instead.
- Repaint the spot-primed area with your topcoat once the primer has cured, matching sheen and color to the surrounding surface.
Our interior repaint prep checklist covers the broader steps for blending a spot repair into an existing wall or trim run.
Pro Tip: Feather your primer coat well beyond the stain's edge. A hard line at the stain's boundary is one of the most common reasons bleed-through shows up again later.

Safety, lead-paint guidance, and when to call a professional
Sanding or scraping a painted surface in a home built before 1978 carries a real risk of disturbing lead-based paint. EPA guidance on lead-safe renovation recommends testing or presuming lead is present in these homes, avoiding dry sanding or high-speed power sanding, and using containment and HEPA-filtered tools throughout the job. Our guide to dustless sanding methods covers practical dust control if you are working on an older home yourself, and a partner resource on lead paint disclosure for older rentals explains testing and disclosure obligations for landlords in similar situations.
A few signs it is time to bring in a professional:
- Stains keep returning after you have properly sealed and repainted the area.
- The bleed-through covers a large section of wall, ceiling, or siding rather than isolated knots.
- You suspect a hidden moisture source, like a roof leak or plumbing issue, feeding the stain.
- Exterior trim is deteriorated enough that replacement makes more sense than another repaint.
A contractor can pinpoint moisture sources you cannot see from the surface and offer prep options backed by a workmanship warranty.
Expected longevity of tannin stain blocking measures and maintenance tips
A properly applied shellac seal coat, protected by a quality topcoat, typically holds up as long as the surrounding paint job, often many years, as long as moisture does not find a new way in. Oil and alkyd stain blockers can hold just as well indoors, though outdoor exposure to repeated heat cycling sometimes causes them to fail sooner than their interior counterparts.
The biggest threat to a sealed stain's longevity is not the primer itself but water finding its way back to the wood. A once-sealed knot can bleed again years later if a roof leak, irrigation spray, or condensation issue introduces new moisture.
A short annual check keeps small issues small:
- Walk your exterior trim and siding each spring, looking for any new discoloration near old repair spots.
- Keep gutters clear and sprinklers angled away from siding to limit moisture exposure near wood.
- Touch up any chipped or cracked paint promptly, since a break in the film gives moisture a direct path to the wood.
- Recaulk gaps around trim boards every few years to keep water from tracking behind the paint.
Addressing small cracks or chips as soon as you spot them is far easier than dealing with a full stain that has reestablished itself under a finished coat.
Environmental factors affecting tannin bleed-through post-painting
Humidity is the single biggest environmental driver of tannin bleed-through after paint has cured. High moisture in the air, or direct contact with rain and sprinklers, gives tannins a path to dissolve and migrate even through a coat that looked perfectly sealed when it dried.
Temperature plays a supporting role. Resin in knots softens in hot weather and firms up again as temperatures drop, and that repeated expansion and contraction can work a stain toward the surface over multiple seasons. South and west-facing exterior walls, which see the most direct sun, tend to show bleed-through sooner than shaded sides of the same house.
Ventilation matters most during the drying process itself. A primer or paint that dries too slowly in a damp, poorly ventilated space gives tannins more time to dissolve and travel before the film sets. Painting on a dry day with reasonable airflow, rather than a humid morning right after rain, gives your primer a better chance to cure before moisture becomes a problem again.
If a stain shows up well after the paint has fully dried, that delayed timing usually points to an internal moisture source rather than a prep mistake, and finding that source matters more than reapplying primer.
Types of primers and sealers that block tannin bleed-through
Shellac-based primers remain the standard for blocking tannin and resin migration, largely because they use alcohol as a solvent rather than water. Tannins and resins do not dissolve readily in alcohol, and the cured shellac film is nearly nonporous, which stops extractives from reaching the topcoat. This makes shellac the first choice for interior knots, water stains, and smoke damage.
Oil and alkyd stain-blocking primers are the practical second option, especially outdoors where shellac's quick-drying nature and strong odor make it less convenient. These primers resist tannins well, though repeated heat cycling can cause them to wear down over time in ways that sometimes call for a maintenance coat sooner than shellac would need.
Plain latex primer, without a stain-blocking additive, is not formulated to resist tannins and should be reserved for wood with no history of bleed-through. Coating manufacturers continue to refine this category. BASF's research into dispersion technology describes additives designed to prevent knot bleeding in formulated primers, though most homeowners will still reach for a shellac or oil-based stain blocker on the shelf rather than a specialty industrial formulation.

How different paint types perform against tannin bleed-through
Standard latex paint offers almost no resistance to tannin bleed-through on its own. Its water base gives dissolved tannins an easy path upward, which is why latex paint applied directly over a raw knot almost always shows a stain within days.
Oil-based and alkyd paints resist tannin migration better than latex because their solvent base does not dissolve water-soluble extractives as readily. That resistance is one reason alkyd primers remain popular for exterior trim and siding, even as low-VOC formulations have changed much of the broader paint market.
Acrylic paints sit in the middle. Quality acrylic topcoats applied over a proper stain-blocking primer perform well, but acrylic alone, without a dedicated primer underneath, offers little more protection than standard latex. The primer underneath matters far more than the topcoat choice for blocking tannins; a well-sealed surface will hold up under nearly any quality topcoat, while an unsealed one will eventually show staining no matter how good the paint above it is.
Contractor perspective: how Tru Painting approaches tannin-prone projects
On every tannin-prone project, we lead with prep: identifying knots, spot-sealing with shellac primer, and only then moving to a finish coat. Our Cosmetic Refresh, Enhanced Prep & Durability, and Maximum Prep & Protection packages let homeowners choose how much sealing and prep work fits their budget and the condition of their wood.
On exterior trim with deep or widespread resin, sometimes an oil or alkyd primer is recommended instead of shellac, and in some cases full board replacement makes more sense than repeated sealing. A professional estimate typically includes a prep assessment up front, so you know the scope and timeline before work begins.
— Kyle
Let Tru Painting handle your tannin bleed-through problem
A thorough prep process, rather than a heavier topcoat, is what keeps tannin stains from coming back, and that is exactly how we approach every project. We handle spot-sealing, primer selection, and full repaints for homes in the local area.

If you are dealing with persistent staining on cabinets, trim, or siding, our cabinet refinishing and residential interior painting services include the prep work needed to stop it for good. Reach out through Trupaintingllcfl to request an inspection and quote for your project.
FAQ
How to stop tannins bleeding through paint?
Seal the stained area with a shellac-based primer, extending the coat about an inch past the visible stain, and add a second coat if any discoloration remains. For exterior surfaces where shellac is impractical, an oil or alkyd stain-blocking primer is the standard alternative.
What does tannin bleed through look like?
Tannin bleed-through appears as tan, brown, or amber spots and streaks, usually concentrated around knots or sections of heartwood. It can show up within hours of painting or appear weeks later after a humid or hot spell pulls moisture and resin to the surface.
Can tannin bleed through primer?
Yes, tannins can bleed through a standard latex primer because many tannins dissolve in water and travel upward as the primer dries. A shellac-based primer resists this because its alcohol solvent does not dissolve those extractives, making it the more reliable blocker.
Does an all-purpose stain-blocking primer always block tannins?
A dedicated stain-blocking primer, whether shellac or oil-based, blocks tannins in most cases, but it is not guaranteed on every wood species or moisture condition. Manufacturer guidance notes that even with proper preparation, tannin bleed can still occur, especially if an internal moisture source is feeding the stain.
Sources
- EPA — Lead Safe Renovations, Repair and Painting (RRP)
- How to Stop Knots from Bleeding Through Paint (Shellac Fix)
- Rust-Oleum Support — Tannin Staining
- Altay (2025) — Tannin-rich thermal wood & linseed oil (BioResources)