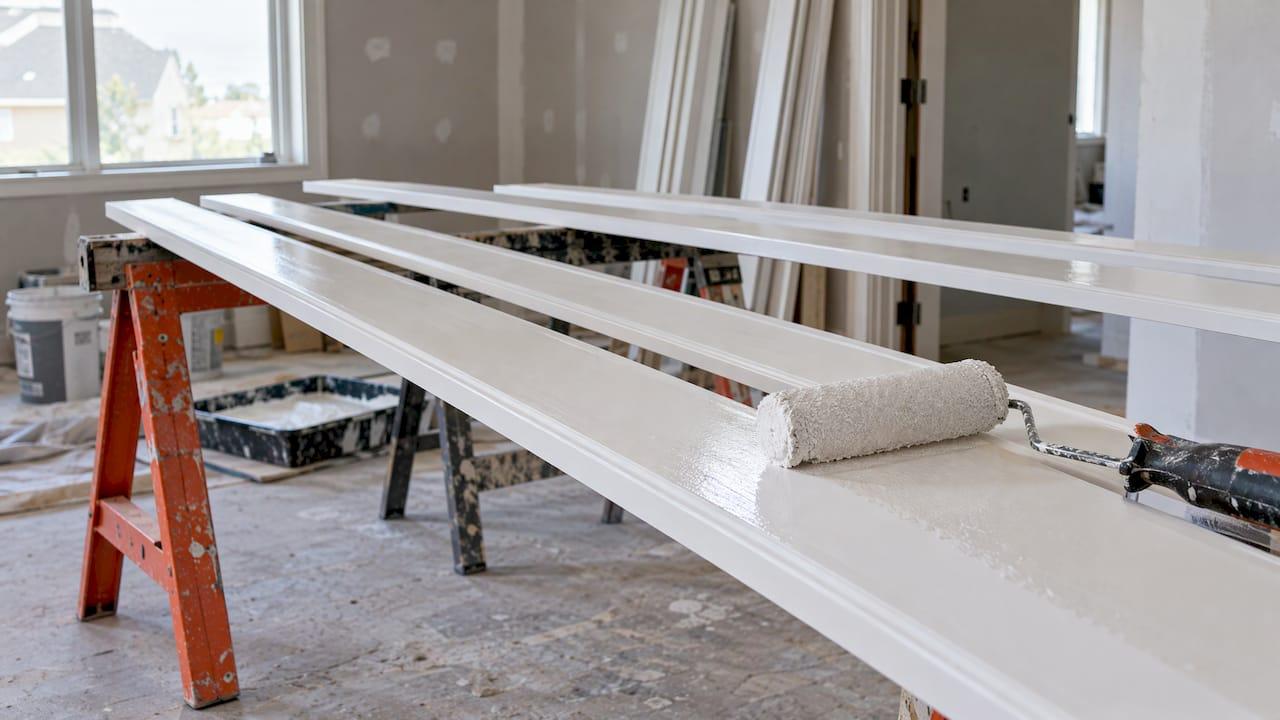
For new trim, paint it before you install it. Prime the raw wood, apply two coats on sawhorses, then fill nail holes, caulk the seams and touch up after it is on the wall. Prepainting is faster and cleaner, because you are not trying to cut a crisp line next to a finished wall. It does not replace the final touch-up. Here is how we think about the order, the prep, the drying times and the finishing steps.
TL;DR
- Prepaint new, unfinished trim when you have room for sawhorses and a drop cloth. Architectural Digest's painting pros favor it because it cuts down on wall protection.
- Prime raw wood first, sand lightly, then apply two finish coats. Let each coat dry fully before you flip, stack or carry the pieces.
- Plan on filling nail holes, caulking seams and touching up after installation. Prepainted trim is never truly finished until then.
- Paint after installing instead when the walls are being repainted anyway or you have no workspace.
- If you want the whole job handled, we paint trim, doors and walls in the right sequence.
Table of Contents
- Should you paint trim before or after installing it?
- What prepainting does not skip
- Prep the trim before you paint it
- Choose the paint and tools
- How to paint trim before installation, step by step
- Drying, handling and stacking
- Protect the trim during installation
- After installation: fill, caulk, touch up
- Our perspective on prepainting trim
- Let us handle your trim
- FAQ
- Sources
Should you paint trim before or after installing it?
For a new project with bare trim, painting first is usually the better call. You can lay each piece flat, brush or spray it from every angle, and never worry about getting trim paint on a finished wall. Architectural Digest describes the approach as priming raw wood, applying two coats, then touching up as necessary after installation.
Painting after installation still has its place. Metrie notes that prepainting on sawhorses over a drop cloth can speed the work and lets you use a roller or sprayer. It also says painting in place may be preferable when the walls will be repainted too, or when workspace is limited.
| Situation | Better order | Why |
|---|---|---|
| New, unfinished baseboards, casing or crown | Paint before installing | Easy access, no wall masking, sprayer or roller possible |
| Walls will be painted after trim goes up | Either, but prepainting still saves time | Wall paint can cover the cut-in line at the end |
| Tight garage or no spare room | Paint after installing | No space for sawhorses and drying pieces |
| New flooring going in | Prepaint trim, install, then touch up | Fewer drips on the floor, and you control the work area |
| Already-installed trim being refreshed | Paint in place | Nothing to remove |
What about the walls?
If both walls and trim are new, a common professional order is trim first, walls second, because wall paint can overlap the trim edge slightly and be cut in cleanly against a finished surface. If you are repainting existing walls, our guide to the interior painting sequence walks through ceilings, walls and trim in order.
What prepainting does not skip
Prepainting saves effort but does not remove steps. Metrie warns that prepainted trim still needs nail-hole filling, caulk and touch-up once it is installed. Nailing nicks the finish, and the joints between pieces and against the wall will show gaps.
Tim Carter of Ask the Builder takes a middle path. He primes both sides of the woodwork and applies one finish coat to the exposed face before installation, then applies the final coat after the trim is up, since installation can nick or scratch the finish. That approach gives you the cleanest final surface, at the cost of one more pass on the wall.
Choose based on how much finish you want to protect:
- Full two coats before install, spot touch-up after. Fastest. Good for rental-grade and straightforward rooms.
- Prime and one coat before, final coat after. Better for high-visibility rooms, where every nail hole and miter joint will be seen.
Prep the trim before you paint it
Preparation decides how long the finish lasts. Fine Homebuilding's professional guidance treats it as the decisive step: poor sanding, cleaning or priming can cause a bad appearance or finish failure.
Sand, fill and clean
Before install, you are working on loose pieces, so this is the easiest prep you will ever do.
- Check each piece. Set aside anything split, warped or damaged.
- Sand rough areas. This Old House recommends 80-grit then 120-grit paper, then vacuuming and wiping with a tack cloth.
- Fill defects. Use wood filler on knots, dents and any factory nail holes, then sand the filler smooth once dry. Fine Homebuilding suggests a nonshrinking filler.
- Remove dust. Vacuum, then wipe. Dust under primer shows up as a rough finish.
If you are refreshing old pieces with a glossy finish, Benjamin Moore advises sanding glossy trim until it is dull, cleaning with a damp sponge and letting it dry thoroughly. Our post on painting over glossy paint covers that step in more detail.
Prime before you paint
Bare wood and filled spots should be primed. Sherwin-Williams says to let primer dry for 24 hours, then lightly sand with 120-grit paper to knock off brush marks or drips before removing dust. Benjamin Moore adds that heavily repaired trim should receive a full primer coat rather than spot priming alone.

The primer step matters most on knots and on any end-grain cut, where raw wood soaks up paint. If you are priming surfaces such as cabinet boxes or doors alongside the trim, see our guide to primers matched to the surface.
Should you caulk before painting?
Before installation, there is little to caulk, apart from the miter joints you may cut. After installation, caulk is what closes the gap between trim and wall. The guidance we found is consistent: caulk gets applied after the trim is on the wall, and the caulk must be paintable latex. This Old House says to apply paintable latex caulk at edges and joints and let it dry completely before painting. Fine Homebuilding recommends letting acrylic-latex caulk dry overnight, then sanding lightly.
So on a prepainted job, the order is: install, fill nail holes, caulk seams, then touch up the caulk and fill with trim paint. The caulk step is the one that gives trim a built-in look. For exterior trim, which faces Florida sun and rain, see why we recommend paintable exterior caulk and a day's wait.

Choose the paint and tools
Trim takes more abuse than walls, so it needs a harder finish. Fine Homebuilding points to enamel, which dries to a hard, glossy, durable finish, and notes that both oil-based and latex enamels exist. Many homeowners go with a waterborne enamel for easier cleanup and lower odor.
For a brush, the same source recommends a 2½- or 3-inch angled sash brush. Benjamin Moore says 1½- and 2½-inch angle sash brushes in quality nylon/polyester are a good fit. Dip about a third of the bristles, tap off the excess and use light pressure.
Sheen is a style choice. Satin and semi-gloss are common on trim because they wipe clean. Our kitchen paint finish guide compares finishes for walls, trim, ceilings and cabinets.
How to paint trim before installation, step by step
Set up the workspace
Use sawhorses with a drop cloth underneath. A simple setup is two horses, a 2x4 across them, and the trim laid on top. Keep the room between roughly 55 and 80°F with humidity below 50%, which is the range Fine Homebuilding prefers. It adds that humidity above 85% can stop paint from drying properly and contribute to sags, wrinkling or blushing.
A garage with the door open on a humid Florida afternoon is the wrong place. A closed, air-conditioned room is better.
Brush it
- Paint with the grain, working in sections of about 3 feet.
- Overlap adjoining sections while the paint is still wet to avoid lap marks, as Fine Homebuilding advises.
- Do the back face and edges as needed. Backs only need primer.
- Let the paint dry before flipping. Common advice is to paint one side fully and wait about an hour before turning the piece, but check your paint's can for the exact time.
- Sand lightly between coats, wipe, and apply the second coat.
Spray it
Spraying gives the smoothest finish and is the best answer to "spray trim before install." Graco recommends filling holes, sanding rough areas, cleaning, then spraying in long even strokes about 12 inches away, overlapping passes by about 50 percent for doors. Fine Homebuilding suggests starting each pass before the tip reaches the work, keeping a constant distance, moving continuously, and overlapping the previous pass by about one-third.
For a specific product, Valspar's data sheet for its Cabinet, Door & Trim enamel says it can go on by premium brush, short-nap roller or airless spray, with a cited spray specification of 2,000 PSI and a 0.013 to 0.017-inch tip. Always follow the label of whatever paint you use.
Spraying needs masking and ventilation, and overspray travels. Do it away from finished floors, furniture and walls.
Drying, handling and stacking
Prepainted trim gets handled a lot, so drying matters more than most people expect. Times vary by product. PPG's data sheet for one alkyd enamel lists 5 hours to touch, 8 hours to handle and 24 hours to recoat at 77°F and 50% relative humidity. A different PPG product lists 15 to 20 minutes to touch, 1 hour to handle and 7 days to full cure under the same conditions. Both note that temperature, humidity and film thickness change the numbers.
What that means in practice:
- Handle gently even when dry to the touch. A finish can be dry but not cured, and it will still mark under pressure.
- Do not stack wet or freshly dried pieces face to face. Use spacers, or lay them on a rack.
- Wait before the final coat or installation. Rushing is the main cause of fingerprints, blocking and dented paint.
Protect the trim during installation
Prepainted trim travels from the workshop to the wall, and that is where most damage happens.
- Carry pieces upright, not dragged on edges.
- Use a sharp blade for miter cuts, and prime or paint any bare cut ends before they go up.
- Use a nail set so the nail head is slightly below the surface and the hammer never touches the paint.
- Cover the floor if you are working on finished flooring.
Plan the room layout so long pieces such as baseboards need as few joints as possible. Joints are where touch-up concentrates.
After installation: fill, caulk, touch up
This is the last 10% of the job, and it is where the work looks professional or amateur.
- Fill nail holes with filler and sand lightly once dry.
- Caulk the top edge of baseboards and the seams where casing meets the wall, using paintable latex caulk. Wipe the excess with a damp finger or cloth.
- Caulk mitered corners if they show gaps.
- Let the caulk dry. Overnight is a safe default.
- Touch up the filler and caulk with the same trim paint, using a small brush. Feather the edges.
- Remove tape only after the paint has had significant drying time, as Graco recommends.
On commercial jobs with long runs of trim, the same logic scales up. For a look at how a commercial painting sequence can be organized, preparation and trim come before the large wall areas.
Our perspective on prepainting trim
We like prepainting trim, and we recommend it whenever the project allows. It gives us better access, a smoother finish and fewer chances of getting paint where it does not belong.
But the real difference between a trim job that lasts and one that does not is preparation. Our approach is built on thorough prep, premium products and clear communication. We fill, sand, prime and caulk before we ever think about the finish coat.
That is also why we offer three service tiers: Cosmetic Refresh, Enhanced Prep & Durability, and Maximum Prep & Protection. Some homes need a clean, fresh look. Others, especially older homes or high-moisture areas, benefit from more repair and priming. We help you choose the level that fits your home and budget.
Finally, we always plan for post-installation touch-up. Even the most careful installer will nick a finish, and a pro painter expects to fix it. Plan for it and it becomes a routine last step instead of a surprise.
Kyle
Let us handle your trim
If you would rather have a professional crew do the priming, painting and touch-up, we are a locally owned painting contractor serving Lake County and Central Florida. We paint interior and exterior trim, doors, walls and cabinets, and repair drywall where needed. Our service packages let you pick the level of prep and protection that suits your project.

For a room-by-room project, start with our residential interior painting page. If you are also refinishing kitchen cabinets, see our cabinet refinishing service. For doors, our step-by-step interior door guide shows how the process works, and our post on how painters clean up after a job explains what to expect when we finish.
FAQ
Should I paint baseboards before or after installing them?
For new, unfinished baseboards, paint them before installing. You get easier access and no wall masking, as Architectural Digest's sources explain. Still plan on filling nail holes, caulking the top edge and touching up afterward.
Do I need primer on new trim?
Yes, for raw wood. Prime bare wood and filled spots, and give heavily repaired pieces a full primer coat. Sherwin-Williams suggests letting primer dry 24 hours, then lightly sanding before the finish coat.
Can I spray trim before it is installed?
Yes, and it is a good way to get a smooth finish. Lay the pieces flat on sawhorses, keep the sprayer moving at a steady distance, and overlap your passes as Graco describes. Mask and ventilate the area, because overspray travels.
Should I paint trim before new flooring?
Often, yes. Prepainting the trim keeps paint drips off new floors, and you can fill and touch up once everything is installed. If the room is cramped, painting in place with good floor protection also works.
How long should painted trim dry before installing?
That depends on the product. Check the paint's data sheet for handling and recoat times. For example, one PPG alkyd enamel lists 8 hours to handle and 24 hours to recoat at 77°F and 50% humidity. Humid conditions slow drying.
Sources
- Architectural Digest: Painting Trim, 6 Things to Know
- Metrie: Should You Paint Trim Before or After Installing?
- Ask the Builder: Painting Walls or Trim First
- Fine Homebuilding: Painting Trim the Right Way
- Fine Homebuilding: Get a Perfect Paint Job on Trim, Windows, Doors, and Cabinets
- This Old House: How to Paint Trim
- Sherwin-Williams: How to Paint Trim
- Benjamin Moore: How to Paint Trim
- Graco: How to Paint Trim & Doors Using a Sprayer
- Valspar: Cabinet, Door & Trim Satin Series 8100 data sheet
- PPG: Glyptex Alkyd Enamel technical data
- PPG: Break-Through technical data