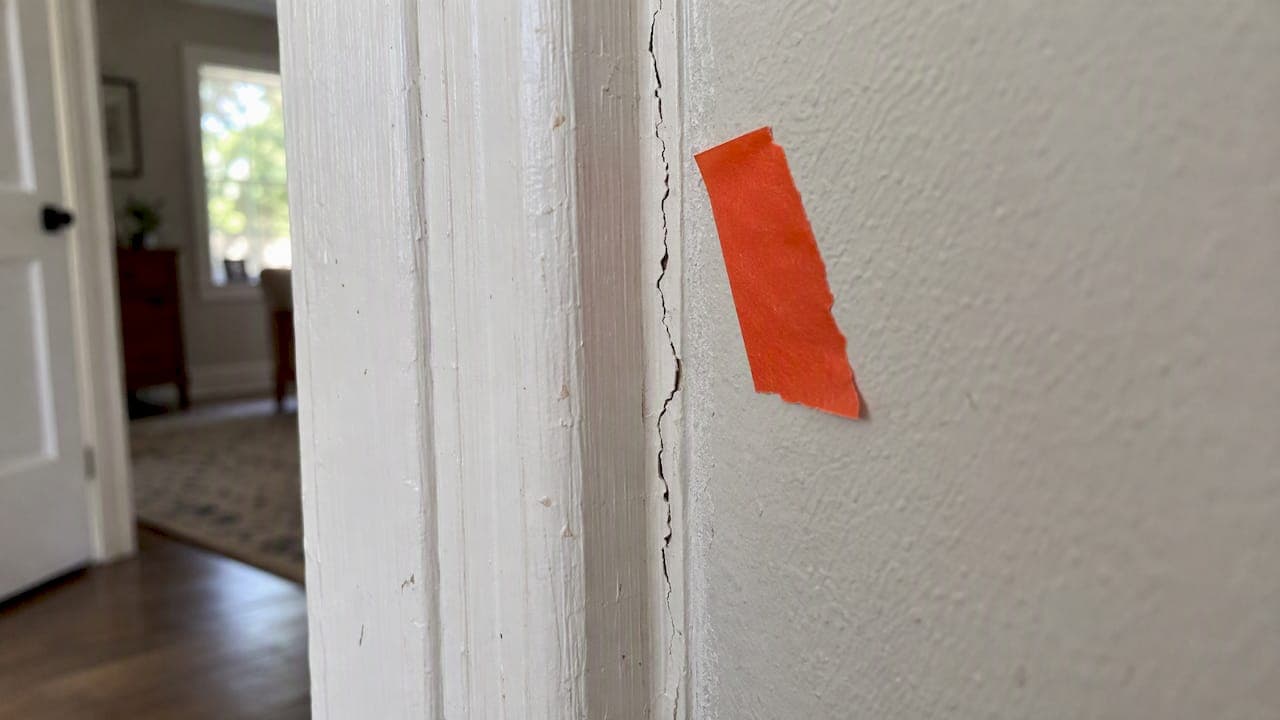
If the caulk or the paint over it is cracking after a paint job, the cause is almost always one of four things: the caulk was painted before it cured, it was the wrong type of caulk, the joint was too deep or too wide for a plain bead, or the paint was too stiff to move with the joint. The fix is rarely just "add more caulk." You cut out the failed bead, correct the cause, and recoat it properly.
We paint homes and businesses across Lake County and Central Florida, and cracked caulk lines are one of the most common call-backs we see on work done by others. Here is how to tell what went wrong in your case and what to do about it.
TL;DR
- Cracking right along the caulk line usually means the paint went on before the caulk cured. Plan on 24 to 72 hours, longer in Florida humidity, and always follow the label.
- Check that the caulk is labeled paintable. 100% silicone is essentially not paintable, and paint over it will fail.
- Wide, deep or moving joints need a backer rod so the caulk bonds on two sides, not three.
- Flat, stiff paint cracks over flexible caulk. A more flexible, higher-sheen finish often solves chronic hairline cracks.
- Cracks that return after a repair mean something is still wrong: moisture, movement or prep. Fix the cause, not just the line.
Table of Contents
- What cracked caulk after painting actually looks like
- Why it happens
- Quick diagnosis
- How to fix it, step by step
- Should you caulk before or after painting?
- Why flat paint cracks more
- Our perspective: cracked caulk is a prep problem
- When to call a pro instead of recaulking
- Fix it once with Tru Painting
- FAQ
- Sources
What cracked caulk after painting actually looks like
The symptom shows up in a few different forms, and each one points to a different cause.
- Hairline cracks in the paint only, directly over the bead. The caulk is intact underneath but the paint film split. This is the classic paint cracking over caulk problem.
- A gap opening between the caulk and the trim or wall. The caulk lost adhesion or shrank. Dirty surfaces, moisture or a bad product are the usual suspects.
- Wrinkled or crawling paint on the bead. The paint skinned over while the caulk was still wet or off-gassing underneath.
- The bead splitting down its own middle. Often a sign of three-point adhesion in a joint that moves, or a bead that was applied too thick.
Look closely before you decide anything. Run a fingernail along the line. If the paint flakes off a soft, intact bead, think timing and paint flexibility. If the bead itself is torn or pulled away, think joint design and adhesion.
Why it happens
1. The paint went on too soon
This is the leading cause. Industry guidance puts the full cure window at 24 to 72 hours depending on the product and conditions, and painting before that point is a common reason caulk fails.
The trap is that a bead feels dry long before it is done. Painting pros often point out that fast-drying is not the same as fully cured: the surface can feel firm while the inside stays soft and keeps shrinking. A rigid paint film on top of a bead that is still shrinking has nowhere to go, so it splits.
Sherwin-Williams lists the same family of causes: caulk that is not paintable, and paint applied before the caulk has dried.
2. Florida humidity slows everything down
Most trim caulks are water-based, which means they cure as water leaves the bead. In a damp Lake County summer, with morning dew and afternoon storms, that takes longer than the number on a spec sheet written for ideal conditions. A bead that would be ready in a day in a dry climate may need more time here. We cover the dew point side of this in our guide to painting season and dew point in Florida, and the wider picture in how weather affects exterior painting.
Temperature matters at the other end too. Sherwin-Williams guidance says not to caulk when air or surface temperatures are below 40°F. That is rarely a concern in Central Florida, but the occasional winter cold snap can catch a job scheduled for January.
For exterior joints that stay damp, some professional-grade polyether sealants are made for the problem. Manufacturer data for one such product, NovaLink 35, lists no outgassing on damp surfaces and paintability within 24 hours, subject to its stated limitations. Check any product's own data sheet before relying on it.
3. The caulk was never meant to be painted
Paintable on the label is not a detail to skip. Sherwin-Williams names caulk that is not paintable as a direct cause of cracking paint, and says to read the packaging first.
The big one is silicone. According to GE Sealants, 100% silicone is essentially non-paintable. Paint beads up, fails to bond, then peels and cracks. In showers and wet kitchen zones, use a color-matched or clear silicone from the start rather than trying to paint it.

4. The joint is moving, and the paint is not
When the paint cracks only over the caulk, it is often a mismatch in flexibility. Caulk stretches and compresses as the joint opens and closes with temperature and moisture. Many paints, especially flat, heavily filled ones, cannot stretch with it. Sashco, a sealant maker, describes this elasticity mismatch and notes that moving to a more flexible, higher-gloss finish can resolve chronic hairline cracking where other methods have not.
This is especially relevant on Florida homes. Stucco, wood trim and fiber cement all expand and contract in our heat and humidity swings, and joints between different materials move the most.
5. Three-point adhesion in deep or wide joints
If the gap is wider than about 1/4 inch, a bead of caulk pushed straight into it sticks to both sides and to the bottom. That is three-point adhesion, and it restricts the caulk so it tears when the joint moves. The Sherwin-Williams guidance calls for a backer rod or bond-breaker tape in joints over 1/4 inch so the caulk bonds wall to wall only. When the caulk tears, the paint tears with it.
Quick diagnosis
| What you see | Most likely cause | Best fix |
|---|---|---|
| Fine cracks in paint only, bead intact | Paint too stiff or applied too early | Recaulk if needed, prime, topcoat with a flexible paint |
| Paint wrinkles or crawls on the bead | Painted before caulk skinned or cured | Let it cure fully, remove loose paint, recoat |
| Paint beads up or peels off the line | Silicone or non-paintable caulk | Remove all of it, clean, recaulk with paintable product |
| Bead splits down the middle | Deep or wide joint, three-point adhesion | Remove, add backer rod, recaulk |
| Gap between bead and surface | Dirty or damp surface, poor adhesion | Clean and dry, remove, recaulk |
| Cracks come back every season | Moving joint or moisture problem | Find the source of movement or water, then repair |
How to fix it, step by step
This is the process we follow. If you are doing a small interior joint yourself, it works for you too.
- Identify the caulk. If paint will not stick at all and the bead feels rubbery and slick, assume silicone. Every trace has to come out, because new caulk and paint will not stick to the residue.
- Cut out the failed bead. Use a sharp utility knife or a caulk removal tool, and scrape back to clean, sound edges. Leaving old caulk can work for minor hairlines, but removing it is the more reliable repair.
- Clean and dry the joint. Remove dust, chalk, old paint flakes and mildew. In Florida, check that the area is actually dry. A joint that looks dry at 8 a.m. may still hold moisture.
- Add a backer rod if the gap is over 1/4 inch. It keeps the depth right and prevents the bottom bond.
- Choose a paintable caulk suited to the spot. Look for a label that says paintable, and one rated for exterior use outside. Pick a high-quality, flexible product for joints that move.
- Apply a modest bead and tool it smooth. Thicker is not stronger. Overfilled joints take longer to cure.
- Wait. Check the label, and treat the 24 to 72 hour range as the guide. In humid weather, lean toward the long end.
- Prime the bead if needed. Some experienced painters spot-prime caulk with an acrylic primer or a stain-blocking coat so the topcoat does not soak unevenly into the porous bead.
- Topcoat with a flexible paint. Two coats, brushed so the paint overlaps onto the surrounding surface by a hair and seals the edge.
On exterior work, the order of operations matters as much as the products. See our walkthrough on using paintable exterior caulk and waiting a day and our wider exterior prep best practices.
Should you caulk before or after painting?
Before, in nearly every case. Caulk goes onto clean, primed surfaces, then the finish coat seals over it. A caulk-to-primed-surface bond is stronger than caulk applied over finished paint, and the topcoat gives you one continuous, sealed line.

There is one exception. Some painters add a second, thin touch-up bead after the final coat to close a stubborn gap. If you do, use a paintable caulk, let it cure, and touch up only that line.
For interior rooms, the sequence is worth knowing in full. Our interior painting sequence guide shows where caulking fits between prep, priming and finish coats, and the interior wall prep checklist covers what to do first.
Why flat paint cracks more
Flat and low-sheen paints carry a high load of pigment and fillers. That gives a beautiful matte look, but it also makes the film less elastic. Over a flexible bead that moves daily, the paint can craze or hairline-crack along the line.
You do not have to give up your look entirely. Options include:
- Using a satin or eggshell on trim and baseboards, where caulk lines are most common.
- Choosing a paint formulated for flexibility on exterior trim and siding joints.
- Keeping flat sheens for ceilings and large wall fields, where there is little joint movement.
On exteriors, a quality elastic paint is part of the answer to long-term performance. Our guide to choosing low maintenance exterior paint goes deeper on what to look for.
Our perspective: cracked caulk is a prep problem
We do not see cracked caulk as a bad-luck problem. We see it as a schedule problem. Caulk fails when someone is racing the clock: a crew paints the same afternoon the bead goes in, or a homeowner wants the job done before the weekend. The caulk looks fine for a week, then the lines appear.
That is why we build cure time into every job, and why we are upfront about it when you ask us for a timeline. Florida weather can move that schedule, and we would rather tell you so than rush a finish that will not last. Preparation is the part of painting you cannot see once the job is done, and it is where most failures start.
It is also why we offer three service packages: Cosmetic Refresh, Enhanced Prep & Durability, and Maximum Prep & Protection. The more prep a surface needs, the more it matters to pick the level that matches its condition, not just your budget this month. If a home has tired caulk lines, stucco cracks and chalking paint, a surface-only refresh will not hold up as long as a job that addresses the joints first. For stucco in particular, we do specialized repairs before any coating goes on.
Our advice for any homeowner: ask every painter what caulk they use, whether it is paintable, and how long they wait before coating it. A clear, specific answer is a good sign.
— Kyle
When to call a pro instead of recaulking
Small interior touch-ups are a reasonable DIY project. Call a professional when:
- Cracks keep returning after a repair, which points to movement, water intrusion or a substrate problem.
- The cracking runs along exterior siding, windows or stucco, where water getting behind the caulk can cause hidden damage.
- You find soft, stained or crumbling wood or drywall around the joint.
- The paint is chalky or failing in a broad area, not just at the caulk lines. Our 30-second rag test for chalking paint helps you check.
- You are preparing a rental, a retirement community unit or a commercial space and need clean, consistent results across many rooms.
Fix it once with Tru Painting
If your caulk lines are cracking and you want them fixed properly, we can help. We handle residential exterior painting, residential interior painting, stucco painting, drywall repairs and specialty coatings for homes and businesses in Lake County and across Central Florida. Look at our three service packages to see which level of prep fits your home, then reach out to schedule your appointment.
FAQ
How do I keep caulk from cracking?
Use a caulk labeled paintable and suited to the location, and keep the bead modest in size. Use a backer rod in joints wider than 1/4 inch. Then wait for the full cure before you paint, leaning toward the longer end of the 24 to 72 hour range in humid weather.
Why is my paint cracking over caulk?
Usually the paint went on before the caulk cured, the caulk was not paintable, or the paint was too stiff for a joint that moves. Flat paints are the most likely to crack. Remove the loose paint, check the bead, and recoat with a flexible paint once everything is cured.
Are you supposed to paint over caulk?
Yes, if it is a paintable caulk, such as an acrylic latex or siliconized acrylic product. Painting over the bead seals the edge and gives a uniform finish. Do not try to paint 100% silicone, since paint will not bond to it.
Can I just caulk over the cracked caulk?
For a hairline crack on a stable interior joint, a thin bead can work as a quick fix. For anything wider, loose or exterior, cut out the old caulk first so the new bead bonds to a clean surface. Caulk over a failed bead tends to fail the same way.
How long should I wait to paint after caulking?
Read the label first. As a general range, 24 to 72 hours allows most caulks to cure enough to accept paint. High humidity, thick beads and cooler or wet weather all push you toward the longer end.
Sources
- How to Fix and Repair Caulk Cracking, Sherwin-Williams
- Caulk: Paint Cracking or Crawling, Sherwin-Williams
- How to Prevent Paint From Cracking Over Sealant, Sashco
- Everything you need to know about caulking when painting, GE Sealants
- Why Caulk Cracks After Painting (and How to Prevent It), Surface Prep Pro
- Paint cracking over caulk: what are the solutions?, The Decorators Forum
- NovaLink 35 technical data sheet, Chemlink