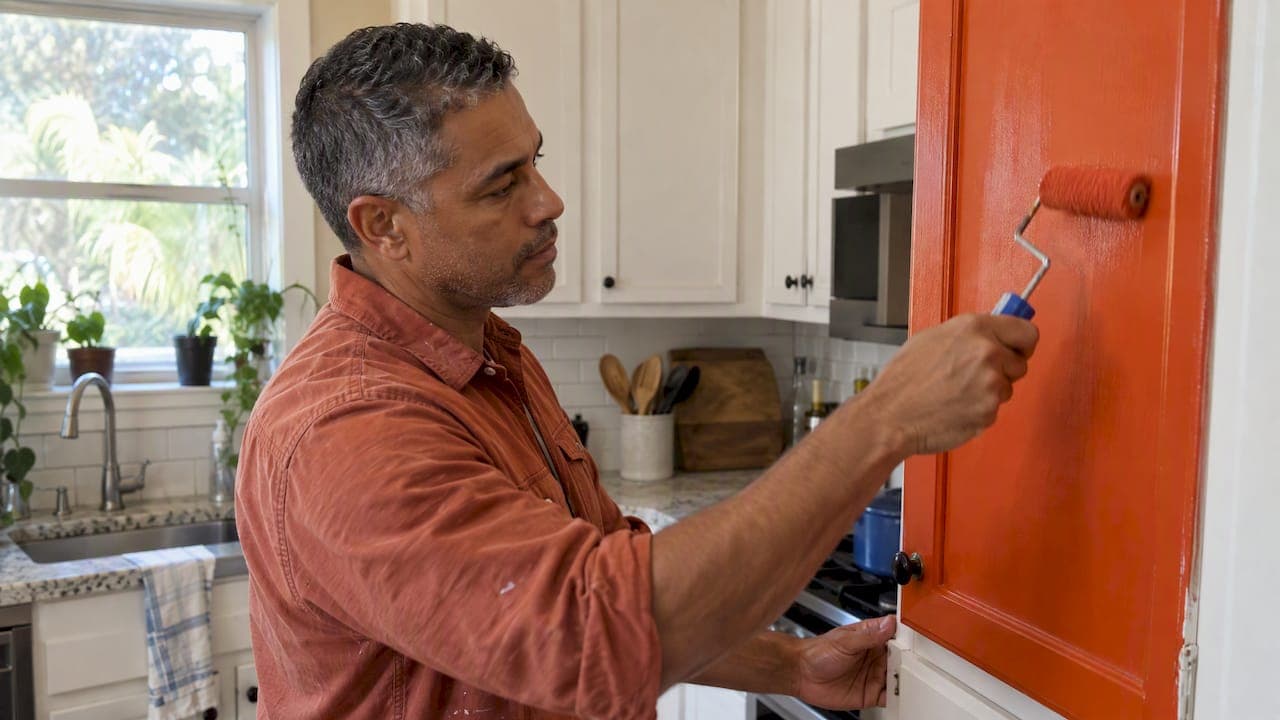
Yes, you can paint over oil-based paint, and latex topcoats are fine to use. The surface just needs the right prep first. Clean it, scuff-sand it, apply a bonding primer, then add your latex. Skip any of those steps and the new paint will probably peel, sometimes in large sheets.
We are a Lake County painting contractor, and we see this question on older homes all the time. Below is the process we trust, the mistakes that cause failures, and the point where hiring a professional makes more sense than a weekend of sanding.
TL;DR
- Latex paint can go over oil-based paint, but only after cleaning, scuff-sanding and priming with a bonding primer.
- Test first: rub a small spot with a cloth and denatured alcohol. If no paint comes off, it is oil-based.
- Sanding is for creating grip, not for removing the old coat. Light, even scuffing is the goal.
- If your home was built before 1978, test for lead before you sand anything.
- Florida heat and humidity are hard on weak adhesion, so shortcuts show up fast here.
Table of Contents
- Why latex does not stick to oil by itself
- Step 1: Find out whether your paint is oil-based
- Step 2: Check for lead before you sand
- Step 3: Clean the surface properly
- Step 4: Scuff-sand to create grip
- Step 5: Remove the dust without ruining the bond
- Step 6: Prime with a bonding primer
- Step 7: Apply your latex topcoat
- Why Florida homes need extra care
- Our perspective: where prep decisions pay off
- DIY or hire a painter?
- Let us handle the prep
- FAQ
- Sources
Why latex does not stick to oil by itself
Oil-based paint (often called alkyd) cures to a hard, smooth, glossy film. Latex is water-based. A fresh coat of latex has very little to grab on a slick surface, so it dries on top of the old paint instead of bonding with it. Behr's pro guidance explains the mismatch with a salad dressing comparison: oil and water do not blend.
The result is paint that looks fine for a few weeks, then chips at the edges, lifts at door frames or peels away when scraped. The Spruce notes that temperature swings and high humidity make this worse, which is a fair description of a Central Florida summer.
The good news is that modern latex is more forgiving than it used to be. Glidden's FAQ says that in most cases, with today's latex technology, painting over alkyd is not a problem, but the surface needs extra attention. That attention is what the rest of this guide covers.

Step 1: Find out whether your paint is oil-based
If the house is older, or you do not know what the previous owners used, test before you buy anything. Trim, doors, window frames, cabinets and handrails are the most likely places to find oil-based paint.
- Dip a cotton ball or soft cloth in a little denatured alcohol.
- Rub it on a small, out-of-the-way spot.
- Check the cloth.
If paint transfers to the cloth, it is latex. If nothing comes off, it is oil-based and needs priming before any latex topcoat. Both Behr and Glidden describe this same test.
A few other clues help, but none replace the rub test:
- Oil-based paint tends to look harder and glossier, and it often yellows with age.
- It can feel smooth and almost glassy on trim.
- A coat that has been repainted many times may hide what is underneath, so test through to the older layers if you can.
If the test is unclear, ask a professional to check before committing to a product.
Step 2: Check for lead before you sand
This step matters most if your home predates 1978. Sanding is part of the standard process, and sanding old paint can create dust you do not want in your home.
The EPA's guidance says lead-based paint may be found on any surface inside or outside the home, and that disturbing it during renovation, repair or painting can create dangerous amounts of lead dust. The same booklet says about nine in ten homes built before 1940 contain it, and about two in three homes built between 1940 and 1960.
The federal rule is also clear about who can do the work. Under the EPA's Renovation, Repair and Painting program, anyone paid to disturb painted surfaces in homes, childcare facilities and preschools built before 1978 must be certified, and their workers trained. If you hire a painter for an older house, ask whether they follow lead-safe practices.
What to do in practice:
- If your home was built before 1978, get the paint tested before sanding or scraping. Use a certified professional or a testing method the EPA recognizes.
- If you have children, pregnant family members or pets in the home, bring this up before any prep starts.
- If you are renting out the home or doing a larger remodel, treat lead testing as part of the planning. A guide like these budget-friendly renovation ideas can help you decide which updates to tackle first, but test your paint before you plan the prep.
If lead is present, do not sand it yourself. That is a job for a certified professional.
Step 3: Clean the surface properly
Paint does not bond to grease, soap film, kitchen residue or chalky dust. Kitchens, bathrooms, door frames and anything people touch daily need this step the most.
Bob Vila's guide suggests a TSP solution of 1/4 cup per gallon of warm water to cut grease and grime. Wear gloves and eye protection, wipe the surface down, rinse with clean water, and let it dry fully. Do not paint over damp trim.
Outdoors, the same logic applies to mildew and dirt. Pressure washing is the usual method on exterior trim and siding, but keep the pressure moderate on old wood so you do not gouge it. Exterior surfaces should be completely dry before any primer goes on.
Step 4: Scuff-sand to create grip
Many homeowners are surprised by this part: you are not trying to remove the oil paint. You are trying to dull it. Benjamin Moore's contractor advice points out that the goal is a profile, a mechanical tooth, that lets the next layer lock in.
The common recommendation is 180 to 220 grit sandpaper. Here is how to do it well:
- Sand until the shine is gone and the surface looks uniformly dull.
- Use light, even strokes. Heavy sanding creates gouges that show through the finish.
- Use a sanding sponge on moldings and curved trim.
- Fill any dents or cracks, then spot-sand the filler.
If you wish to avoid sanding altogether, a liquid deglosser is sometimes used, but a bonding primer is still the step that does the real work. Read the product label and follow it.
Step 5: Remove the dust without ruining the bond
After sanding, wipe away every trace of dust with a damp cloth or vacuum. A tack cloth also works, with one catch. The Spruce warns that pressing hard leaves a waxy residue that can keep new paint from bonding. Use it with a feather-light touch.
Then let the surface dry. Dust trapped under primer creates a rough finish and weak spots, and it is easy to prevent.
Step 6: Prime with a bonding primer
This is the step that separates a repaint that lasts from one that peels. The Spruce says that scuffing alone is not enough and that a quality bonding primer is what gives the latex a firm base. Look for a primer labeled for adhesion over glossy or previously oil-painted surfaces, and check the can for compatibility with your topcoat.
As for type, you have two broad options:
| Primer type | Best for | What to know |
|---|---|---|
| Water-based bonding primer | Most interior walls, trim and doors | Easier cleanup, lower odor, dries quickly |
| Oil or alkyd-based primer | Stained wood, heavy tannin bleed, very slick surfaces | Stronger odor, needs solvent cleanup, longer dry time |
Whichever you choose, apply one even coat and respect the recoat time on the label. Rushing the primer, or painting over it before it cures, is a common reason for failure. If you are refinishing cabinets, we cover the substrate-by-substrate choices in our guide to primers for painting cabinets.
Step 7: Apply your latex topcoat
Once the primer has cured, paint as normal. A few habits help:
- Use two thin coats rather than one thick one.
- Choose a quality acrylic latex for trim and doors. Satin and semi-gloss hold up to cleaning better than flat.
- Keep edges wet and avoid overworking the paint as it starts to dry.
- Give the finish time to harden. Latex can feel dry in hours but take much longer to fully cure, so go easy on doors and cabinets for the first couple of weeks.
If you would rather stay with oil-based paint, you can. Bob Vila's answer notes that using oil over oil is generally the most straightforward refresh. The tradeoff is stronger fumes, slower drying and cleanup with solvent. Many homeowners choose latex for those reasons, and with proper prep it works well.
Why Florida homes need extra care
Prep matters everywhere, but Central Florida gives paint very little room for error. Heat, humidity, heavy summer rain and strong sun all stress the bond between layers. A coat that would limp along in a drier climate can start to fail here within a season.
Two timing points help:
- Paint when surfaces are dry and the weather is stable. Our Florida painting season and dew point checklist explains how to avoid moisture trapped under fresh paint.
- Plan for how long the finish needs to last. Our posts on repaint frequency in Florida and exterior paint lifespan show why prep is what separates a 5-year repaint from a 10-year one.
Exterior trim, front doors and garage doors are the places where old oil-based paint most often hides, and they take the most weather. They are also where weak prep is most visible.
Our perspective: where prep decisions pay off
We do not compete on being the cheapest painter in Lake County. We compete on preparation, premium products, skilled craftsmanship and clear communication. Painting over oil-based paint is a perfect example of why.
From the street, two repaints can look identical on the day they are finished. The difference shows up in year two, when one has held its edges and the other is lifting at the door casing. The only thing that separated them was what happened before the topcoat went on.
Here is what we think homeowners should know:
- Test before you decide. A two-minute rub test saves you from guessing, and it changes the whole prep plan.
- Prep is the product. Cleaning, scuffing, repairing and priming are not extras. They are most of the job.
- Older homes deserve a lead check first. Beautiful and safe should go together, and we think a repaint should never start with sanding unknown paint.
- Match the level of prep to the surface. A bedroom wall in good shape and a sun-baked front door do not need the same plan.
That last point is why we built our work around three tiers of service: Cosmetic Refresh, Enhanced Prep & Durability, and Maximum Prep & Protection. You choose the level of protection and investment that fits your home and budget, and we are open about what each one includes. We also stand behind our workmanship with warranties.
When we look at a house, we start with the same questions our post on what a professional painter inspects before starting covers: surface condition, moisture, previous coatings and the age of the home. Oil-based paint is one more item on that list, and a manageable one when you plan for it.
— Kyle
DIY or hire a painter?
Painting latex over oil is a realistic DIY project for a single door, a small room's trim or a set of shelves, if your home is newer than 1978 and you have patience. It becomes a different job at larger scale.
Consider hiring a pro when:
- Your home was built before 1978 and the paint has not been tested.
- You have a whole house of trim, doors or cabinets to prep and prime.
- The oil-based coating is on exterior surfaces exposed to Florida sun and rain.
- Paint is already peeling, bubbling or chalking, which usually points to a moisture or adhesion problem under the surface.
- You live in a retirement community or manage a commercial space and need work finished on a clear schedule with minimal disruption.
Cost is a fair concern. Prep takes labor, and labor drives price. Our house painting cost guide for Florida walks through what shapes a painting budget so you can compare bids on equal terms. Ask every painter what is included in prep, which primer they use over glossy surfaces and what the warranty covers. If a bid does not mention any of that, it is hard to compare fairly.
Let us handle the prep
If you have oil-based trim, doors or cabinets and want a finish that lasts, we can inspect the surfaces, test the existing paint and recommend the right level of prep. We paint residential and commercial interiors and exteriors, refinish cabinets and handle drywall repair, stucco painting and specialty coatings across Lake County and Central Florida.
See our three service packages, read about cabinet refinishing, or schedule your appointment and tell us what you are working with.
FAQ
Can you paint latex over oil-based paint without priming?
It is risky. Scuffing alone usually leaves the new paint with too little grip, and it can peel later. Use a bonding primer made for glossy or previously oil-painted surfaces, then topcoat with latex. Some manufacturers say that modern latex works in most cases, but they still call for extra surface prep.
How can I tell if paint is oil-based?
Rub a cloth or cotton ball dampened with denatured alcohol on a small hidden area. If paint comes off on the cloth, it is latex. If it does not, it is likely oil-based. Test a few spots, since different rooms and trim can have different paint histories.
Do I have to sand oil-based paint before painting over it?
Yes, in most cases you should scuff-sand to dull the gloss, typically with 180 to 220 grit paper. You are not removing the paint, only giving the primer something to hold. If your home was built before 1978, test for lead before sanding.
Is oil-based paint safe to sand in an older home?
Not until you know what is in it. Homes built before 1978 may contain lead-based paint, and sanding can release dangerous dust. The EPA requires certified, lead-safe work for paid painting that disturbs painted surfaces in those homes, so ask your contractor about certification.
Sources
- Tips on Painting Over Oil-Based Paint, Behr Pro
- Painting Over Oil-Based Paint, Glidden
- Painting Over Oil-Based Paint? Rules to Remember, Bob Vila
- How to Paint Over Oil-Based Paint, The Spruce
- How to Choose the Best Paint Primer, Benjamin Moore
- Steps to Lead Safe Renovation, Repair and Painting, EPA
- Lead Renovation, Repair and Painting Program, EPA